Right Panel - Layer
Right Panel - Layer
The panel design needs to know the concept of several layers. The settings of these layers are in the properties of the primitives. Currently, there is no separate layer display interface.
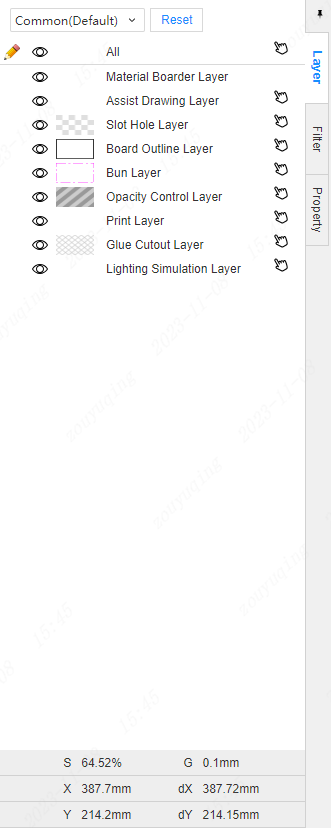
Layer introduction:
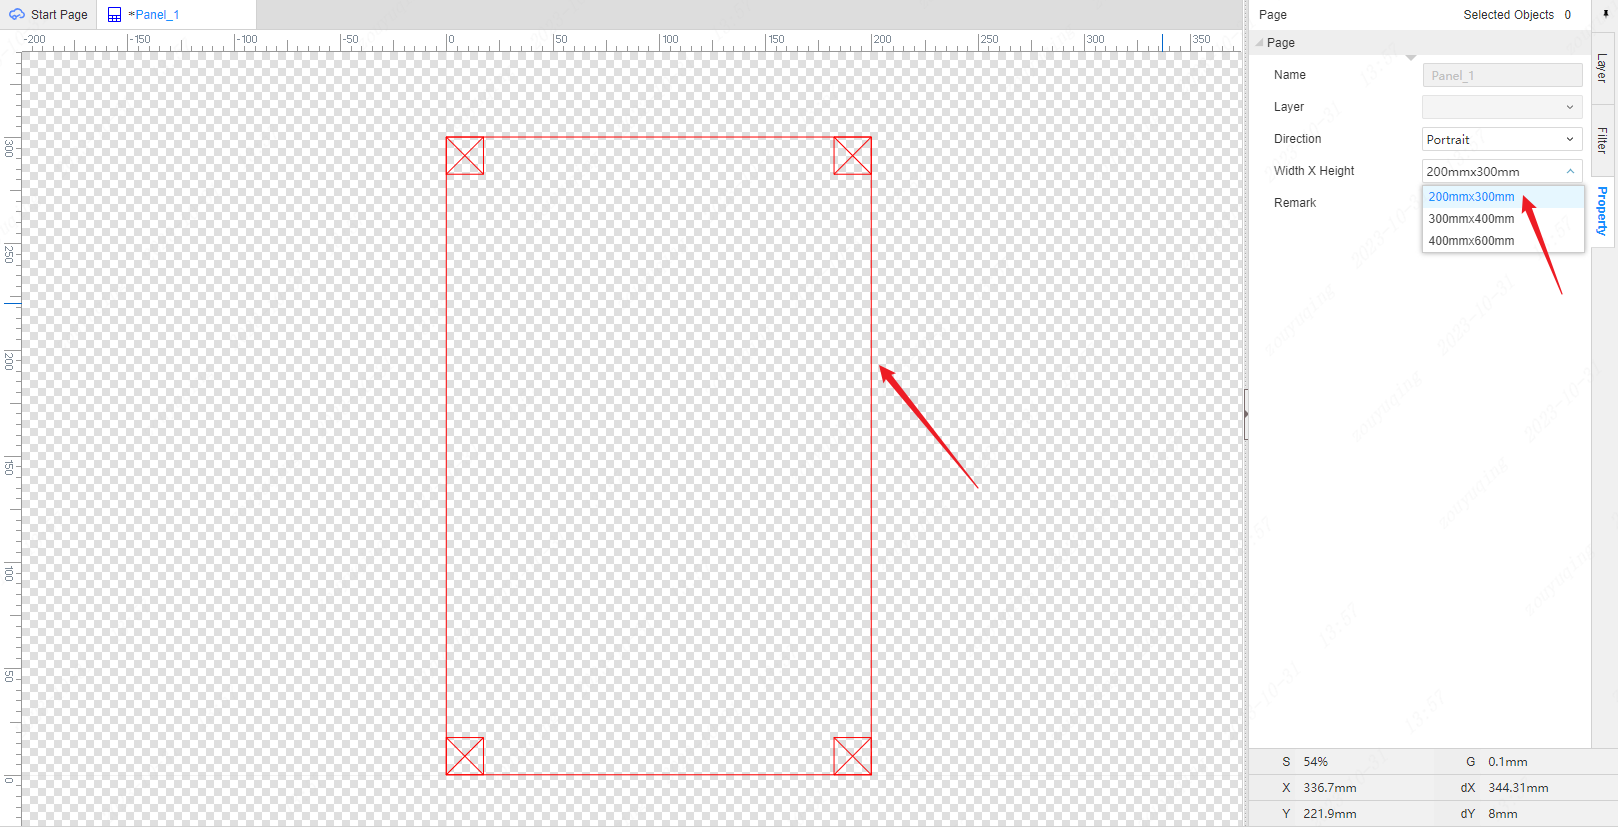
Material Boarder layer: Represents the selected material area, which cannot exceed this area, otherwise it will not be possible to print and cut. This layer is only used to display the red material bounding box, and the orientation and width dimensions can be customized in the property panel on the right side of the canvas. The settings here determine the material specifications used in actual production.
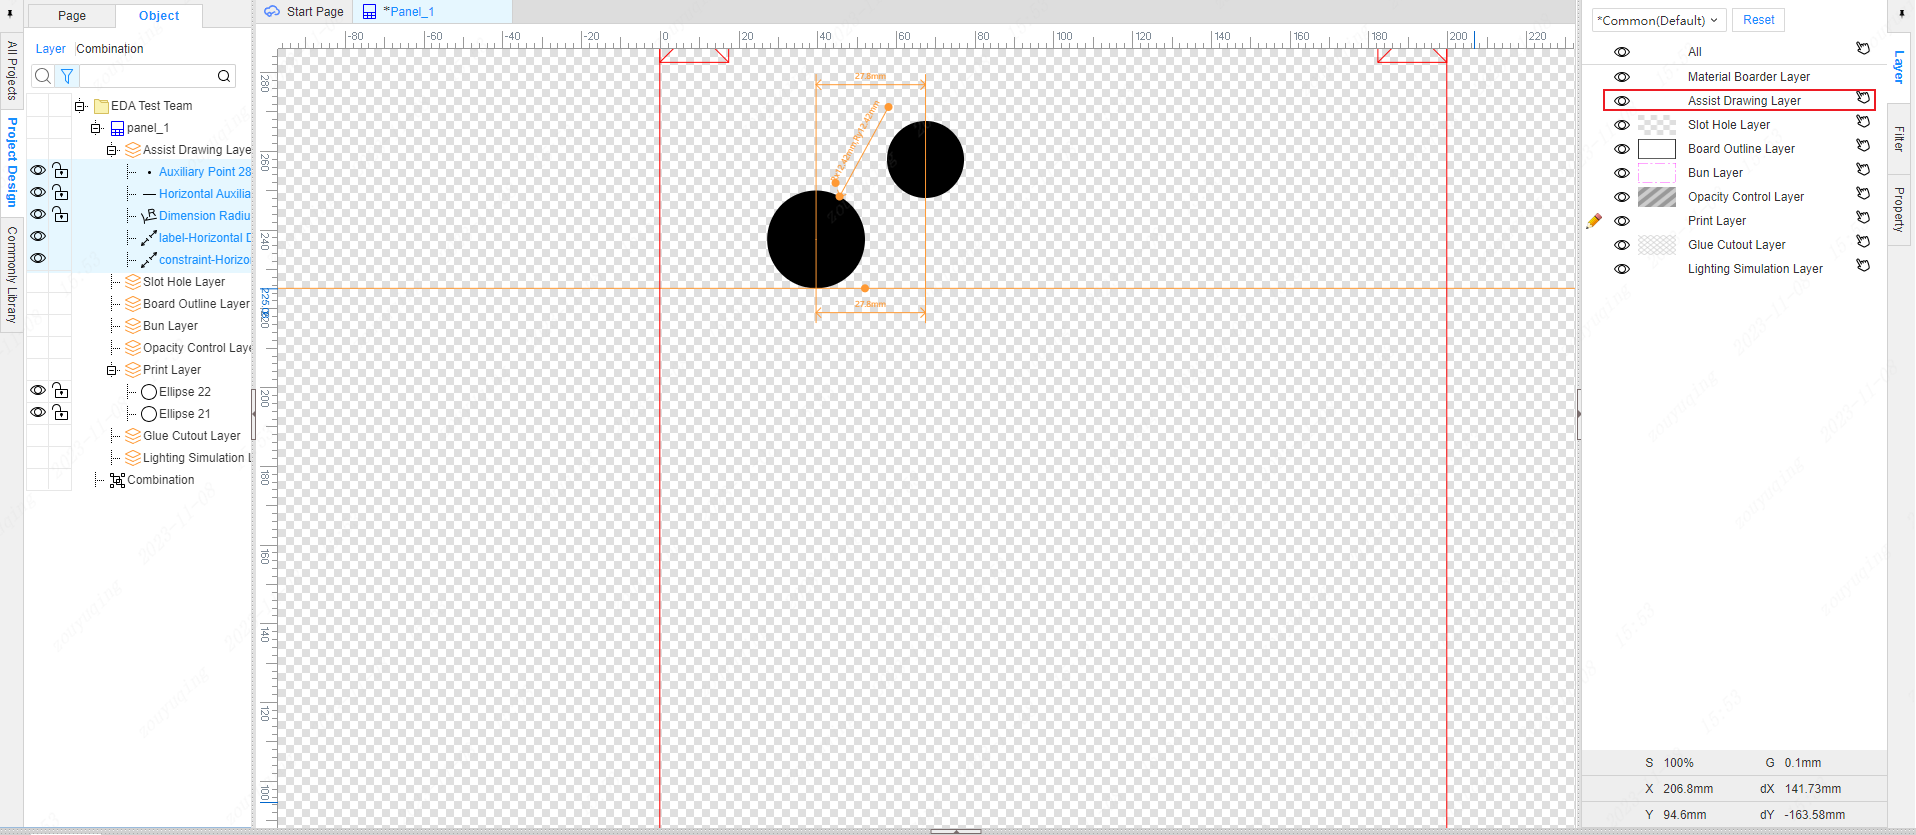
Assist Drawing Layer: intelligent size, auxiliary line, auxiliary point, size are auxiliary elements that can only be located in the auxiliary drawing layer, and the layer elements are not effective in actual production.
Slot Hole Layer: The graphic placed on the digging layer means that the hole is opened here, and the entire panel is opened.
Board Outline layer: It is used to draw the outline drawing that needs to be cut. It can cut special shapes, all wave shapes are supported, and the path needs to be closed. Content located outside the board frame layer cannot be exported.
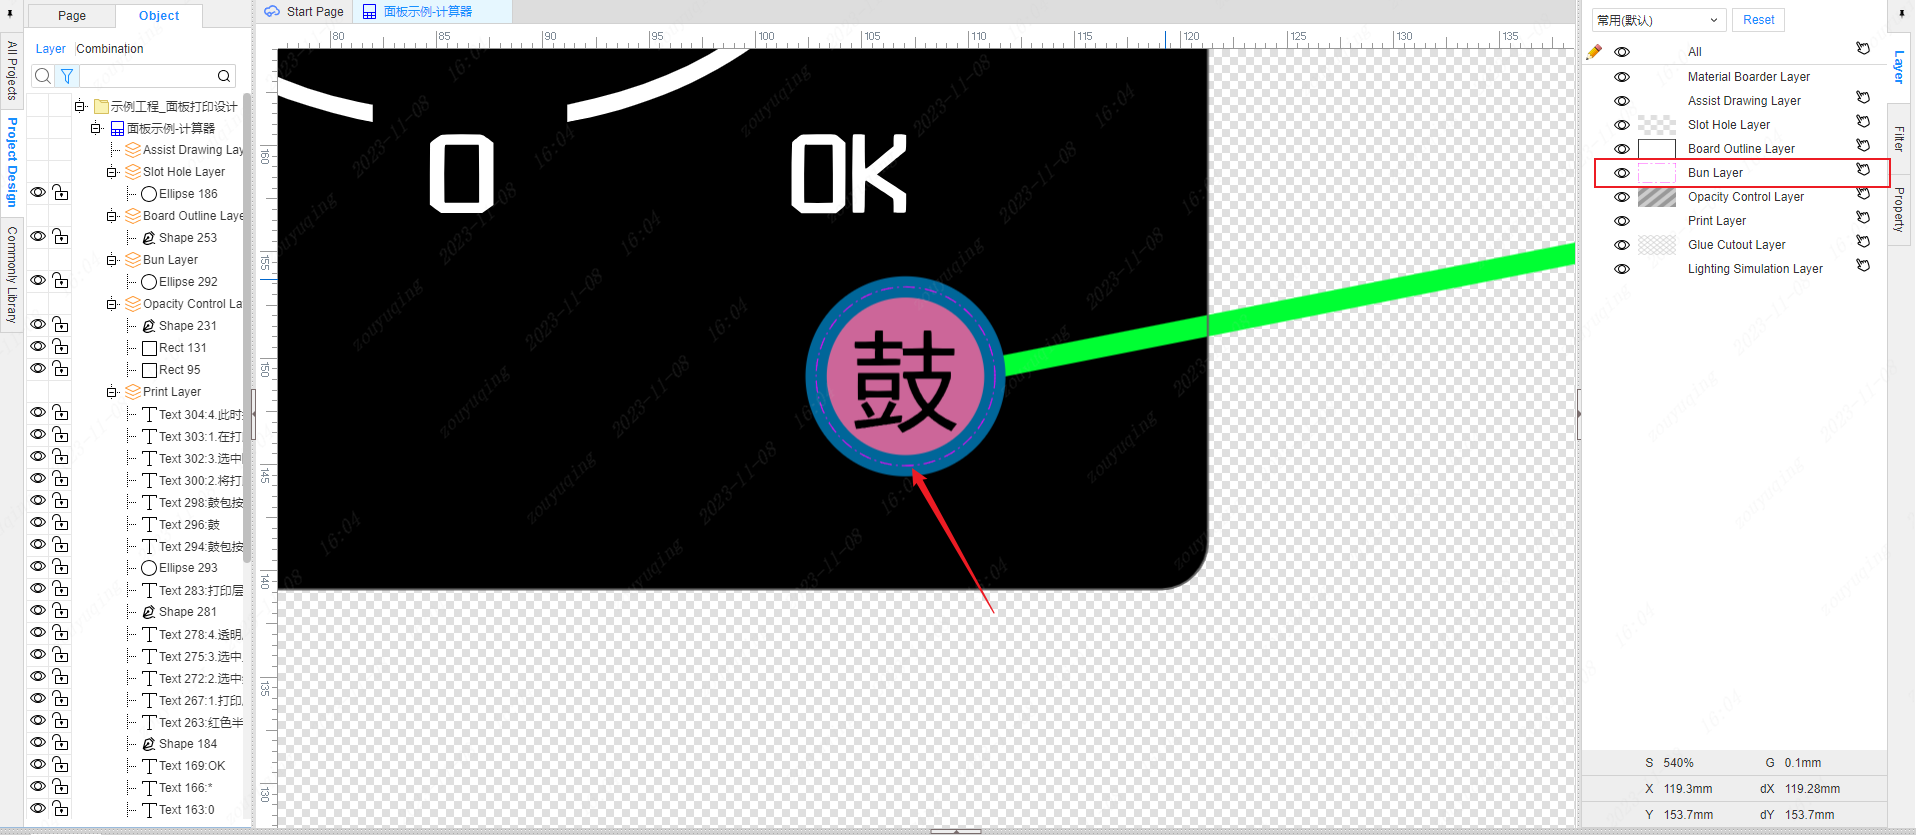
Bun Layer: used to draw the raised drum package graphics, this layer does not support the placement of pictures, text, and the raised height and range of the drum package are also default, it is recommended that the drum package size diameter is greater than 6mm, and the drum package diagram element spacing is greater than 2mm. The drum package diagram on the canvas has a fixed dotted line stroke style by default, the default color is #FF00FF, and the line width is 1.
Transparent Control layer: The graphics of the transparent control layer will affect the transparency of the print layer and white bottom mask layer in the area.
- The higher the value, the more transparent. (100,100) is fully transparent, (0,0) is opaque. For specific settings, please refer to the color card.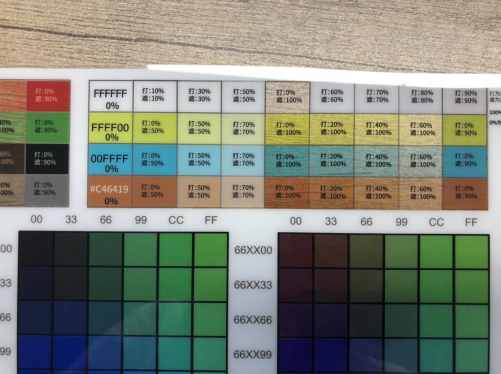
-   **The translucency of white color is different from the translucency setting of other colors**: The translucency of white color is printed through the white color cover layer, so you need to set the cover layer to 80% for the best effect. Transparency is optional. Such as: white translucent (80%, 80%).
-   For the translucent color of other colors, you need to remove the white bottom cover layer, the best effect is to print the full layer, and the color is translucent (0%, 100%). If it is too transparent, you can increase the white background a little bit, you can set it to (0%, 90%), different colors have different effects.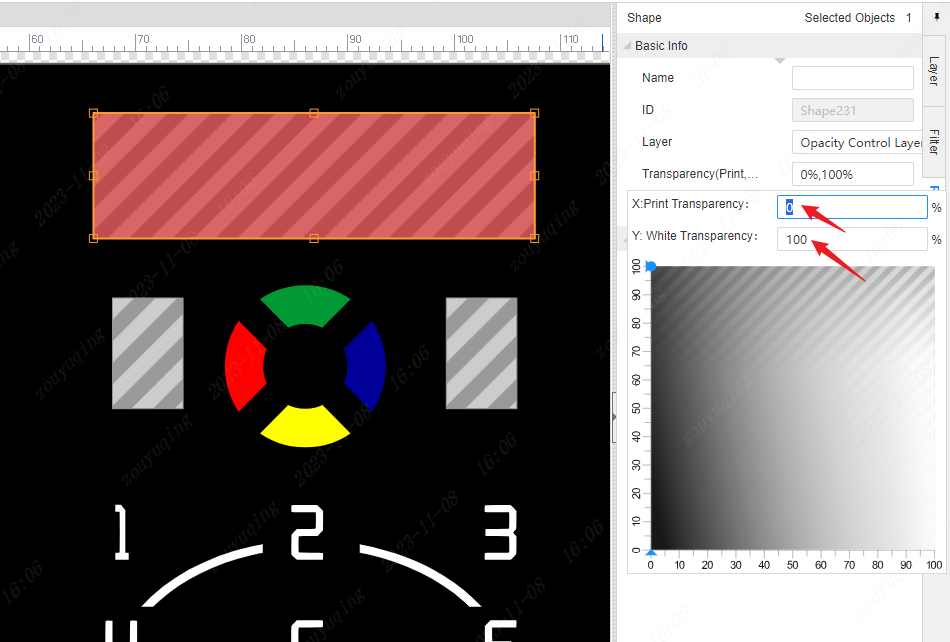
Print Layer: The layer used to print ink, it will not be printed by default without drawing, just the raw material itself. The graphics drawn on the print layer have a white background mask by default, and the general shading is used. If you want to adjust the opacity, you need to use the transparent control layer to achieve.
Glue Cutout Layer: It is used to draw additionally where the adhesive will be removed. By default, the system will cut out the adhesive in the transparent control area and the opening area.
Lighting Simulation layer: It is used to simulate the lighting effect. After drawing, you can view the effect in the 3D preview, but it does not actually affect the drawing.
Layer is not selectable
You can set the corresponding layer not to be selected on the right. The black finger icon indicates the optional state of the object in the layer. Clicking it can switch it to non-selectable, that is, it becomes a gray finger icon with a slash. 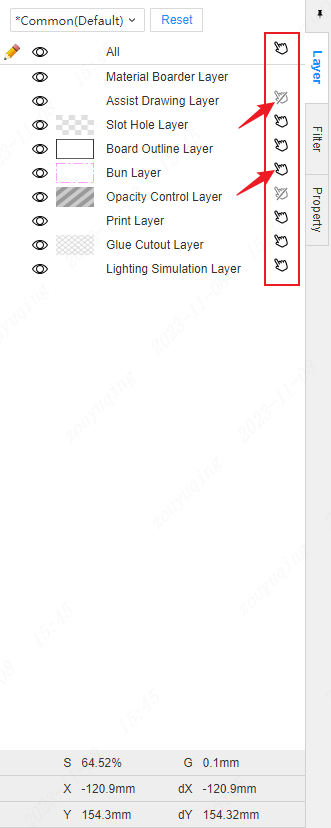
Note: Objects within the layer are not selectable, but can be moved to non-selectable objects by constraining intelligent dimensions.
Layer description
Click the thumbnail below the layer to view the layer description.
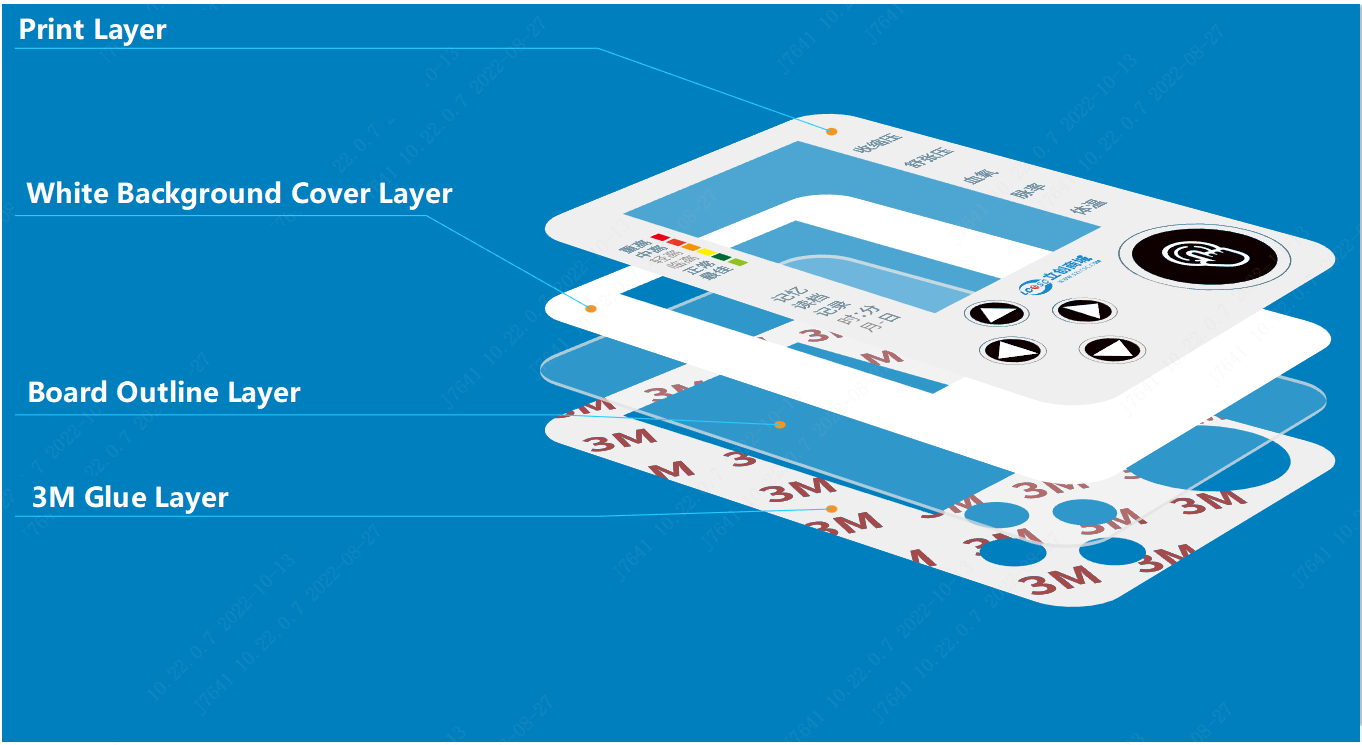
Tip:If the conventional shading cannot meet the needs, and the surrounding area should be more shading, you can choose strong shading when placing an order, and black ink will be printed in the non-transparent and non-translucent areas to block the light. No need to draw your own pictures. By setting different layers and different attribute parameters of primitives, the final required production effect can be obtained.