Net Label
Due to the difference in design, EasyEDA Pro does not support the independent network label primitives of the standard version. The network label of the professional version is virtual, and a name attribute is set to the wire after Place. Therefore, the interaction after Place is quite different from the standard version.
In terms of interaction, since v1.7, EasyEDA Pro supports two modes:
- Similar to the standard version or Altium's network label, after the network label leaves the wire after moving, the wire network name is automatically cleared
- Similar to the network labels of PADS and Orcad in the previous professional version, after the network label is moved away from the wire, the network name of the wire remains unchanged, and only the position of the network name is modified.
You can set it according to your usage habits.
Setting entry: Top Menu - Settings - Schematic - Common - Drag Net Name

Entry: Top Menu - Place - Net Label
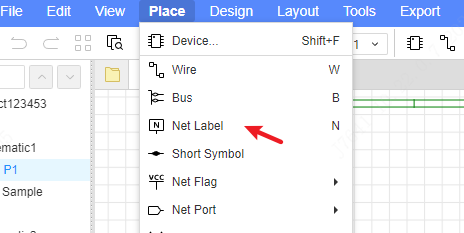
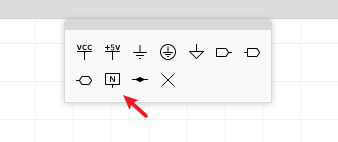
When placing, you can press the TAB key to set the name of the network label and the increasing order rule.
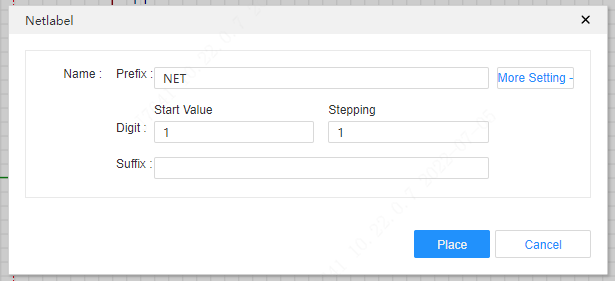
After being placed, it becomes the name attribute of the wire, which is the same as setting the name directly in the wire's attribute panel.
Supports direct Place on the pin of the symbol, a wire will be automatically generated, and the wire will be given a name.

Fanout Network Labels / Non-Connection Identifiers
In case you need to rapidly generate network labels and wires for a component with an extremely large number of pins, or to set non-connection identifiers for pins, the Fanout Network Label / Non-Connection Identifier function can be utilized.
Method of Use:
Select the components or reusable module symbols (multiple selections are allowed) - Right-click Menu - Fanout Network Labels / Non-Connection Identifiers
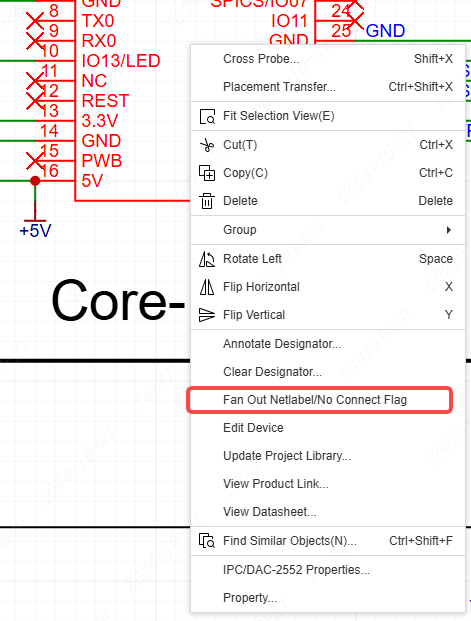
When the pop-up window is opened, the pin information and connection status of the selected item will be filled into the table. If the wire connected to the pin has an inflection point or is connected to other pins, the wire length and non-connection of the corresponding row will be grayed out and unmodifiable.
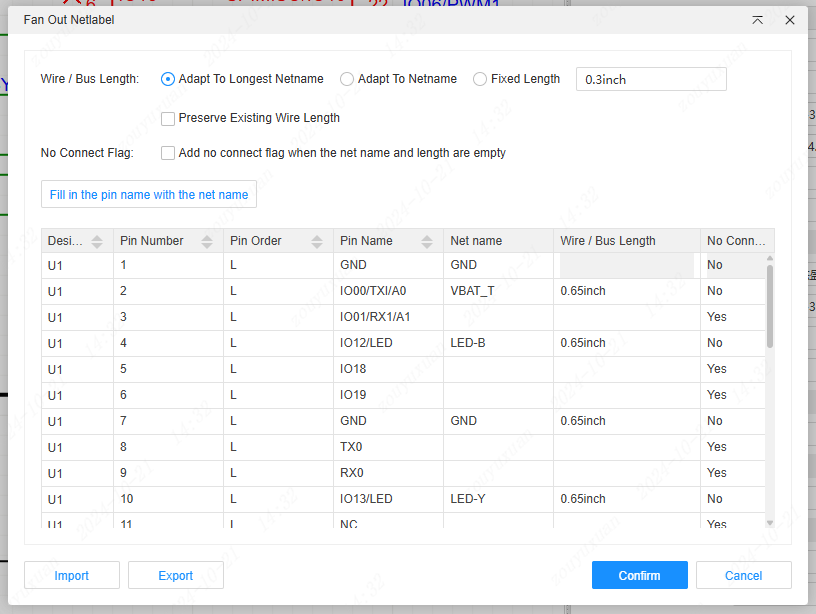
Click or hold down the Ctrl or Shift key and left-click to select rows. Click "Fill Pin Name into Net Name" to batch fill the pin names into the Net Name column.
Configurable Items
Conductor/Bus Length: The rule for automatically assigning values to the items in the table that have network names but no conductor/bus lengths specified.
When choosing to adapt to the longest network name, the wire lengths led out from the pins with filled network names on the same side are consistent, and the wires are led out according to the longest network name. When choosing to adapt to the network name, wires of corresponding lengths are generated based on the network name of each pin. When choosing a fixed length, newly generated wires are generated based on the fixed length. Retain Existing Wire Length: When checked, the items with existing wire lengths are grayed out and unmodifiable. After confirmation, the existing wire lengths will not be modified. If unchecked, the wire lengths will be updated according to the lengths in the table and the settings above.
Non-Connected Identifier: When checked, the pins corresponding to rows with empty network names and lengths will be set as non-connected pins and display the non-connected identifier; if unchecked, rows with empty network names and lengths will not be processed.
Table
Double-clicking on the columns of Network Name, Wire/Bus Length, and Non-Connected enables modification of the corresponding parameters.
Parameters can be exported for modification and then imported.
After confirmation, network labels or non-connection identifiers will be generated on the pins according to the settings.