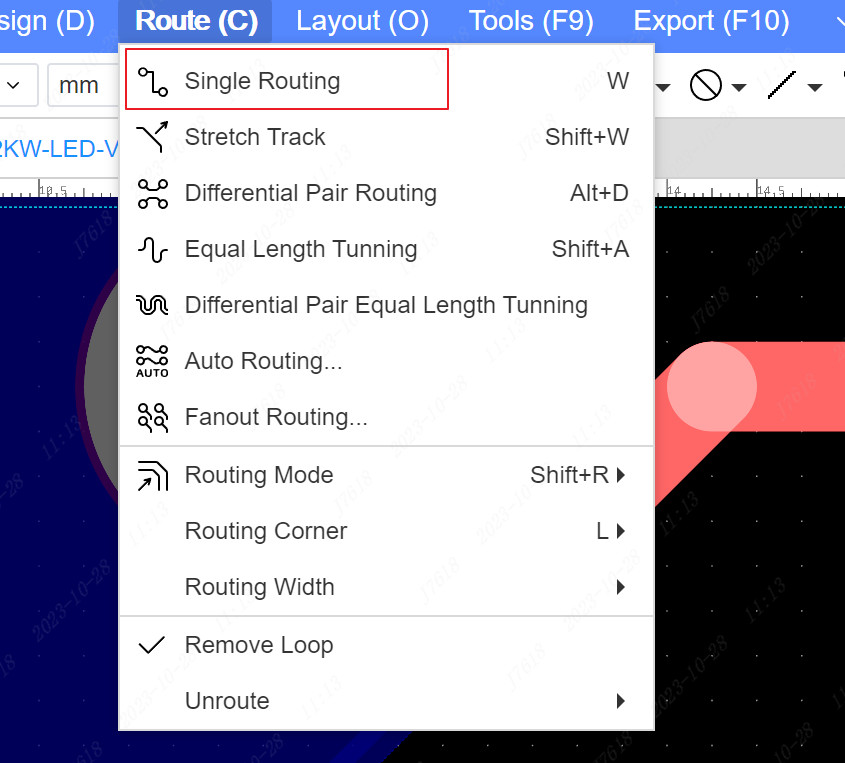
Single Routing
Single routing method:
Click the top menu - Routing - Single Routing to enter the Add Routing mode
In addition to the top menu, you can also use the top toolbar - one-way routing
Shortcut W
Double click on pad or via to enter routing mode
**Add inflection point**

-   In the process of routing, click the left mouse button to add an inflection point where you need to add an inflection point.
-   Use the shortcut key <kbd>L</kbd> to switch the knee point during routing.
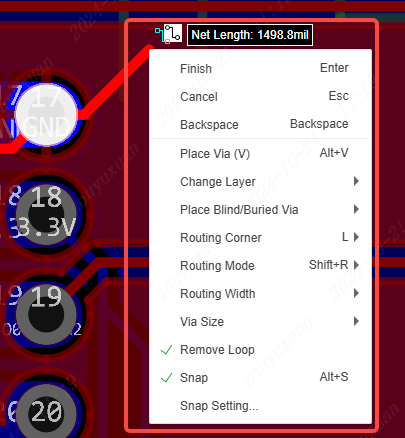
Add vias when routing
Click the right mouse button during the routing process and select the function to add a via hole, and a via hole will be added at the next corner to be routed. Click the left mouse button on the canvas, and the via hole will be added successfully
You can also directly add vias by entering the shortcut key V during the routing process
Cut the layer to the signal layer during the routing process, and automatically add vias
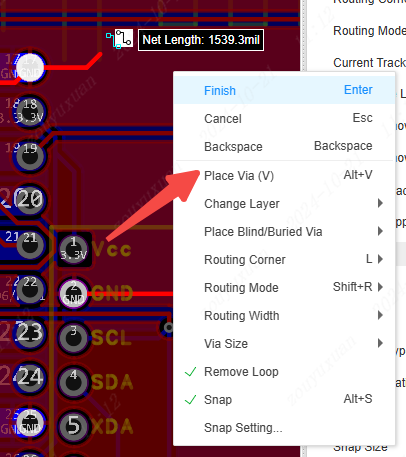
If you want to add blind and buried vias, you need to add a list of blind and buried vias in the design rule first. Then click the right mouse button to place the blind via or buried via function during the routing process ** Select the blind and buried via you need to add.
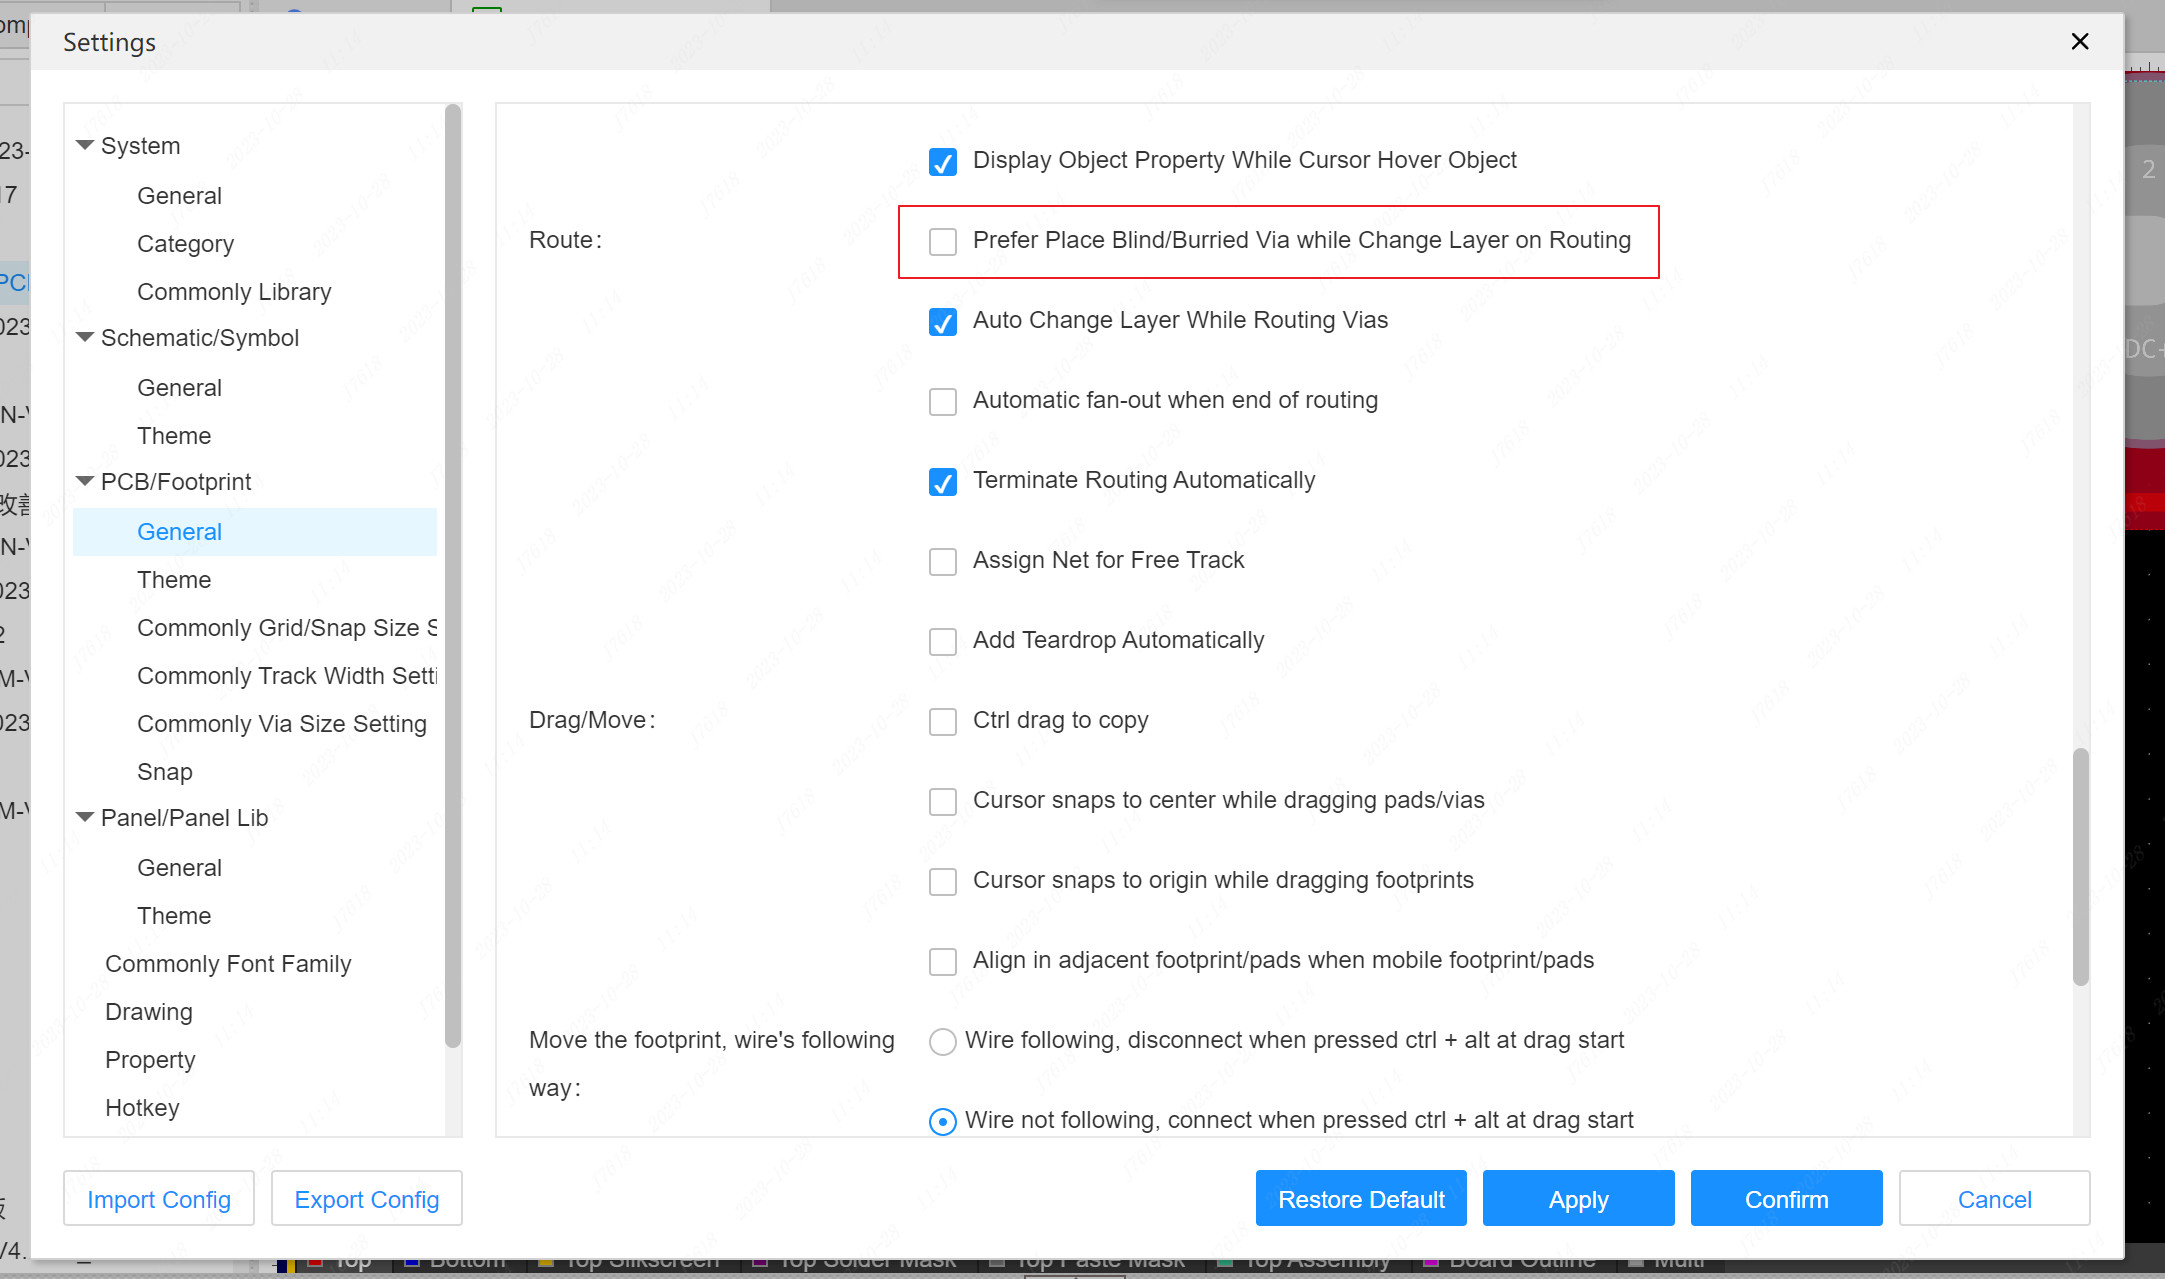
In the setting dialog box, if **Blind and buried vias are placed preferentially when routing layer cutting is checked, **When the signal layer is cut during the routing process, blind and buried vias that meet the conditions will be preferentially placed for Place
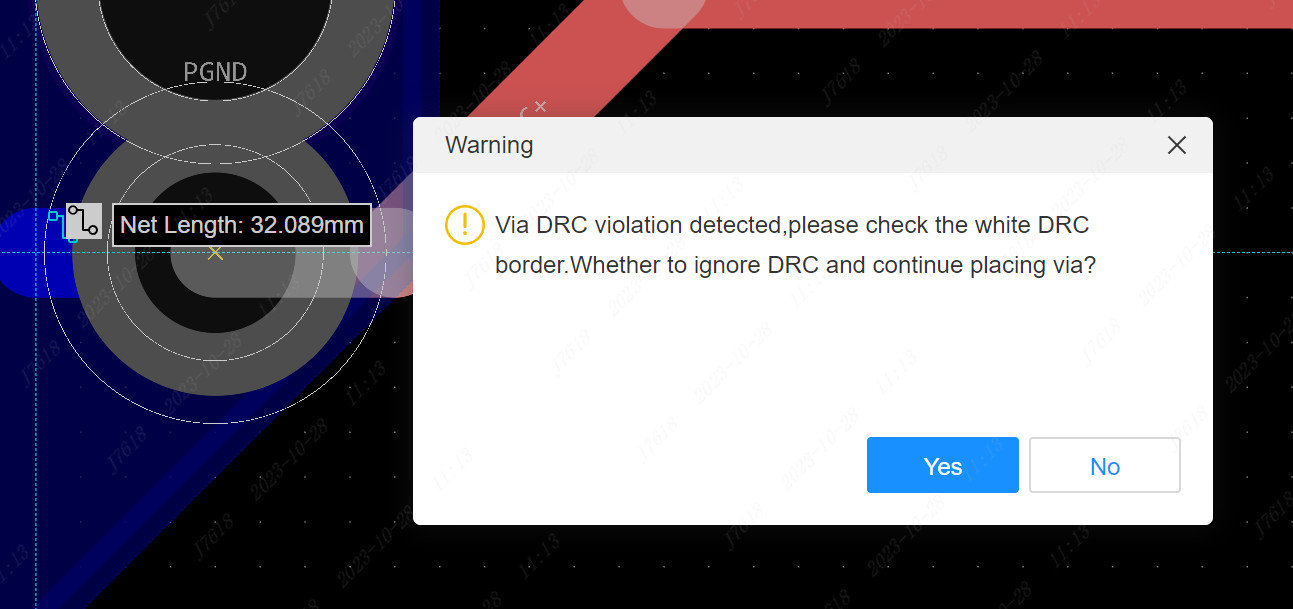
- In the block, around, and push mode, a hole is added during the wiring process. If the addition of the additional perforated violates the DRC, a warning prompt will appear. You can click on whether the DRC continues the wiring, or click to cancel the addition hole.
fallback routing
During the routing process, click the right-click menu, click Back, or use the shortcut key backspace, you can manually back the routing to the previous inflection point
During the routing process, if the cursor moves to the part that has already been routed, it will automatically return to the previous inflection point of the wire at the cursor position. At this time, if the mouse moves back to the part where no loop is generated, the previously hidden wire will be restored; after adding an inflection point, a new inflection point will be determined, and the previously automatically retracted wire will no longer be restored.
Switch via size when routing
Follow the rules. The vias added next after clicking will become the default size in the design rules
Rule settings. Click to pop up the Design Rules dialog box, where you can set the rules for via size
List of commonly used via sizes. Quickly switch the commonly used via size through the right-click menu during routing, click the common size setting, and a system setting dialog box will pop up, where you can maintain a list of commonly used via sizes.
Enter the via size. After clicking, a pop-up window will pop up, enter the outer diameter and inner diameter of the via hole to be modified, and then press Enter, the next via hole will be changed to this size

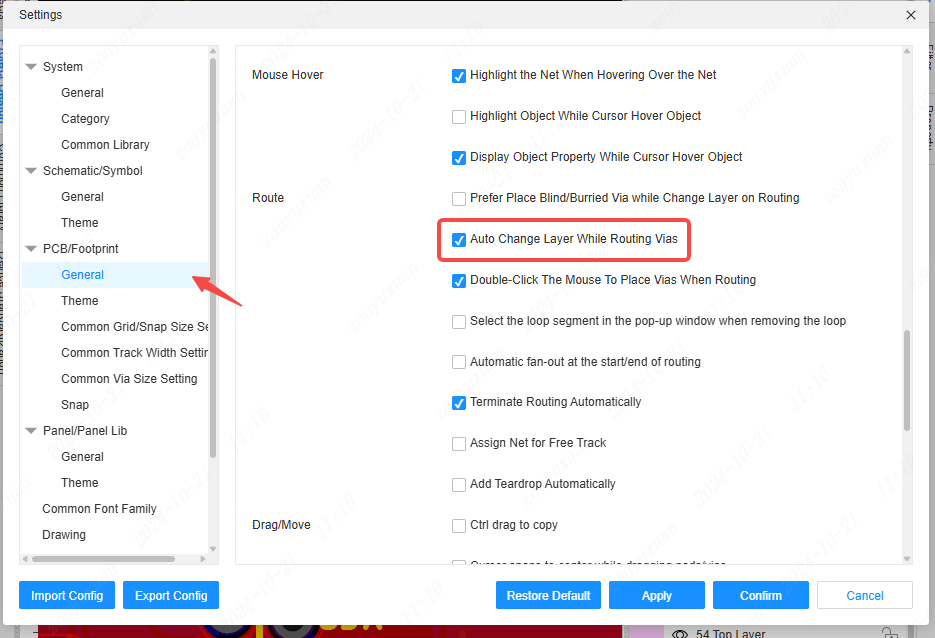
If it is necessary to automatically change layers when drilling holes during the wiring process, the option of automatic layer change can be enabled in the PCB settings.
Add nodes
Support double-clicking on wires or right-clicking to add wire nodes, so you can adjust the wires.
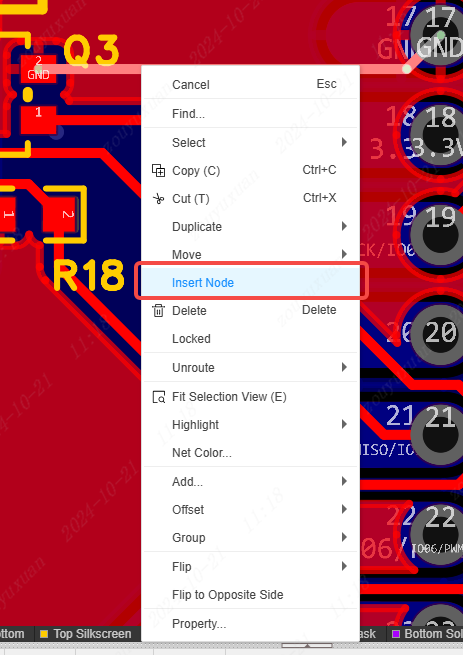
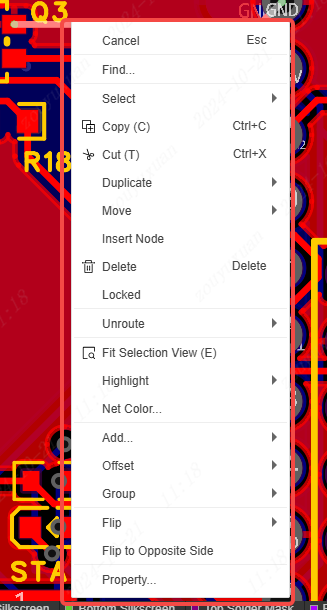
Right-click Menu
The right-click menu of the wires supports a rich array of functions, enabling the rapid implementation of multiple operations.
During the process of routing, clicking the right-click menu of the mouse (or pressing Ctrl + right-click, depending on the PCB settings item), there are also abundant functions that can be utilized based on your own requirements.
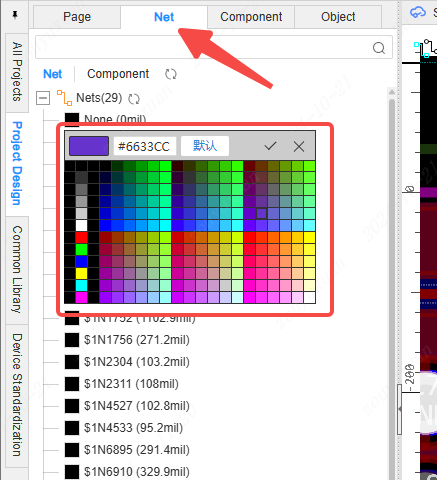
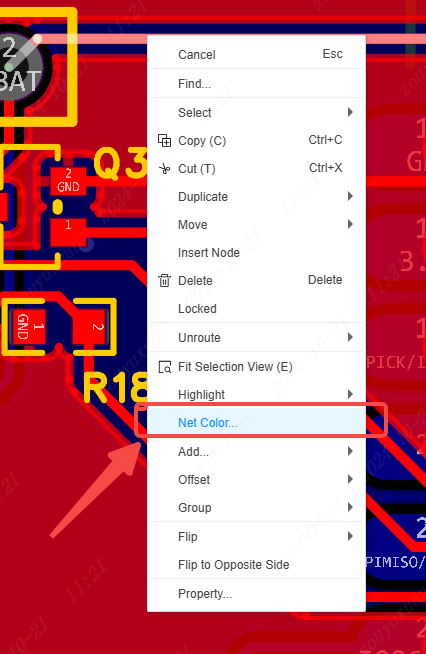
Configure network colors
The network colors can be set in the network tree on the left side.
The color can also be set by right-clicking on the wire.
Hide the flying wires
During the wiring process, hiding the flying wires that are not temporarily required for wiring first is beneficial for reducing interference and concentrating on the wiring of the current network.
The flying wires can be hidden in the network tree on the left side.
