Create 3D Library
Before binding the device library, you need to create a 3D library file before binding. The operation steps are as follows:
Top Menu - File - New - 3D Model
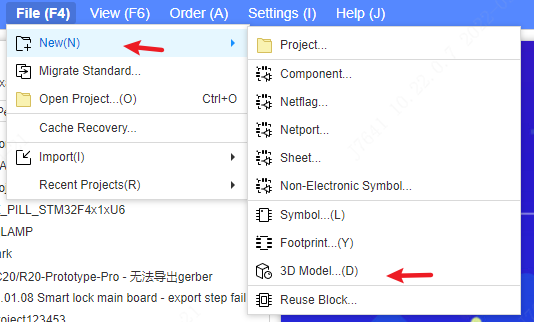
Or at start page - quick start

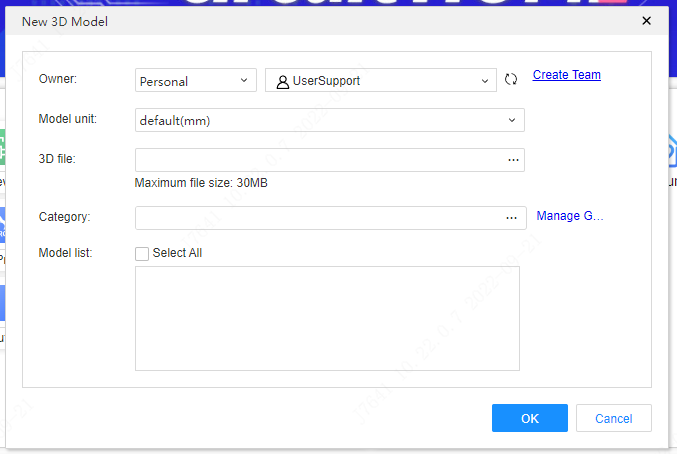
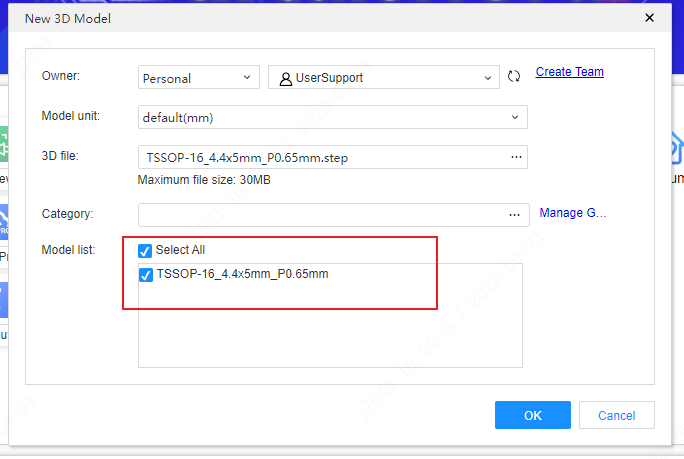
Enter relevant information in the pop-up window
- Owner: the user or team who created the 3D Warehouse;
- Model unit: The unit can choose cm, m, mil, inch. According to the size of the drawn 3D model, the default size is mm;
- 3D file: select the imported 3D file, you can choose zip, step, stp, wrl, obj format file. 3D models can be imported in batches, just compress the 3D files into a zip file footprint and import;
- category: classify the created 3D models;
- Model list: After selecting the imported 3D file, the list will display the files that successfully imported the 3D model;
Steps:
Select the attribution user of the model
When the model is created, the default is mm. There is no need to modify it again here. Just select the default mm unit. You need to select the correct unit for your model, if you don't know the unit, you need to open your model at 3D design tool to check.

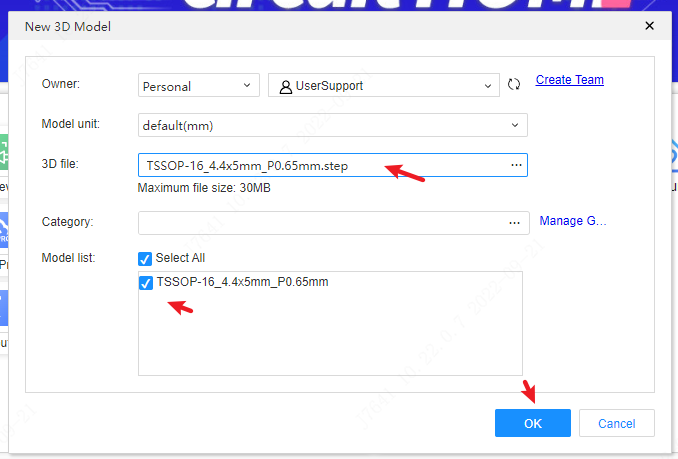
Click Select File to select a 3D model file in STEP/OBJ/WRL/STP/ZIP format.
Click category to classify the model, which is convenient for later search. If there is no category, you can choose to manage the category to create.
Click the model you just selected in the model list, and click to check it. If you don't check it, you cannot create a 3D model file. If you import WRL or OBJ zip files, this list will list all models
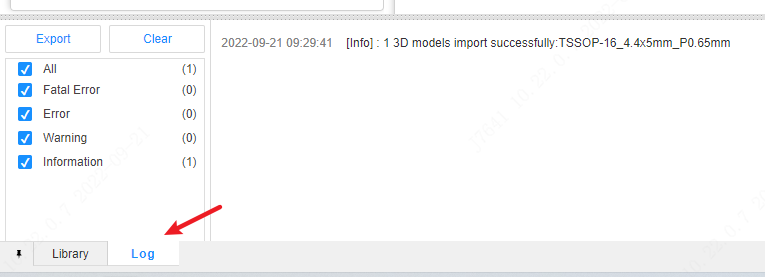
Finally, click OK, and the "Log" in the bottom panel shows that the 3D model was successfully imported, which can be viewed in the personal component library.