Pen
Pen
The polyline of the panel is slightly different from the polyline of the schematic diagram. In the panel, it is a path shape as a whole, which can be seen by checking its properties panel. Lines drawn with the pen tool are called shapes in the panel and can be any line or curve. The default line is drawn, and holding down the left button can switch to curve drawing.
Operation steps
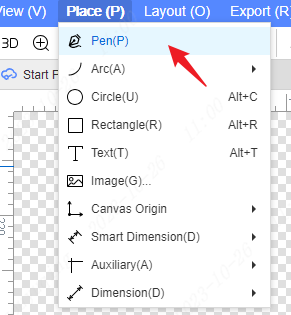
- Top Menu - Placement - Pen Tool
- Menu shortcut: P + P
Draw a straight line
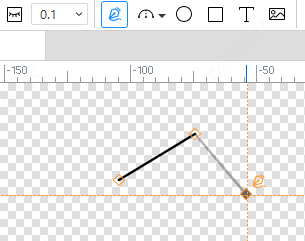
After entering the pen tool drawing mode, the first left mouse button on the canvas determines the starting point, which is the first anchor point, and enters the drawing state of the second anchor point, displaying a segment to be determined.

Continue to determine the line segment path with the left mouse button, complete the drawing of a polyline, enter the drawing state of the next anchor point, and display the segment to be determined between the last left mouse button and the current cursor (Note: To distinguish from the determined segment , the display of the segment to be determined increases transparency)
It can draw any number of polylines continuously. The right mouse button or button Esc will exit the drawing of the current polyline and enter the state to be drawn of the next polyline
Right-click or press Esc to exit the pen tool drawing mode, that is, the upper right corner of the cursor no longer follows the display pen tool icon
Draw curves
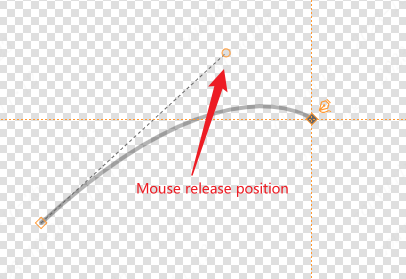
If you hold down and drag the left mouse button on the canvas, an anchor point will be generated at the pressed position, and a handle will be generated to follow the mouse until the left mouse button is released. The handle of the first anchor point will be generated at the position where the mouse is released and enter the drawing state of the second anchor point.
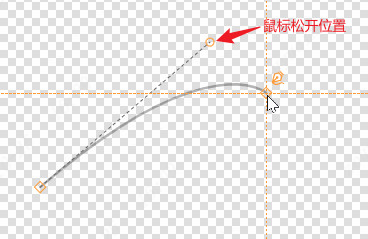
After determining the starting point, the left mouse button is also used to determine the anchor point. Hold down the left mouse button and drag to determine the handle. Subsequent dragging of the mouse will generate two handles based on anchor symmetry. That is, one handle of the anchor point is generated at the position where the mouse is released, and the other is generated at the position based on anchor symmetry.
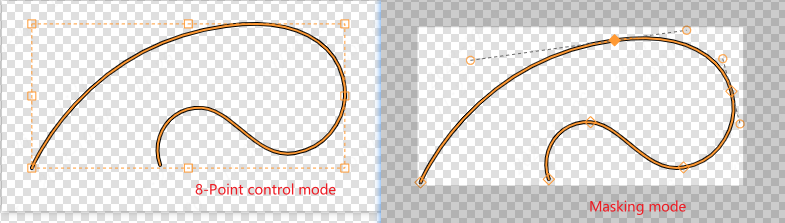
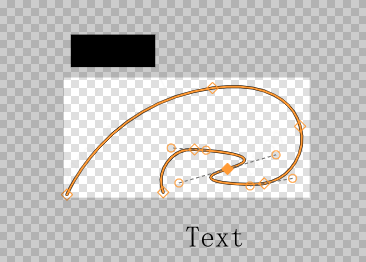
8-Point control mode & mask mode
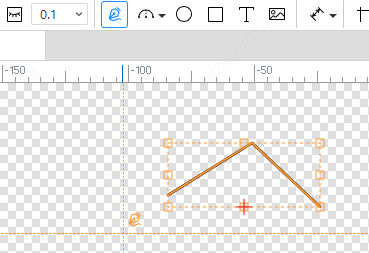
Directly click or box to draw the completed shape, which is the 8-point control box mode. Double-clicking the shape will enter its mask mode.
In the 8-point control mode, you can drag the stretch control points or edges on the bounding frame to adjust the size of the shape
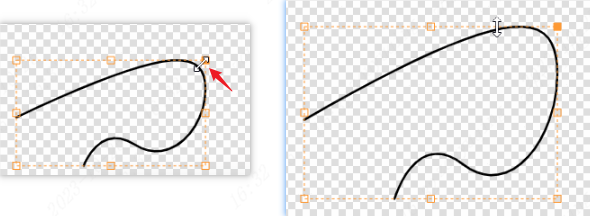
When adjusting the shape of the anchor or handle, you must double-click to enter its mask. Double-click the shape to enter the mask, as shown in the figure below, you can see the gray masking effect in the non-shape area, which will shield the elements outside the shape mask, that is, you can only edit to that shape.
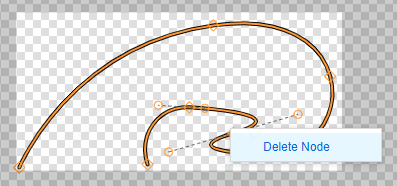
Delete node
Click to select an anchor or handle point, right-click the delete node menu, or double-click the anchor or handle point to delete
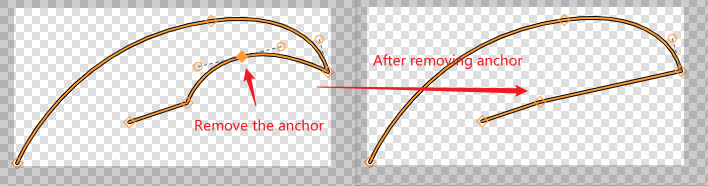
The adjacent anchor points of the deleted anchor point will be connected in a straight line, and the associated handle point will be deleted at the same time as the anchor point.
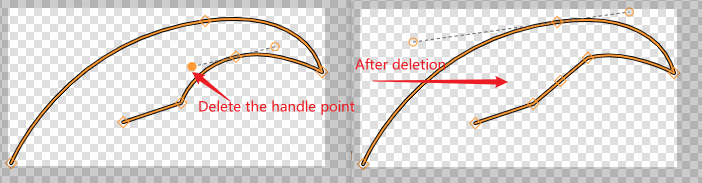
Operating the delete node at the handle point will only delete the current handle point, and the corresponding curve part will become a straight line
Add a node
Add an anchor point, select and move the cursor to hover over the shape. An anchor point waiting to take effect will be displayed between every two adjacent anchor points. Click to generate an anchor point at the corresponding position. Add a handle, hold Ctrl on the anchor point where you want to add a handle and drag it directly to generate the corresponding handle.
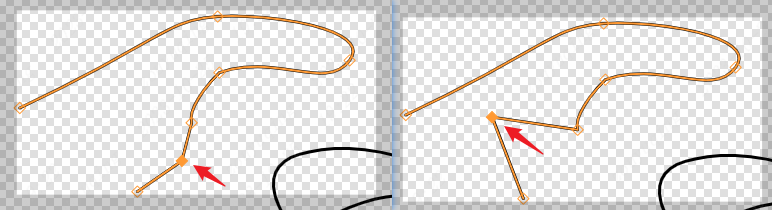
Adjusting handle
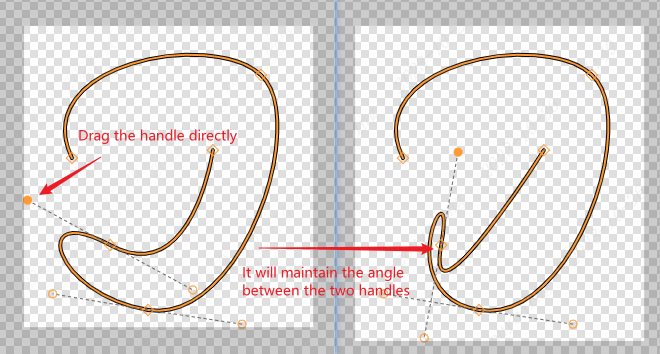
Directly dragging one end of the handle to move will maintain the angle between the two handles, and the handle on the symmetrical end will move synchronously. Adjusting the direction of the handle can control the direction of curve bending.
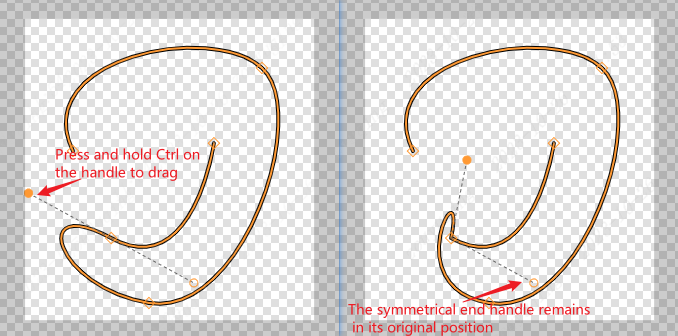
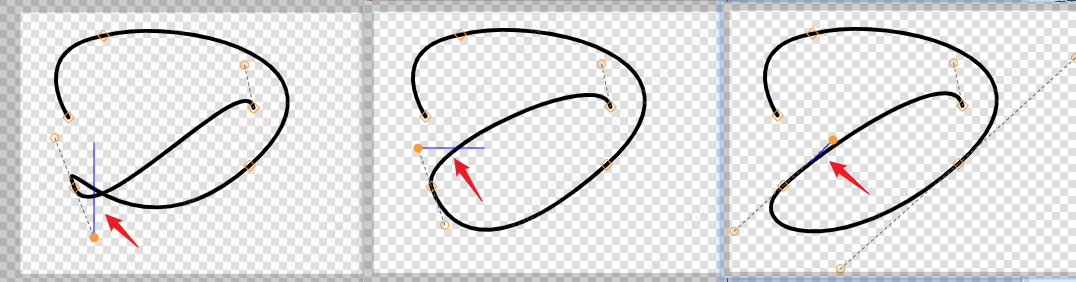
Press and hold Ctrl, drag the handle on one end, and the handle on the symmetrical end will remain in its original position.
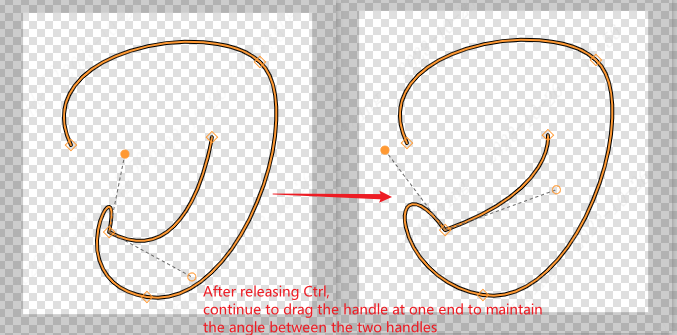
After releasing Ctrl and continuing to drag one end of the handle, the angle between the two handles will still be maintained, and the other end of the handle will move synchronously.
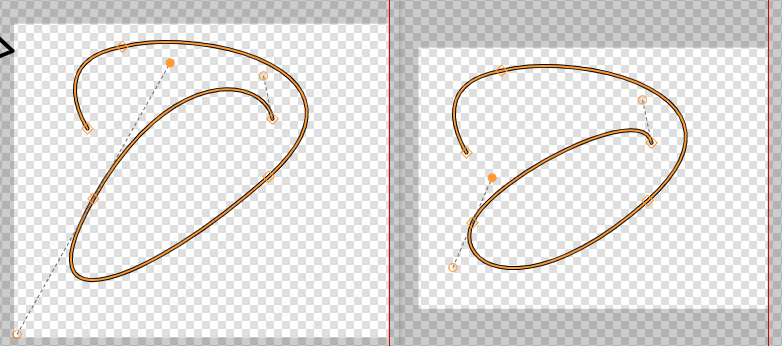
Similarly, by directly moving the handle point to change the length of the handle, the lengths of the two handles will change symmetrically. Holding down Ctrl to move the handle point can only change the length of one end of the handle, while keeping the length of the other end. Adjusting the length of the handle can affect the curvature of the curve.
When holding down Shift, whether it is the anchor point or the handle point, it can only be at a multiple angle of 45 °
Regulating anchor
Hold down the left mouse button on the anchor point and move it, only changing the position of the anchor point, affecting only the two lines connected to the anchor point, and the remaining anchor point line segments will remain