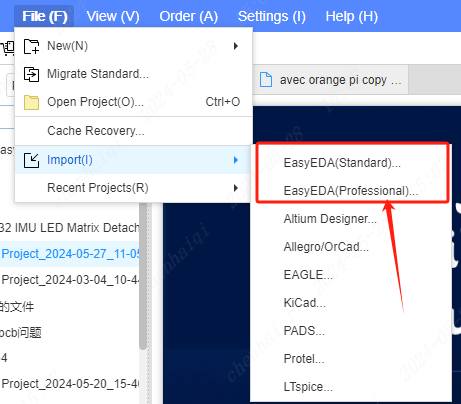
Other FAQs
Recommended Configuration of EasyEDA Pro Professional Edition
When using EasyEDA Pro Professional Edition, you can refer to the recommended configuration of the following devices.
Tips: EasyEDA Pro Professional Edition supports CPU and WebGPU dual engines starting from V2.2. When the computer has no graphics card or the graphics card support is poor, it will automatically switch to the CPU engine. Manual switching may be provided later. The CPU engine is slower than the WebGPU engine and the memory usage will be larger accordingly.
EasyEDA Professional Edition User Configuration:
| Equipment | Description |
|---|---|
| CPU | 2 cores and above, i3-9100 and above are recommended, supporting domestic CPU architectures X86, AMD64, LoongArch64, SW_64, ARM64 |
| Memory | 8G DDR4 memory and above within 10,000 pins, 16GB and above are recommended for more than 10,000 pins |
| Graphics card | Independent graphics card after 2017, GTX1080 and above are recommended, and integrated graphics card after 2019 for X86 CPU. Upgrade the graphics card driver to the latest. A discrete graphics card is required for non-X86 CPUs |
| Disk | System disk must be at least 128G SSD, data disk must be at least 100G HDD, SSD is recommended |
| Browser | Chrome, Edge, Firefox latest version, Chrome is recommended. At least V120 and above, 64-bit version, and hardware acceleration is enabled. The browser kernel version is too low and is not supported. |
| System | 1. Windows: Windows 10 and above, not compatible with Windows 7 and Windows XP. 2. Linux: Linux kernel 4.9 and above, supports Ubuntu, deepin, etc. 3. Mac: MacOS 10.12 and above |
EasyEDA Professional Edition Private Deployment Configuration:
| Equipment | Description |
|---|---|
| Number of users | Within 100 people |
| CPU | Intel processor 2 cores and above, i3-9100 and above configuration is recommended |
| Architecture | X86, AMD64 |
| Memory | 16G DDR4-2666 memory and above |
| Disk | System disk at least 128G SSD, data disk at least 100G SSD, HDD is also OK but some functions and performance may not be ideal |
| System | 1. Windows: Windows Server 2016 or Windows 10 and above. 2. Linux: Linux kernel 4.9 and above, support CentOS/Ubuntu, etc. |
How to change my username?
Details
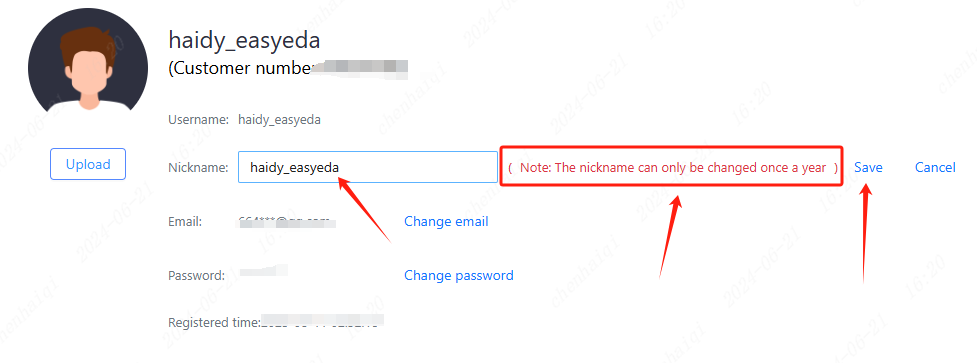
Enter the personal workspace, then you can click to modify the nickname, but you can only modify it once a year. After you finish modifying it, click "save" and you are done.It should be noted that you can only modify the nickname. The username is filled in the registration time. Once confirmed later, it can not be modified. 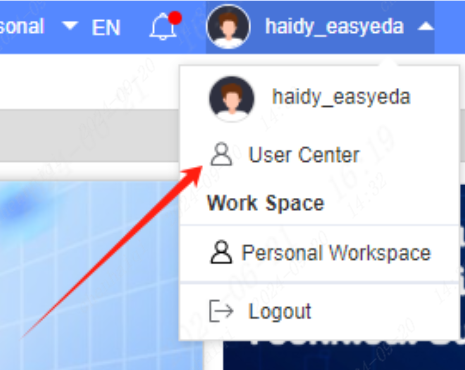
How to change the password for my account?
Details
From the upper right corner of the login account channel into the personal centre, and then click on the button to change the password, according to the information to fill in to complete the operation of changing the password. 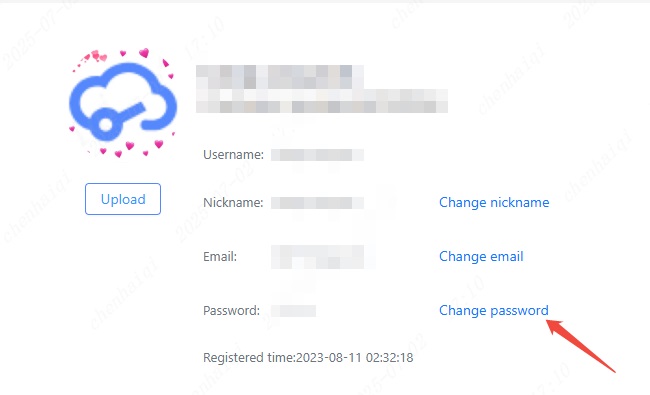
How to cancel the account?
Details
Select the avatar in the top right corner to enter "user center". 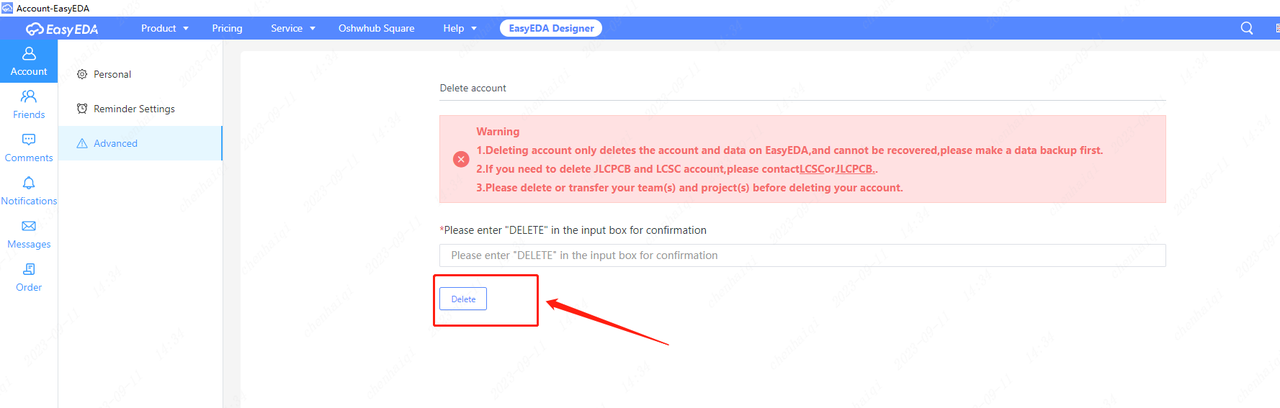
Note: After deleting an account, the account will enter a 15-day retention period, during which you will not be able to log in to use the account again, and once logged in, the account will be reactivated. Once logged in, the account will be reactivated. And you can't register the account again with the original email address after cancellation.
How to change the account email?
Details
Select the avatar in the top right corner to enter "user center". 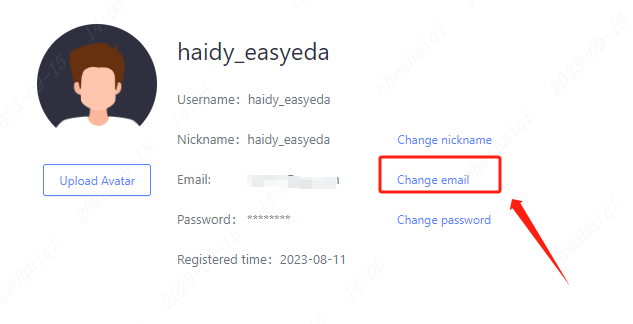
How to lock and unlock projects?
Details
Start by accessing your personal workspace from the top right corner. Then select the project that needs to be unlocked or locked inside the project. Once you are on the homepage, you can see whether the status of the project is locked or unlocked. On the right side, you can perform locking or unlocking operations. 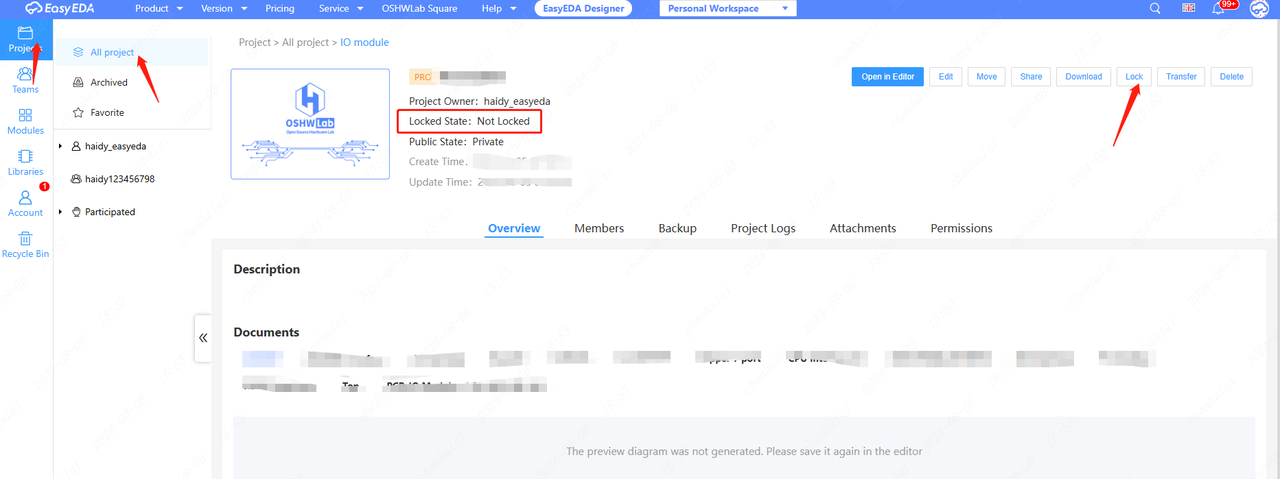
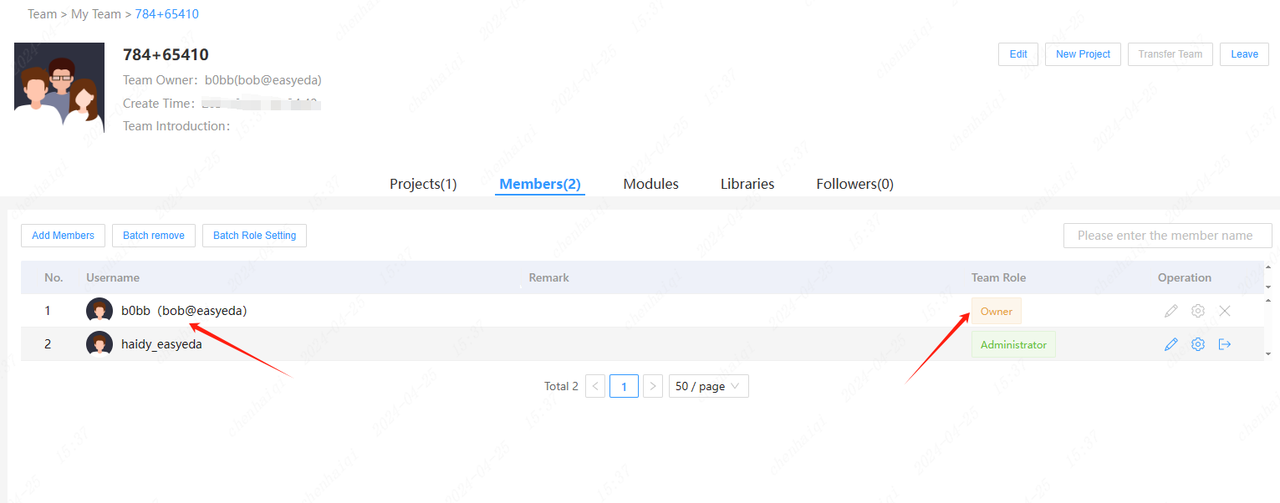
How to transfer a team owner to someone else?
Details
Team owners who are not able to switch roles directly will need to make a transfer.Start by entering your personal workspace from the top. 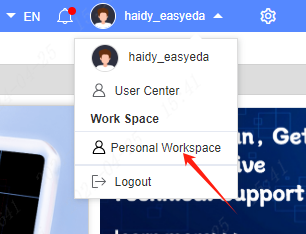
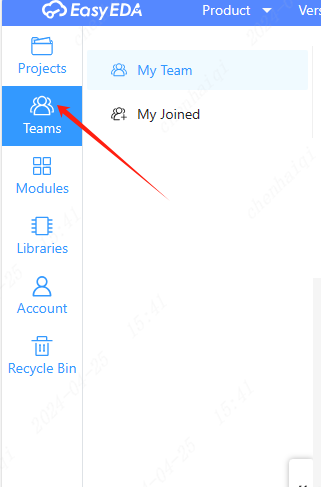
You need to make sure that the person you are transferring to is a member of your team.If you don't know how to add a member, please see the image below. 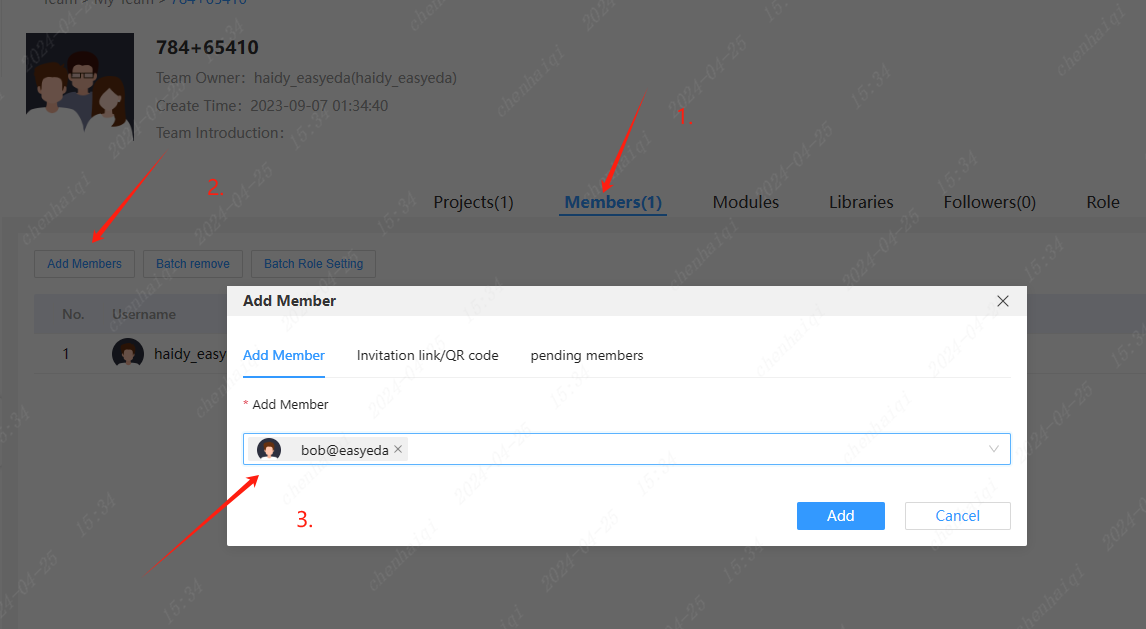
Then select the object that the member is supposedly transferring.This member of the transfer will then become the owner of the team.Note that this operation cannot be reversed.Note that this operation cannot be reversed. 
What should I do if I have no permission to save a file?
Details
There are several ways to try to solve the permissions problem:
It is possible that the login status is out: exit the account login, restart the editor to log in once again.
It may be because the file from oshwlab open project, not the user's personal, needs to save as,save in the local computer and then imported into eda to save.
The current computer network does not work: change the network to restart the editor.
What should I do when the system indicates that the schematic diagram and the pcb are not on the same board?
Details
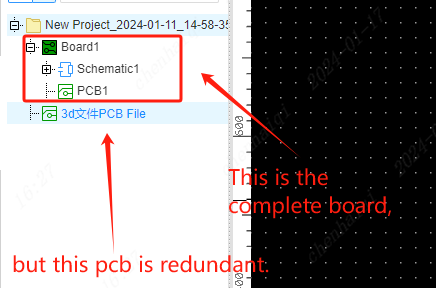
Under normal circumstances, a board can only have a schematic diagram and multiple schematic pages and a pcb composition. Redundant schematics and PCBS cannot exist on a board at the same time. 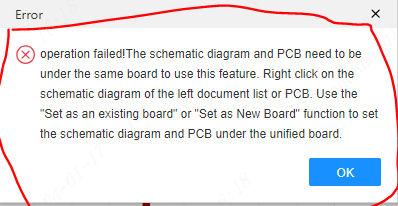
When the system prompts an error, you need to select the pcb or schematic diagram, click the right mouse button, and put them back under the original board. 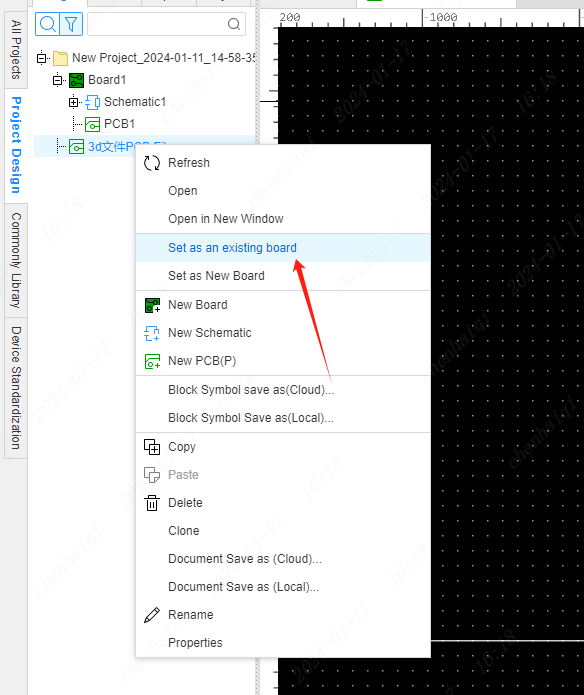
How to add multiple boards or schematics and PCB?
Details
The boards or schematics and pcb's on the left side of the project can be added by clicking the right mouse button after selection. 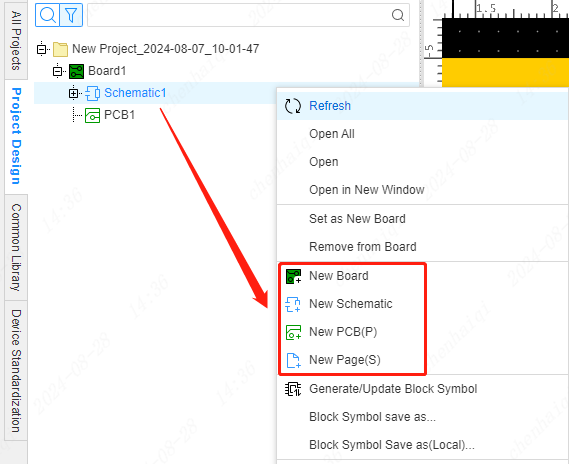
Note: Only one schematic and one PCB can be matched under one board. Designs requiring multiple schematics have the option to add a schematic page.
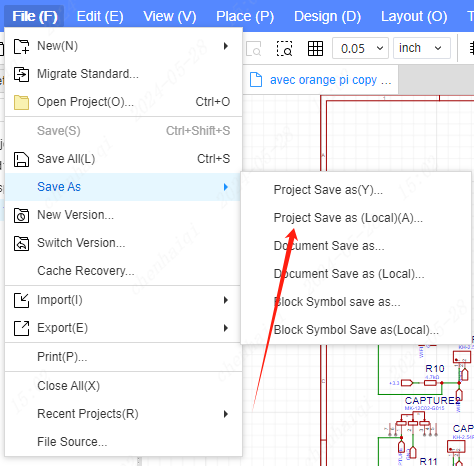
How to export eda files to share with others?
Details
Find the ‘save as’ tool in ‘file’ in the top menu bar to export. Project Save as (Local): means to export the whole project file. Document Save as (Local): means to export the current pcb or schematic. 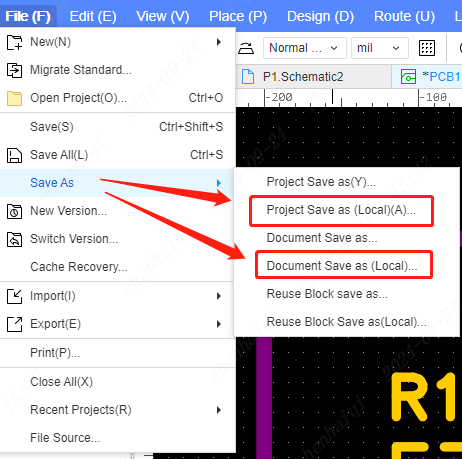
After downloading and installing, what should I do if there is no response when I click on the client?
Details
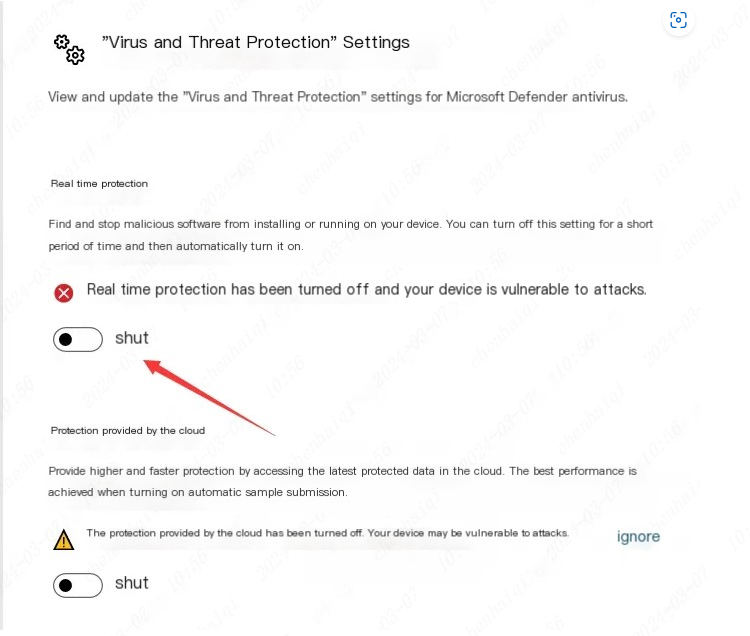
After downloading and installing the client, double-click to open it without response, you can try the following solutions: 1.The software needs to be installed on the C disk, and close all firewalls and antivirus software. 2.Try to run in an administrative way.(Select the client on the desktop by right clicking the mouse and selecting Run as administrator) 3.Turn off the computer's protection mechanism. 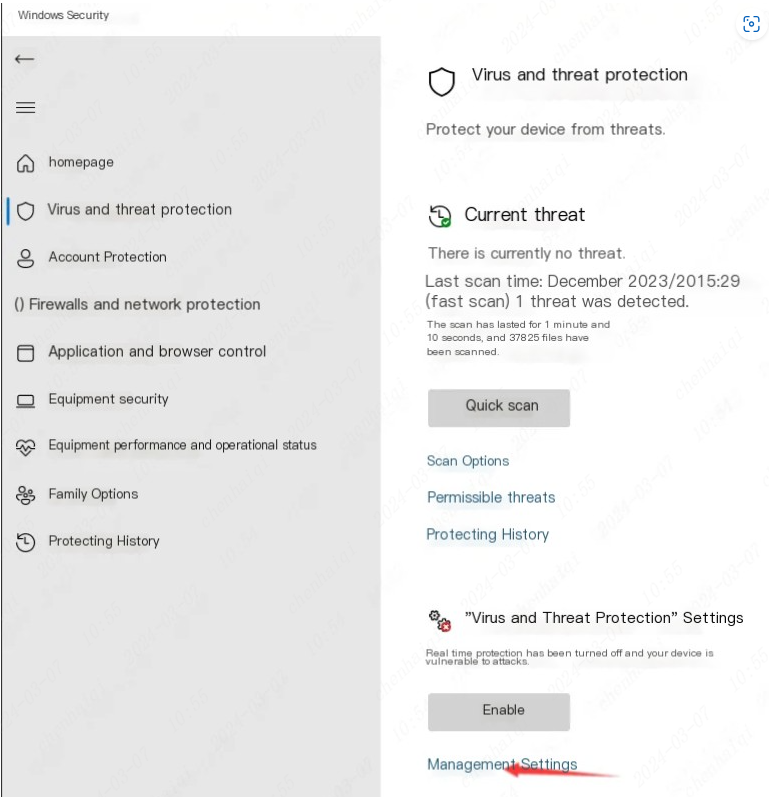
4.In "this computer", find the document - easyeda-pro folder suffix, change the file name to easyeda-pro1, and then double-click to open the client can be, and then easyeda-pro folder libraries and projects migrate over, and then easyeda-pro1 deleted. pro1. It's a folder permission reading problem. 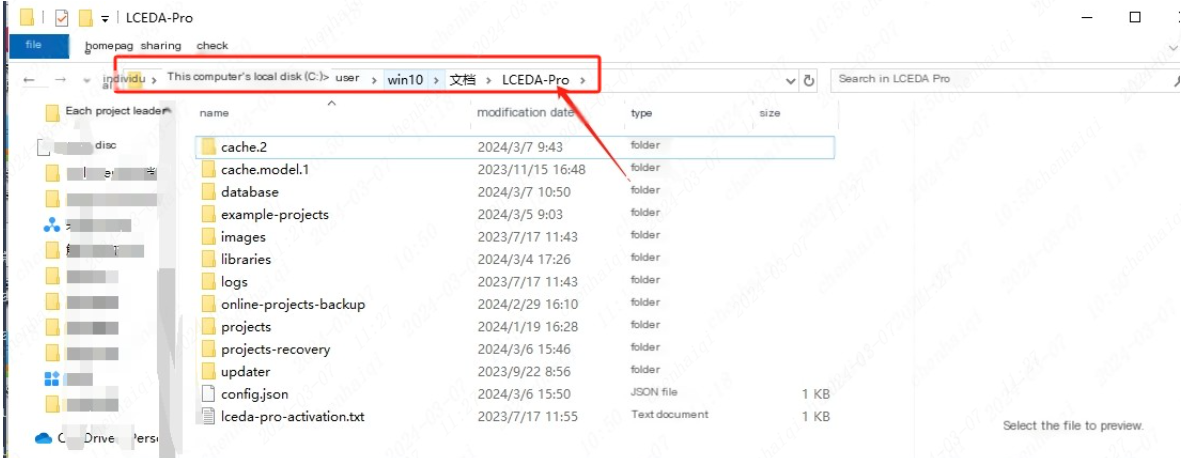
5.Find the path in the installation path of easyeda, delete the config.json file in the path, and then start it again. 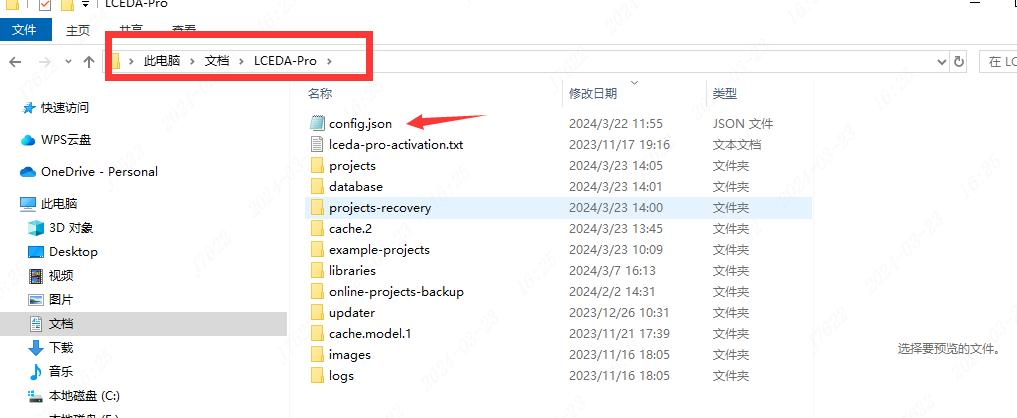
6.When opening the client prompts no graphics card or graphics card is too low, you can do this: Delete EDA, delete the local document file in C disc, download it again, set the acceleration and then open EDA again.
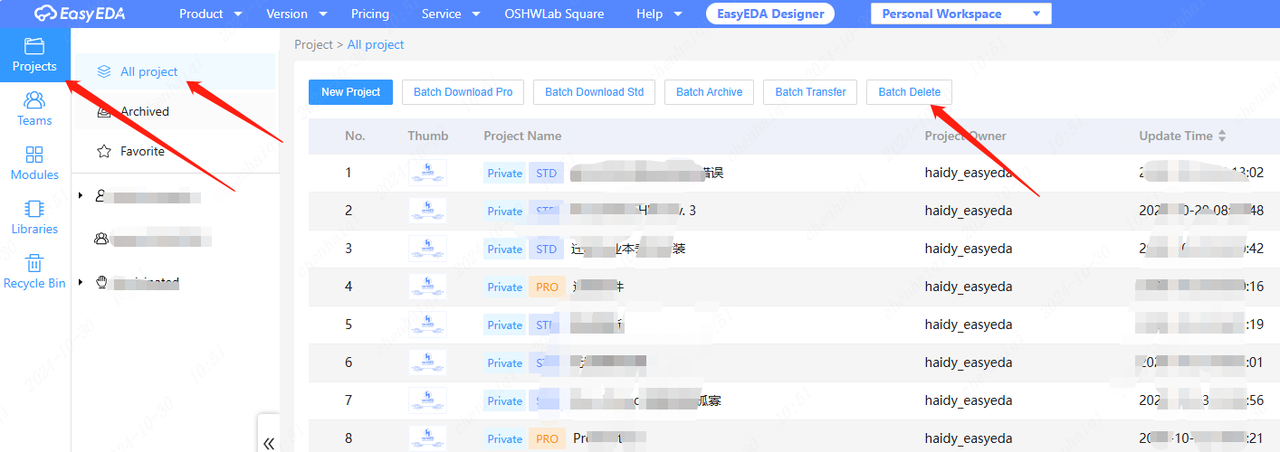
How to batch delete projects?
Details
Go to your personal workspace in the top right corner - click Batch Delete - tick the files you want to delete - click Confirm Delete. Note: Deleted files are not recoverable, please think carefully. 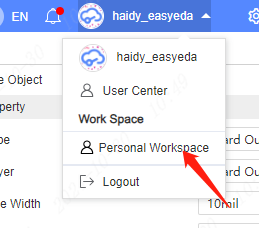
How to take a screenshot of an error report?
Details
Press f12 on your keyboard, open the developer tool and click on the ‘console’ option, then pull the slider at the very end to the top and finally take a screenshot and send it to us.(You need to press F12 three times in a row on the client, but you only need to press F12 once on the browser.) 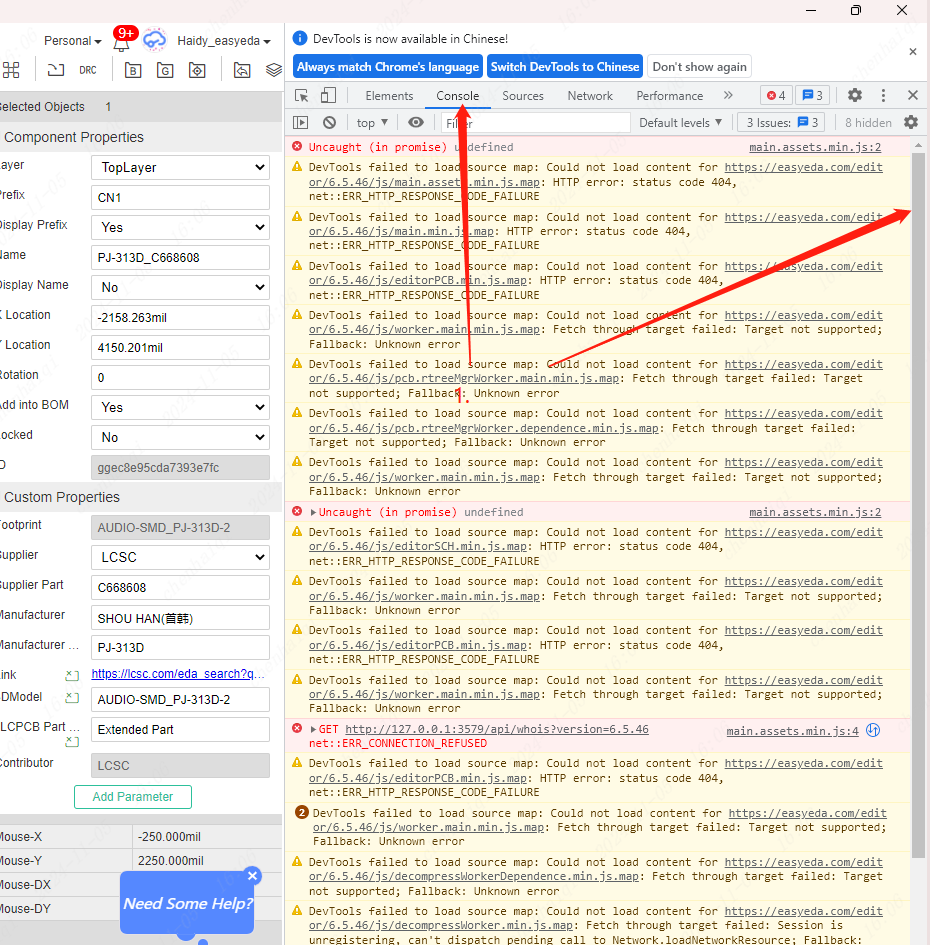
How to clear the cache?
Details
Press f12 on your keyboard, open the developer tools and click on the ‘Application’ option, then tick the ‘including third-party cookies’ box, and finally click on Clean. After clearing the cache, you can editor manage a reboot.(You need to press F12 three times in a row on the client, but you only need to press F12 once on the browser.) 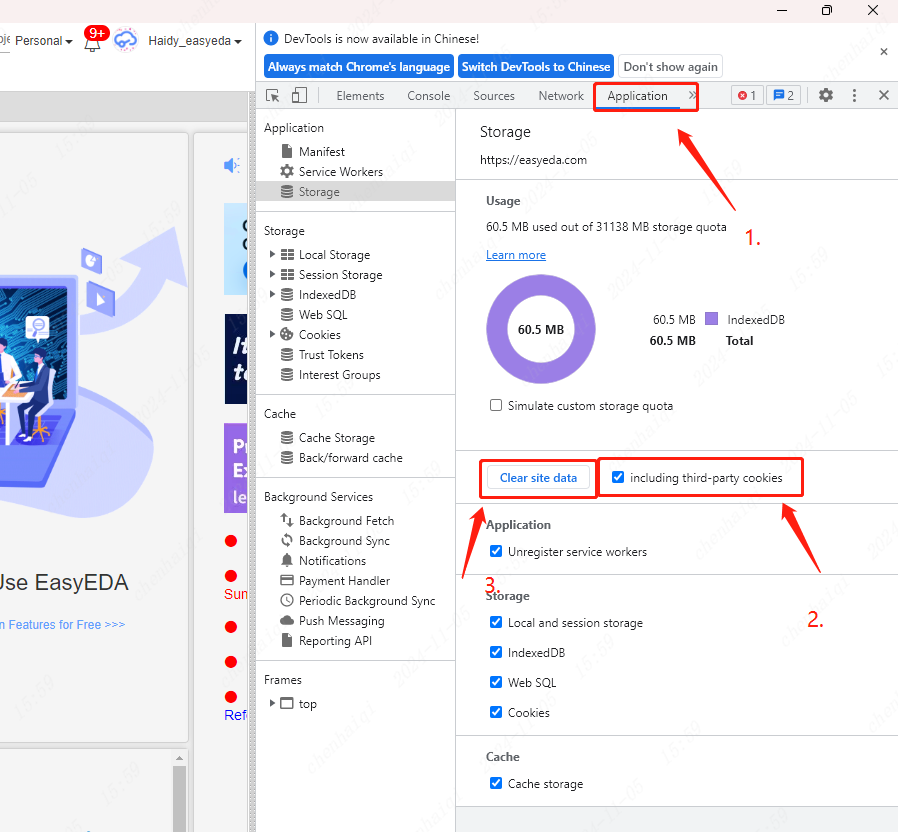 The professional version now offers another way to clear the editor's cache. Click on settings in the upper right corner of the editor, find the "Clear Cache" button, and click it.
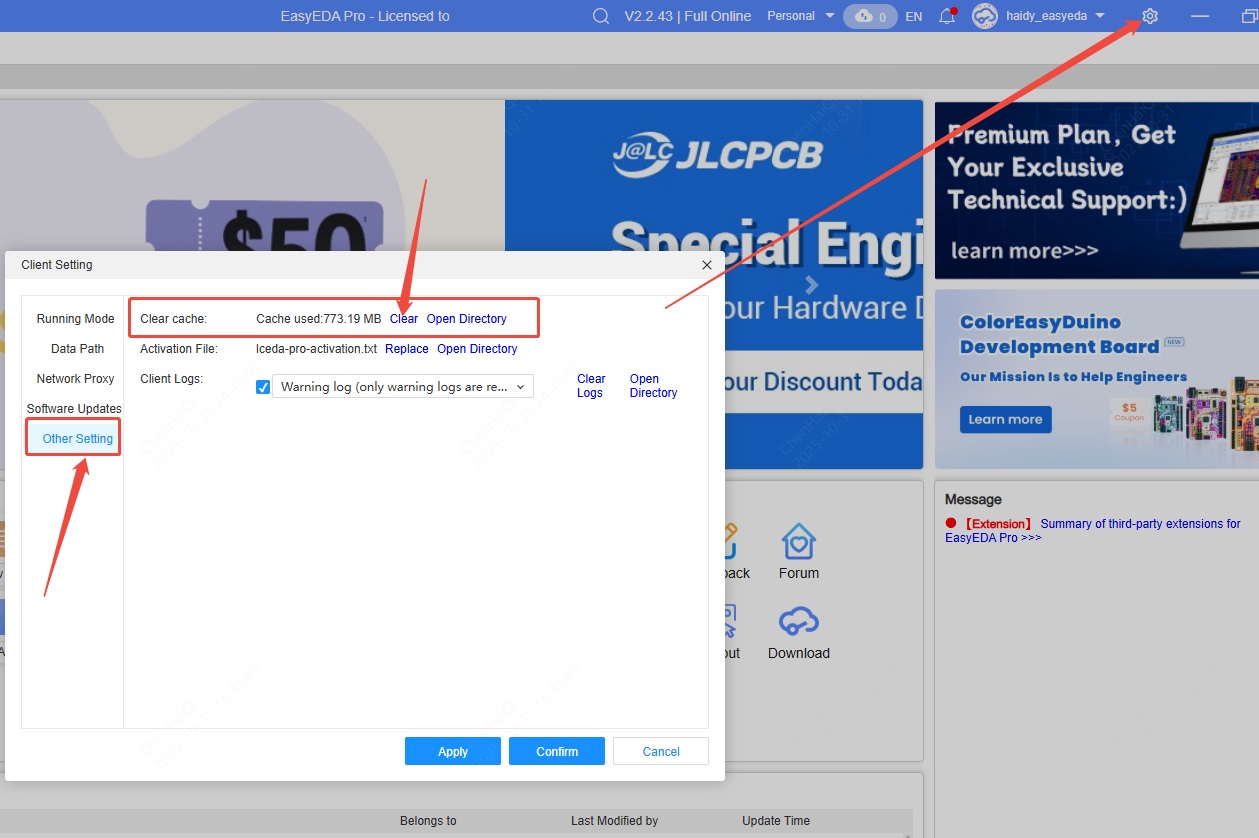
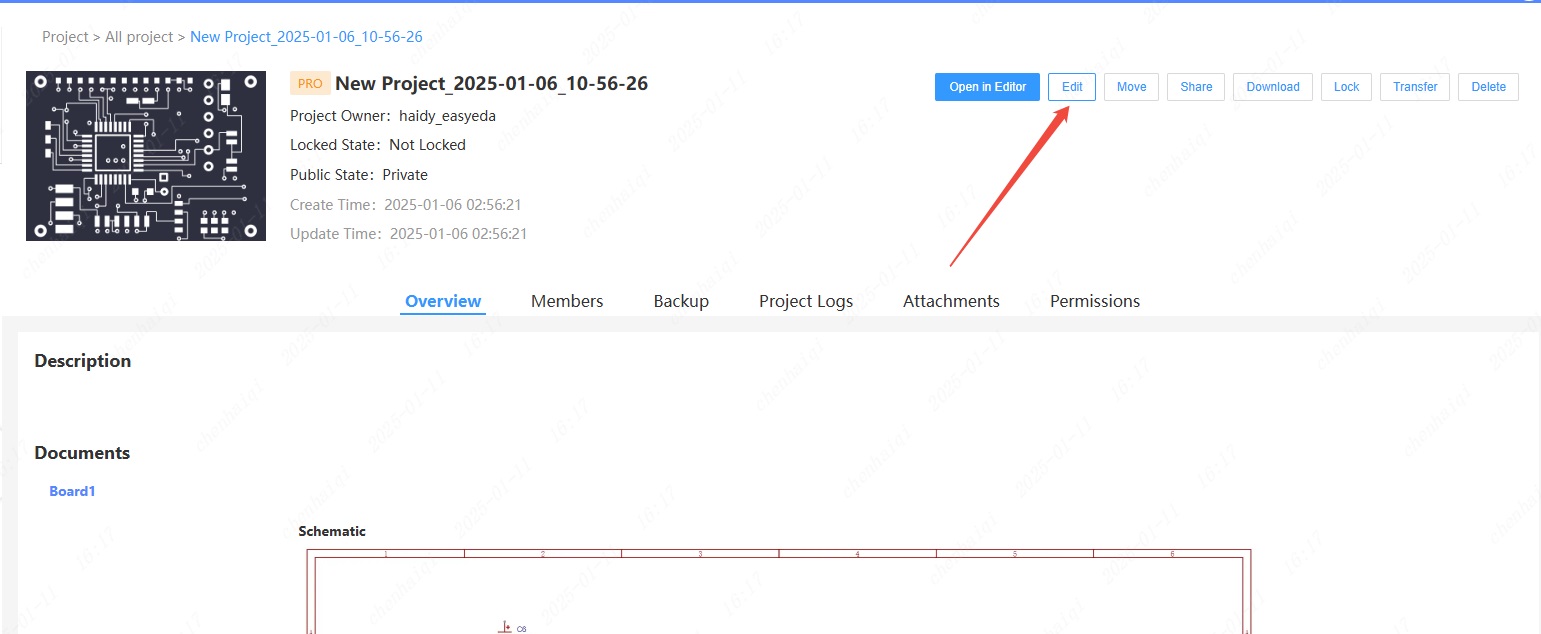
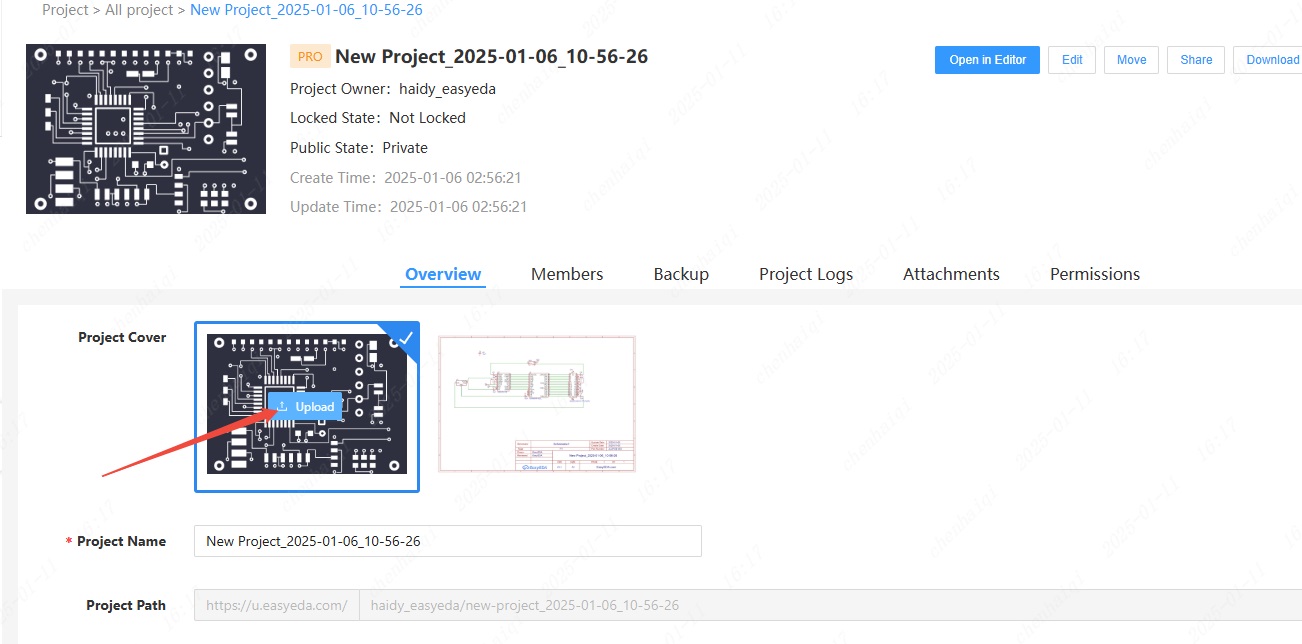
How can I modify the display image of my personal workspace project?
Details
After entering the personal workspace, select the project that needs to be modified, click ‘Edit’, and then you can change the picture of the home page. 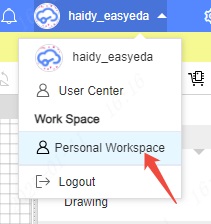
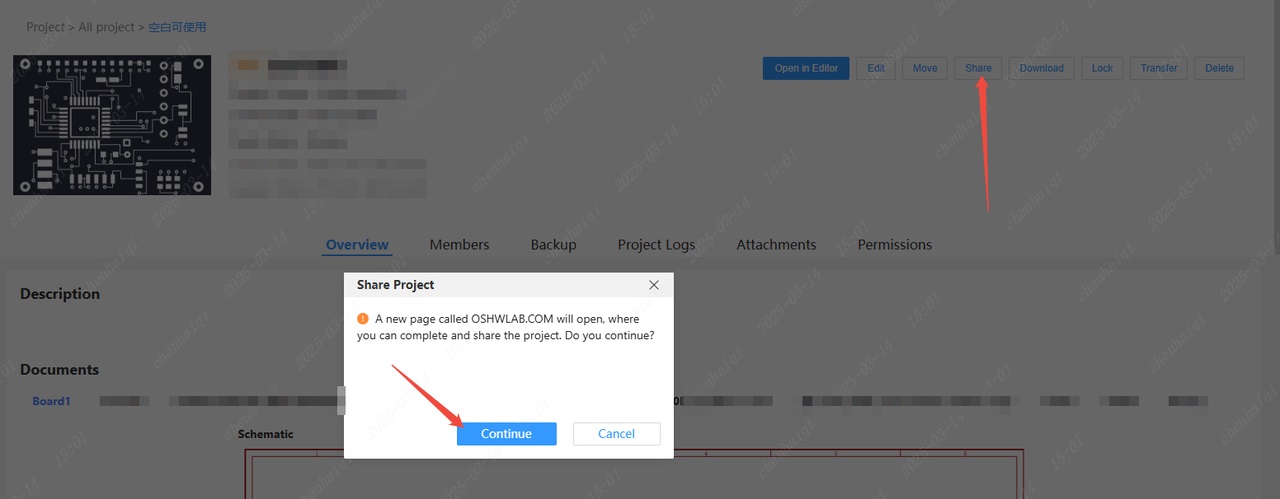
How to publish a project to oshwlab?
Details
Select the folder in the Engineering section on the left and then click the right mouse button to select Share. Note: Sharing to oshwlab means that you make your project public and anyone can download and use your project, if you don't want that please don't share it. (Our oshwlab platform has protection for designers' rights: any project shared to oshwlab by individual users is not allowed to be commercialised, once found, the original authors have the option to protect themselves by legal means.) 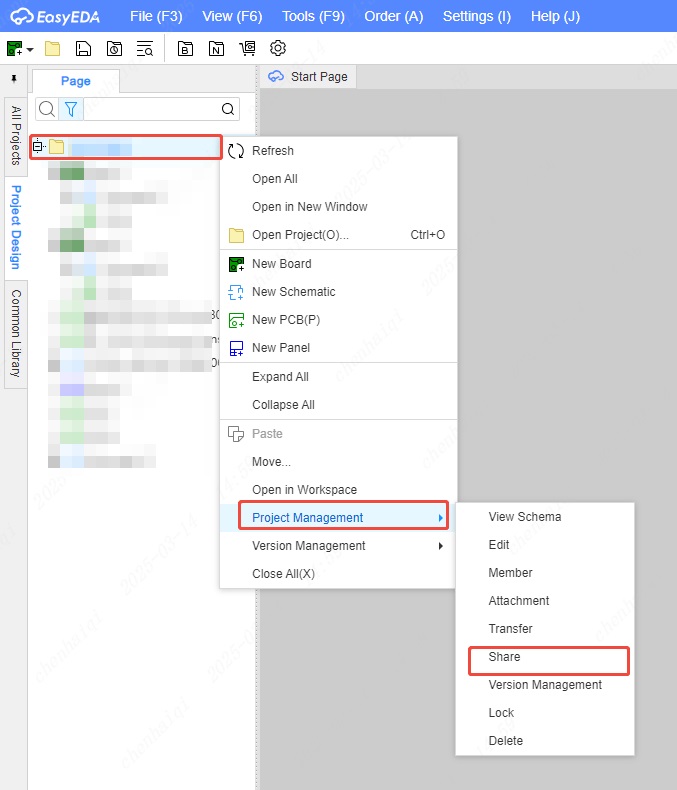
How to change the activation account?
Details
When we use the offline mode, the account shown in the top menu bar is the account that activates the file. So if you want to change this account, you need to change the activation file.  Step 1: Check your installation path and open the installation path.
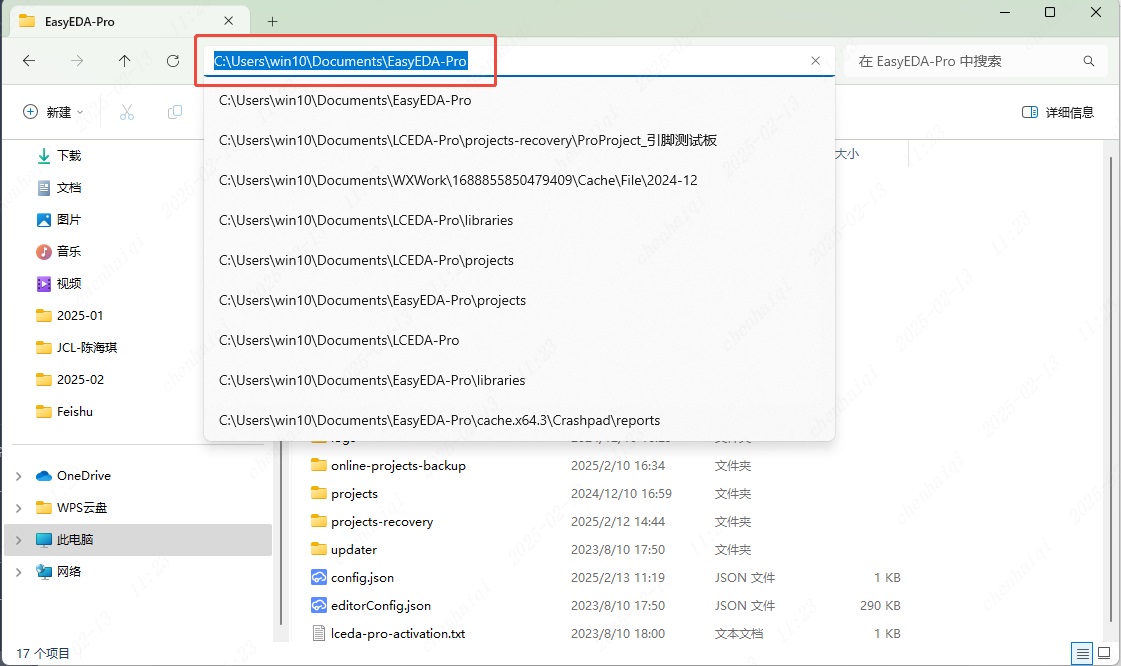
Step 2: Find the activation file and then you can delete it, put the activation file of the new account back inside this path and finally restart the editor. 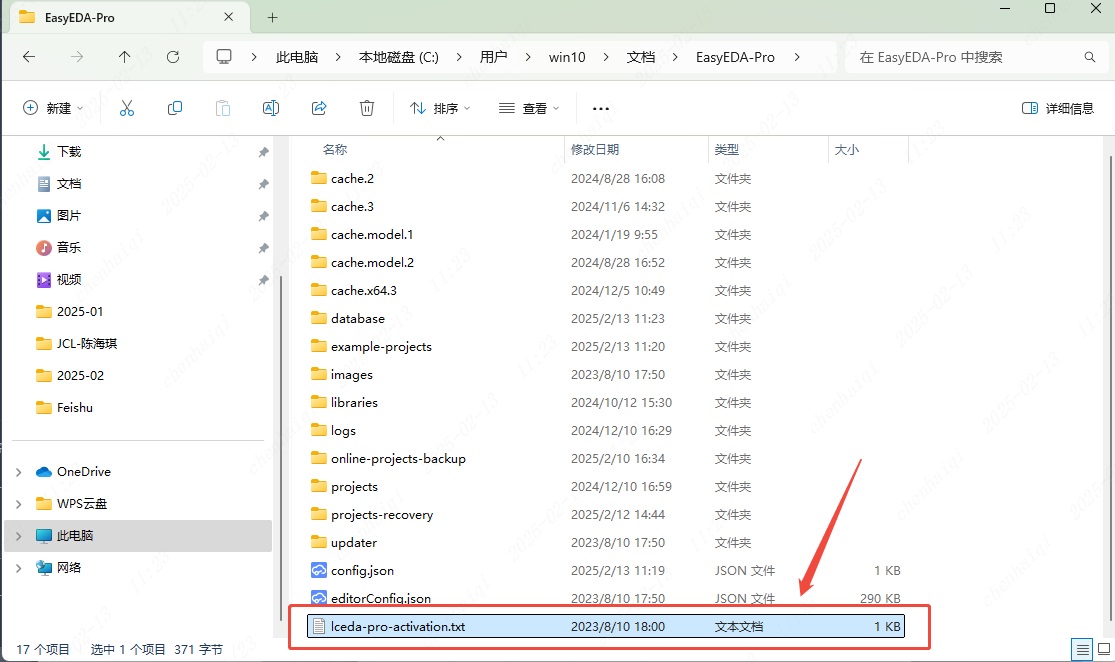
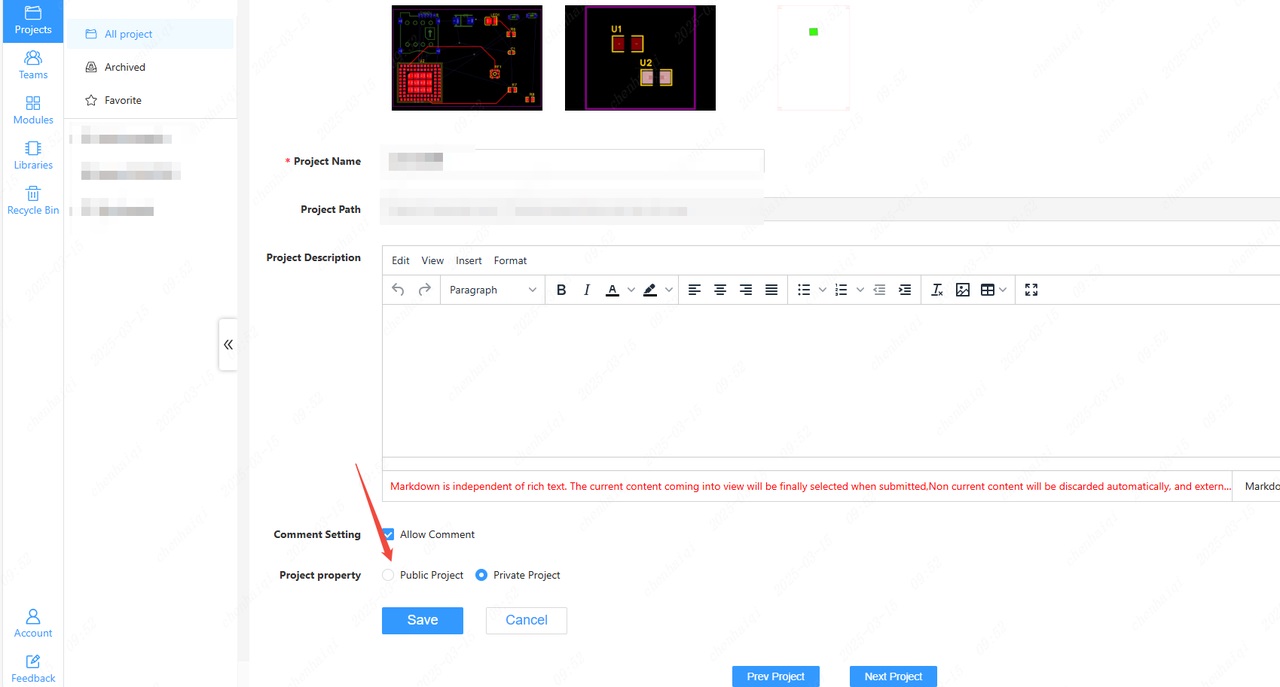
How to set up public/private projects?
Details
Selecting the folder on the right and then clicking the right mouse button gives you access to edit project permissions. 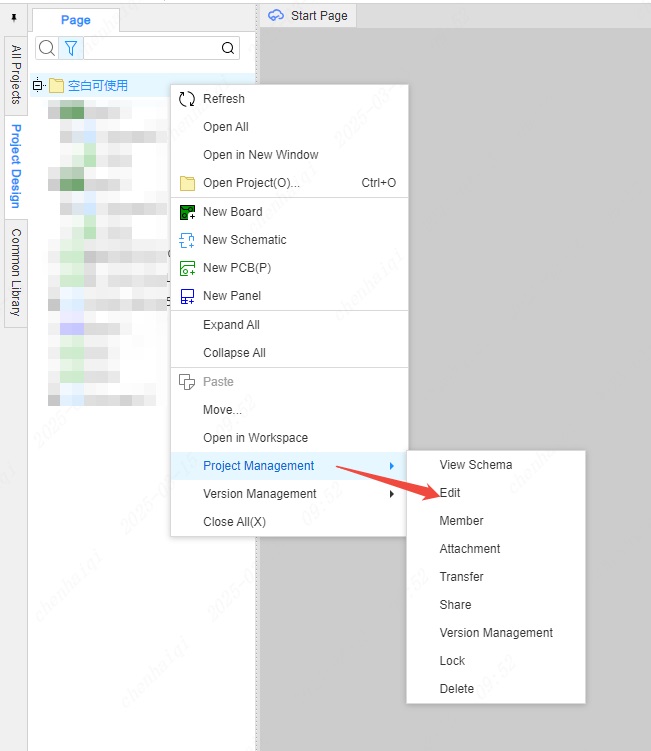
How to change the profile picture of my personal account?
Details
Enter the Personal Center in the upper right corner of the editor.Then click "upload" to change the avatar. 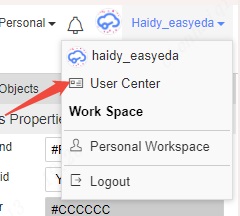

Modify file name in online mode?
Details
Select the project to be modified in the Project column, right-click and enter the editing interface. 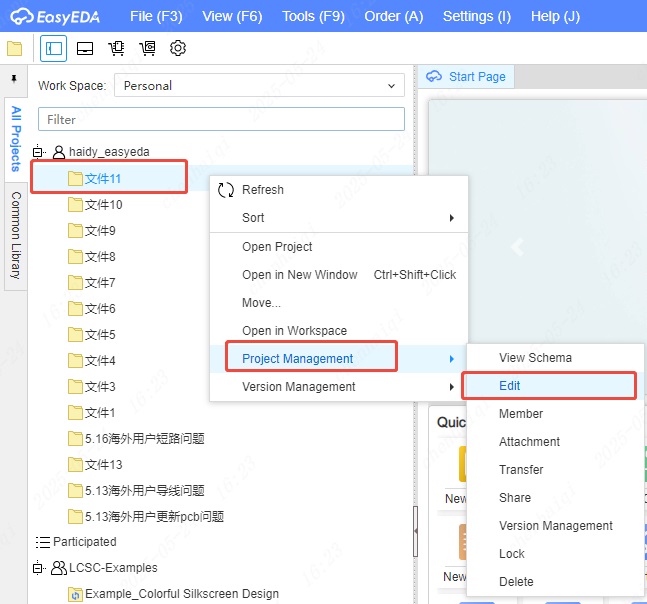
Then you can modify it. 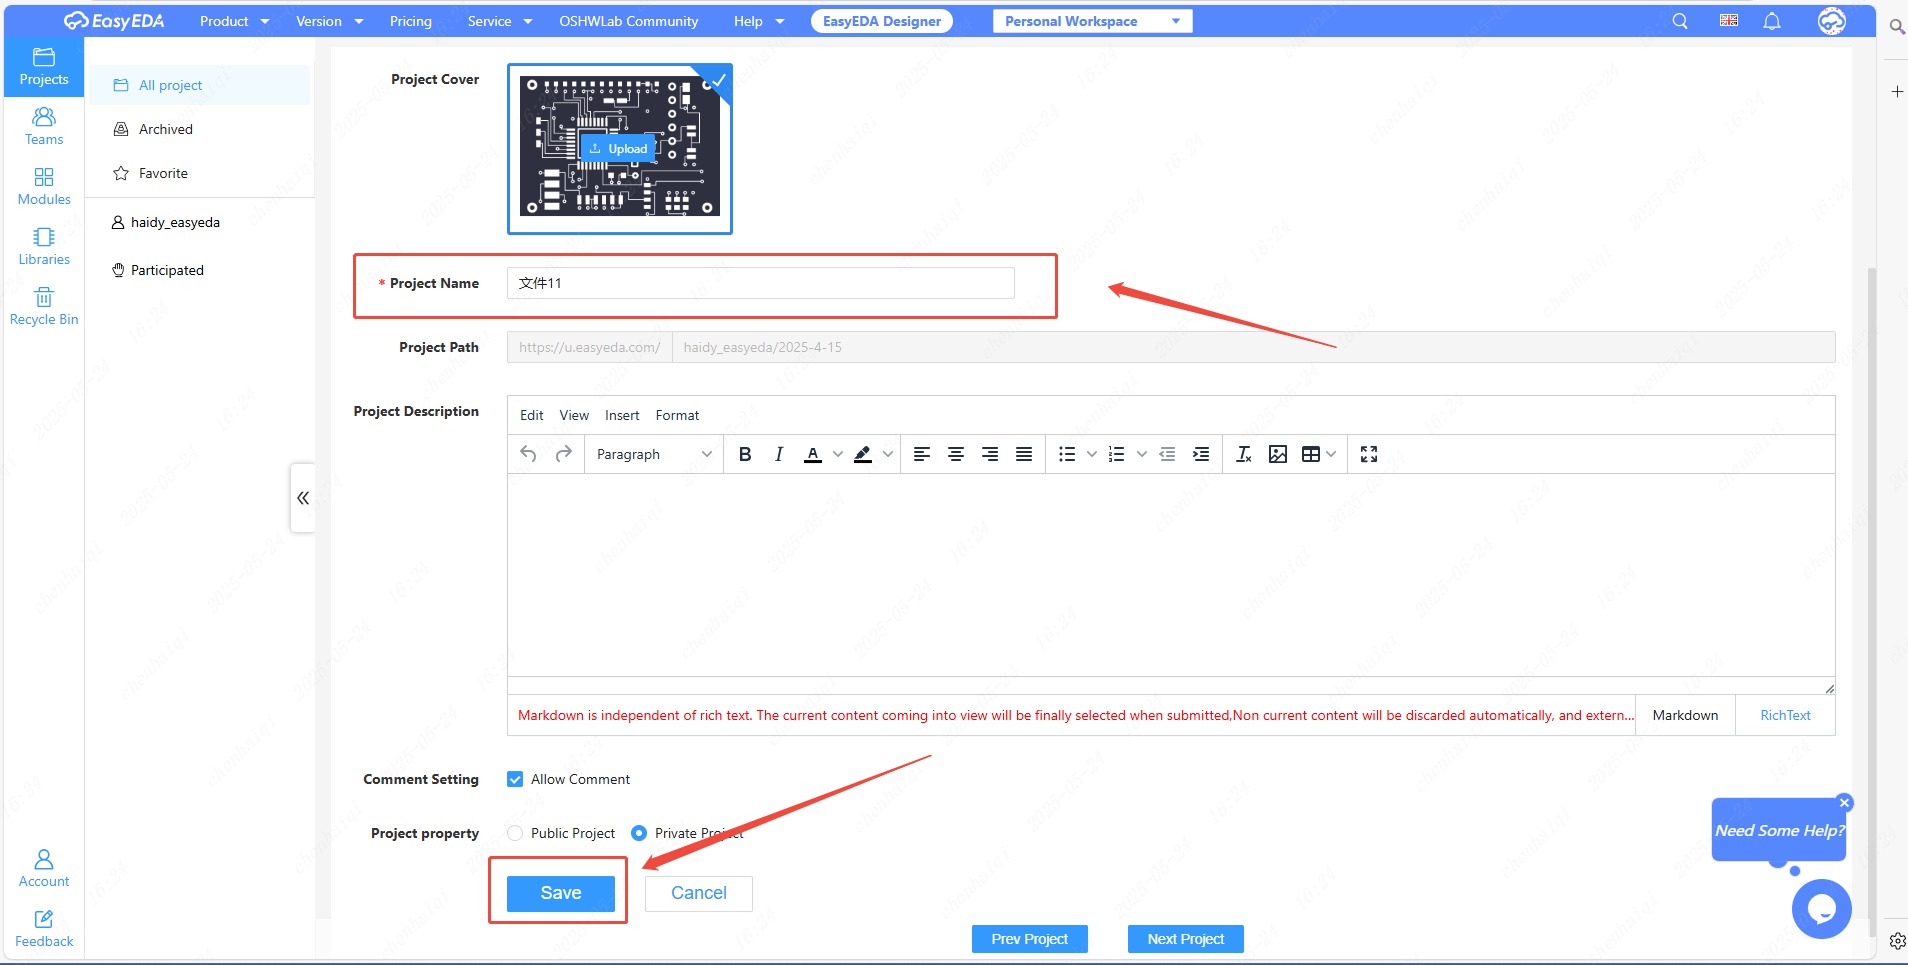
How to modify the schematic and pcb name?
Details
Select the schematic or PCB in the project column on the right, right-click and find the "Rename" tool to modify it. 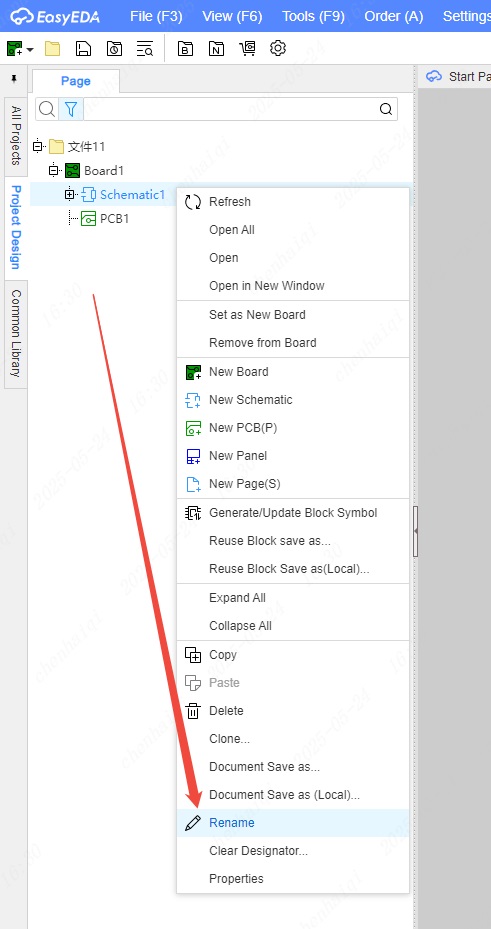
How to delete offline files?
Details
In the Project column, select the project you want to delete, right-click, and select Open Project Path. 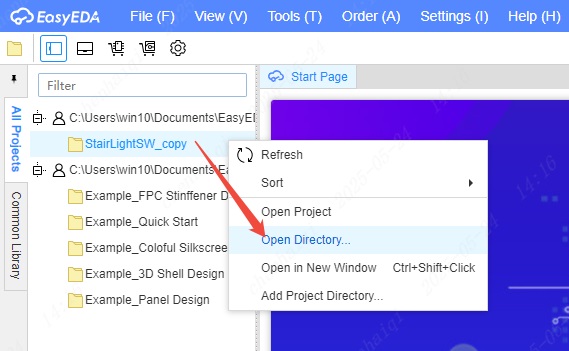
Then delete the files in the path, and then reopen the editor to see that the project has been deleted. 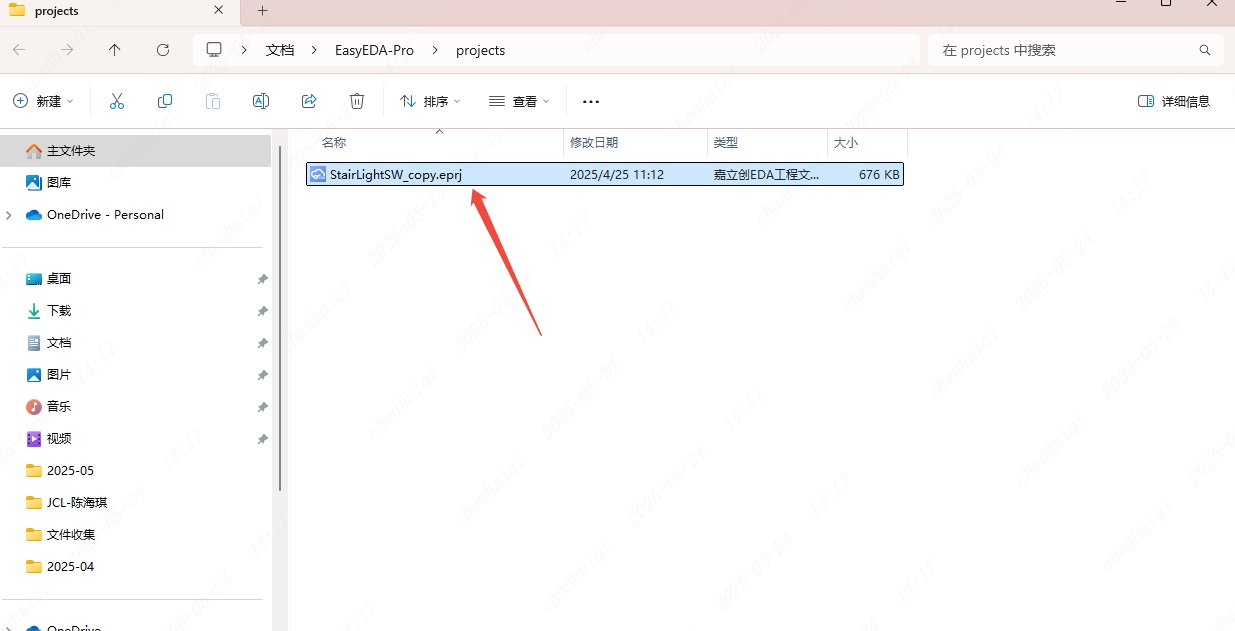
How to set the zoom layout and resolution of the computer to solve the problem of stuttering?
Details
First, go to "My Computer" and find the system in the Settings. 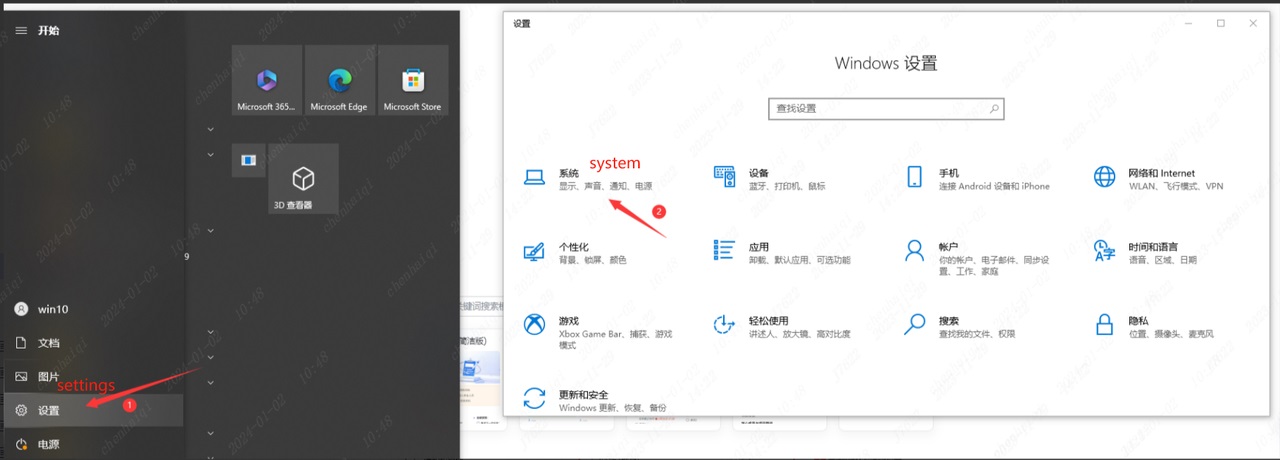
Second, find the Settings about the screen in the system and modify the zoom layout and monitor resolution. 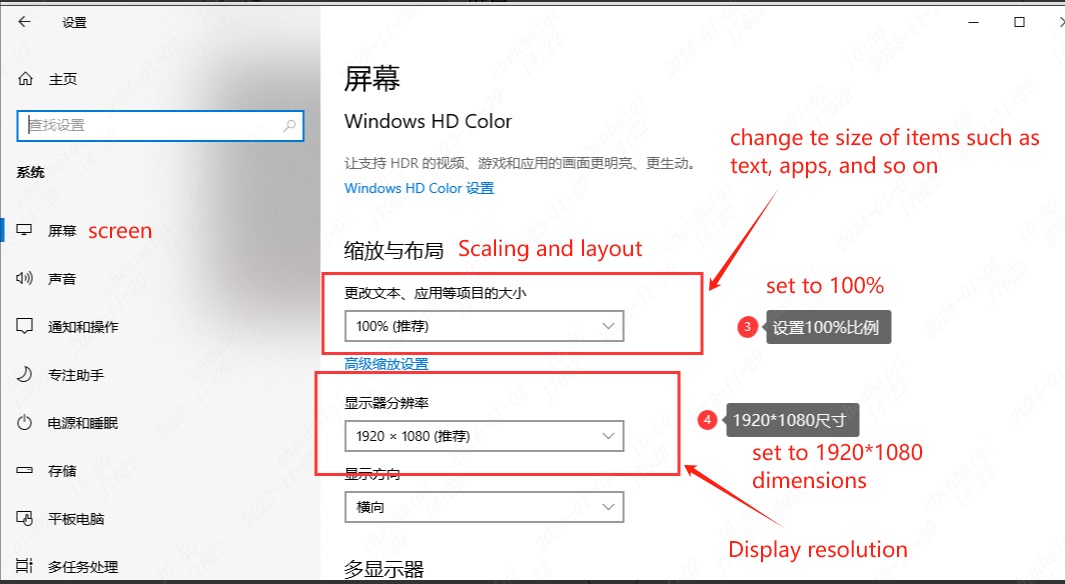
What should I do if I jump to the login page when easyeda clicks login and keeps circling around without being able to log in?
Details
There are three ways: 1.Try changing your computer's default browser to Google or Firefox and try again. 2.Find the path of EasyEDA-Pro\cache.2 and delete the folder cache.2. 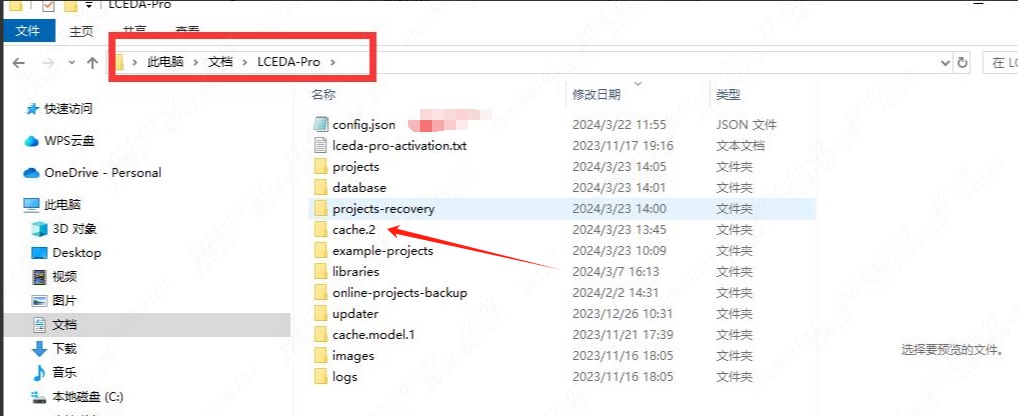
3.check if there are other plug-ins installed on your computer, disable the plug-ins and then try again. 4.You can clear the cache and try again.Please check out this tutorial:https://prodocs.easyeda.com/en/faq/others/#how-to-clear-the-cache The above methods belong to the client editor, but methods 1 and 4 can be tried on the web version.
How do I import devices on the link into Professional?
Details
First click the button to open from the editor. 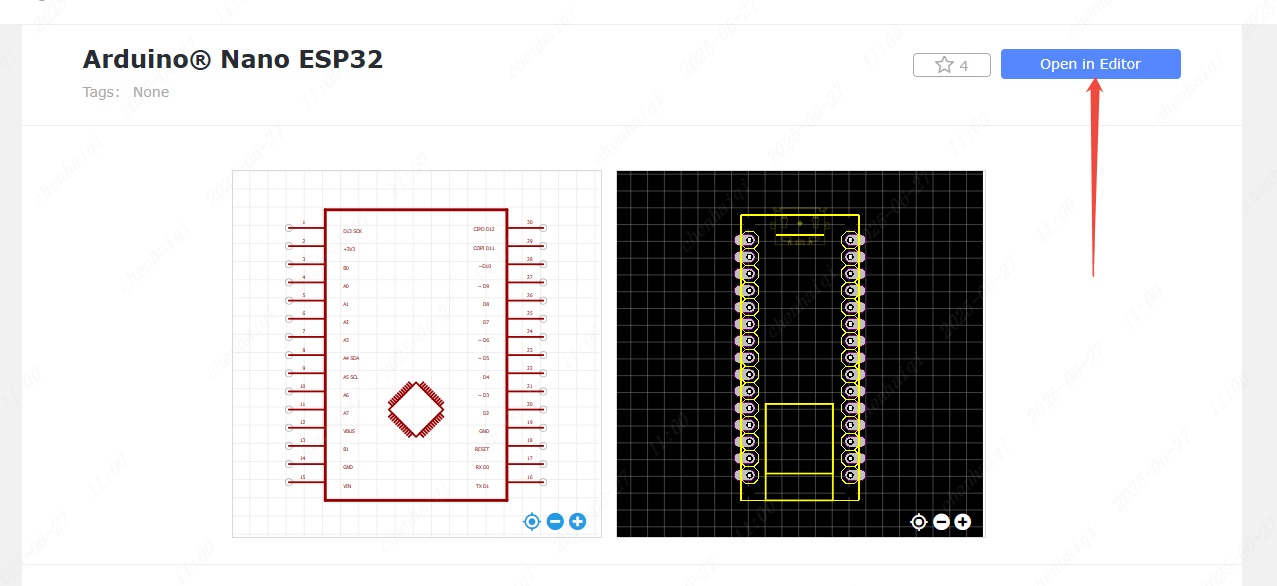
Export the files separately in the standard version. 
Then compress the schematic and pcb into a zip file. 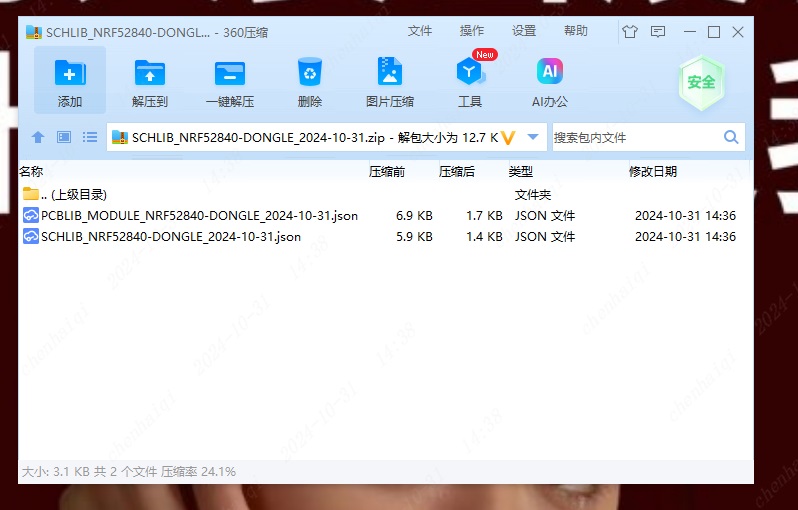
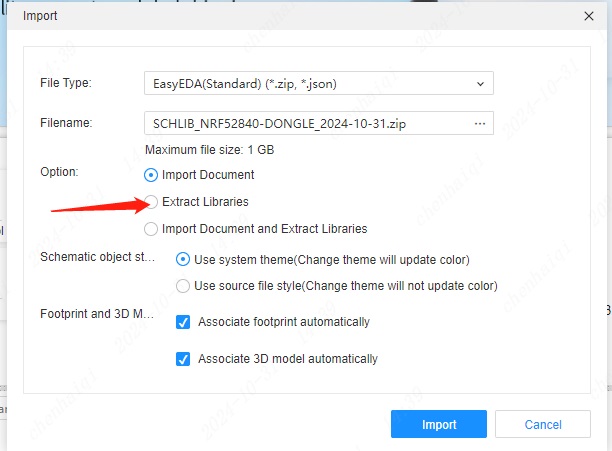
Select Extract Library when importing the Pro version and you're done. 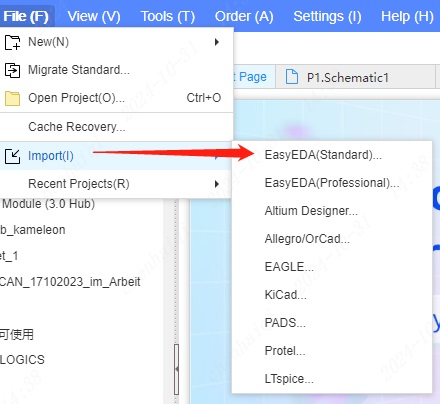
Solution to the problem of blurry and fuzzy fonts on the client interface.
Details
This is because of a setting problem in the graphics driver app. You may need to turn off the GPU rendering of your computer, or turn off the GPUFXAA option.If this method does not work, you can try to see if the web version works properly. Reference Links: https://blog.csdn.net/qq_46435629/article/details/124908258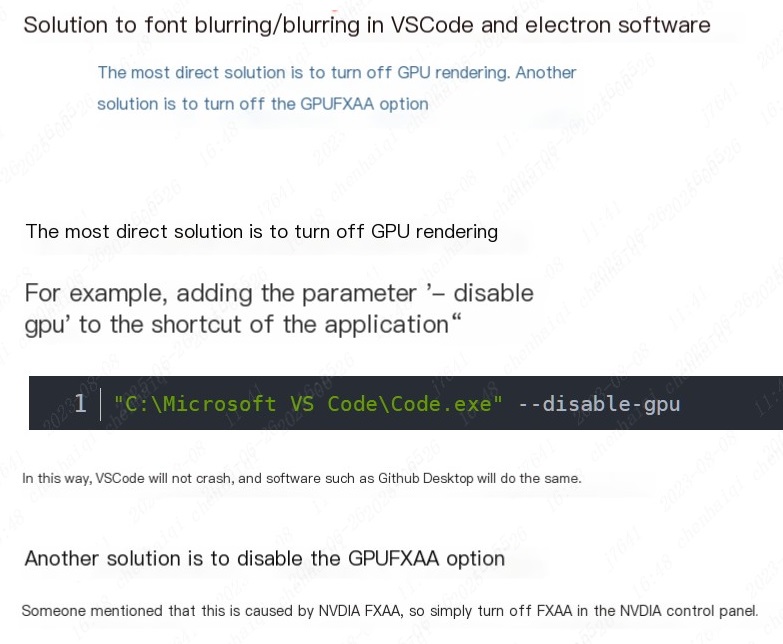
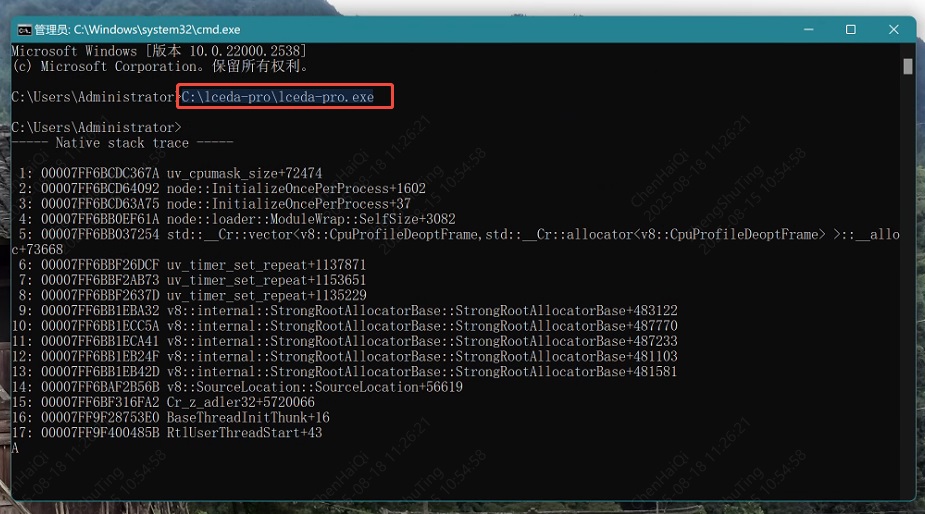
How do I enter the command line to start the editor?
Details
- Open the system's cmd command window. Press Win+R and enter cmd.
- In the opened cmd window, enter: C:\easyeda-pro\easyeda-pro. exe。(That is, the path where you installed EDA, which may be different for each person)
- Press Enter and then open the client.
- If the client does not start after pressing Enter, please send me a screenshot of the cmd interface output.
How to add DNS?
Details
How to set up the computer's DNS server and commonly used DNS servers, please see the following explanation: Find the following image in the network settings of the local computer: Open the Network and Sharing Center in Settings and find the Ethernet settings. 
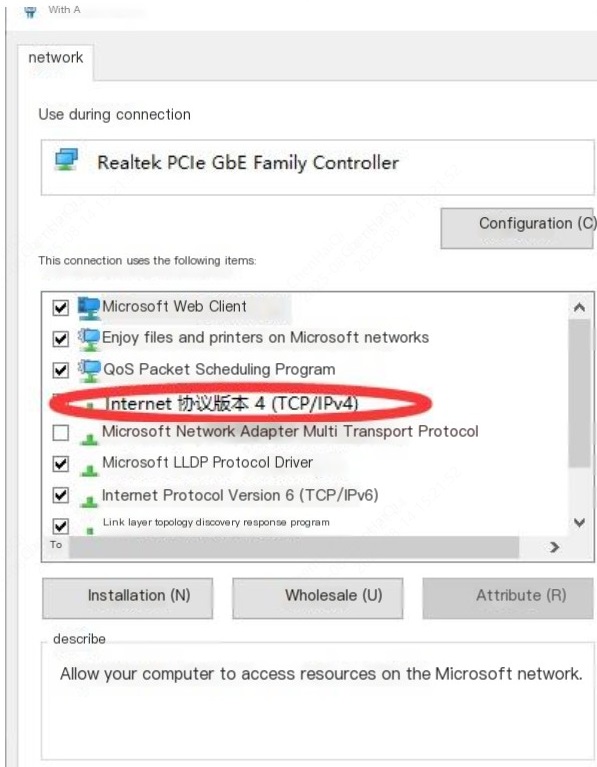
Then click Properties, then Internet Protocol Version 4. Depending on your computer system, your interface might be different than mine. It's actually all the same; just follow the instructions. 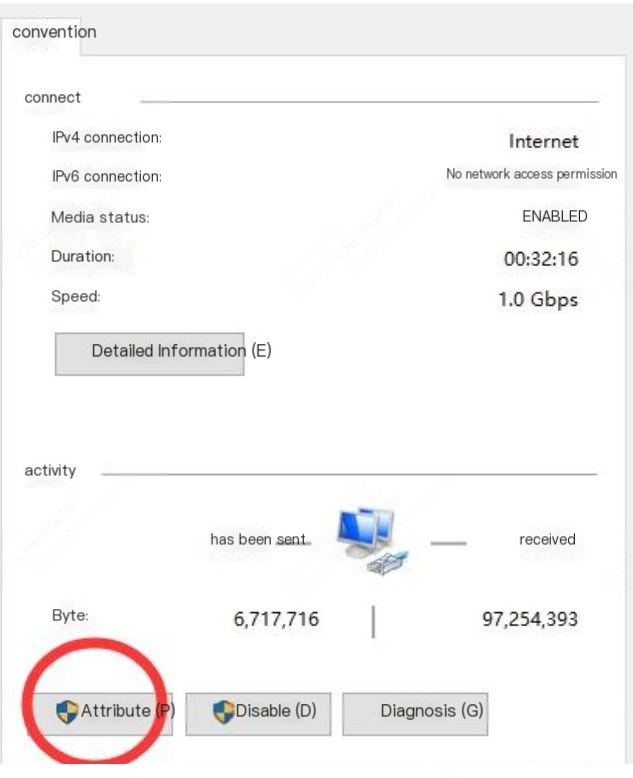
Finally, you need to change the preferred DNS server to 114 114 114 114. 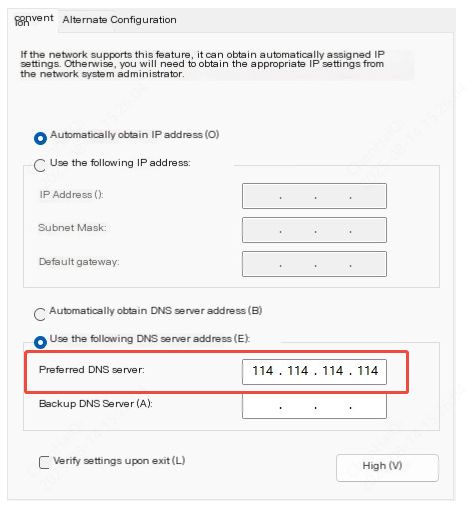
After the change, return to the desktop and reopen the editor to test whether the editor has been restored.
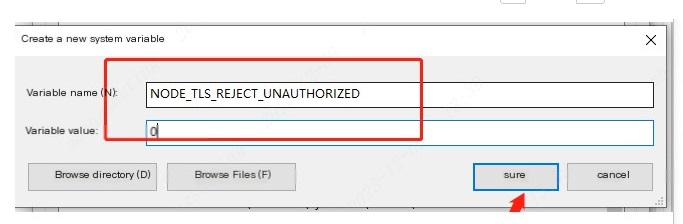
How to add environmental variables?
Details
Step 1: Open the Windows Settings homepage and enter [Environment Variables] to search. 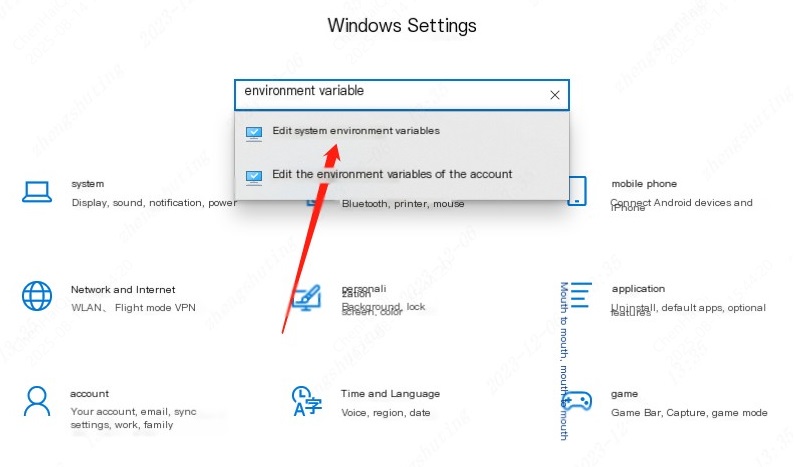
Step 2: Open the environment variable settings in the system properties. 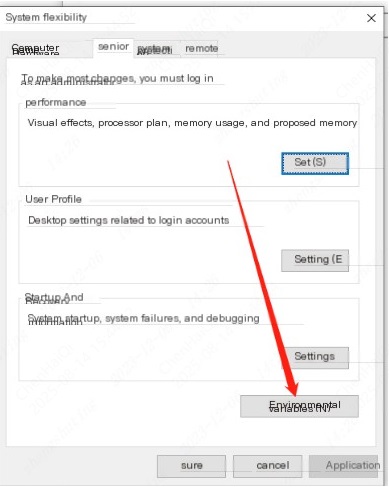
Step 3: In the environment system variables, create NODE_TLS_REJECT_UNAUTHORIZED=0, and then restart the computer 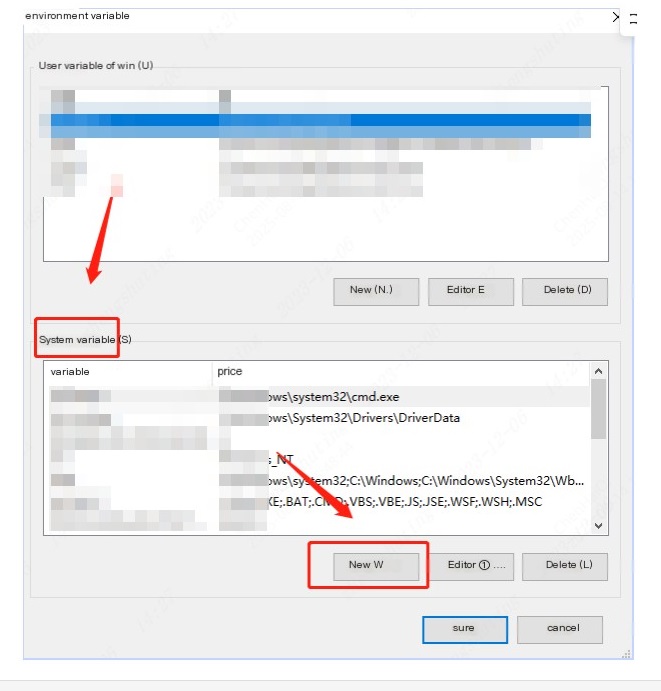
After the change, return to the desktop and reopen the editor to test whether the editor has been restored.
How to register an account?
Details
Click this link to access our registration page, or you can access the registration channel on the Easyeda official website. LINK:u.easyeda.com/register
How can I generate a link to the project and share it with others?
Details
Step 1: Enter your personal workspace. 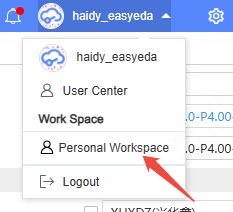
Step 2: Select the project and click the "Add Member" function. 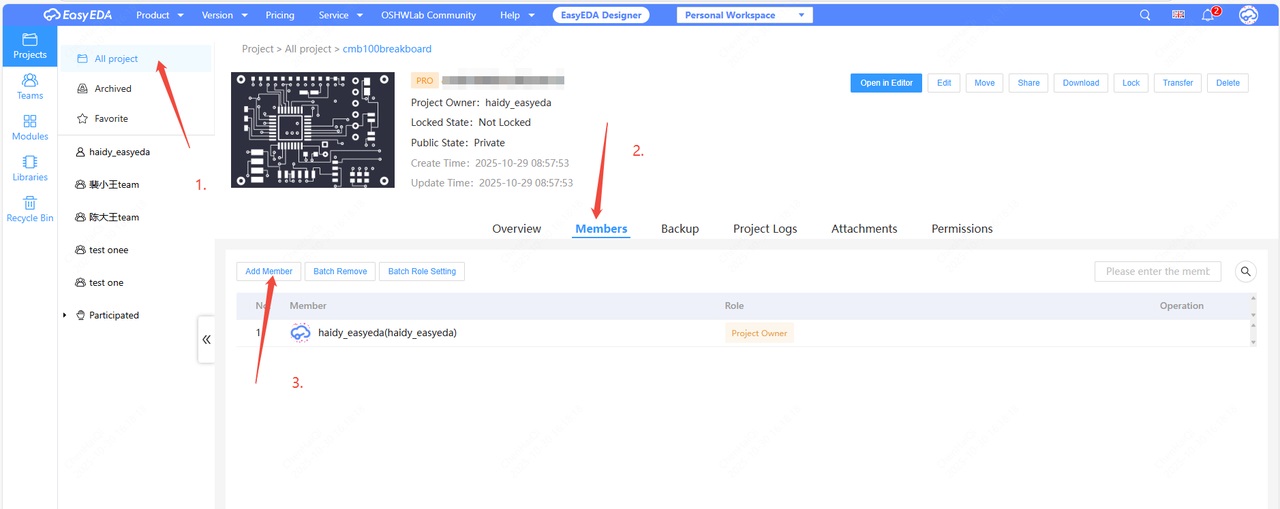
Step 3: Select the link and copy it. 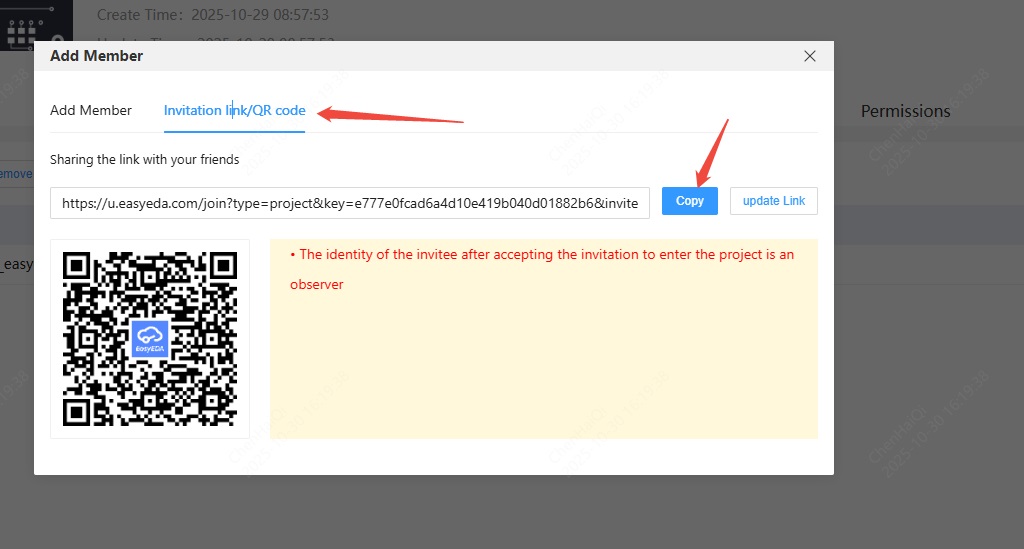
How to force the use of independent graphics card to accelerate EASYEDA Professional Edition PCB?
Details
Many students have dual graphics cards: an integrated graphics card and a dedicated graphics card. Our EasyEDA Professional Edition PCB requires graphics card support, so using a dedicated graphics card for rendering can speed up PCB rendering, zooming, and panning, achieving smoother results. If your system is Windows 7, the client may not display the PCB properly or may even fail to open. You'll need to configure this as follows. The EasyEDA browser defaults to using the integrated graphics card; you need to configure it in your system to use the dedicated graphics card. Before doing so, please download and update the latest graphics card driver from the official website.(It is recommended to use a browser other than Firefox.) The tutorial is as follows: If your operating system is Win10 1.Turn on the Graphics acceleration function in the system settings of Google Chrome. Google Chrome: 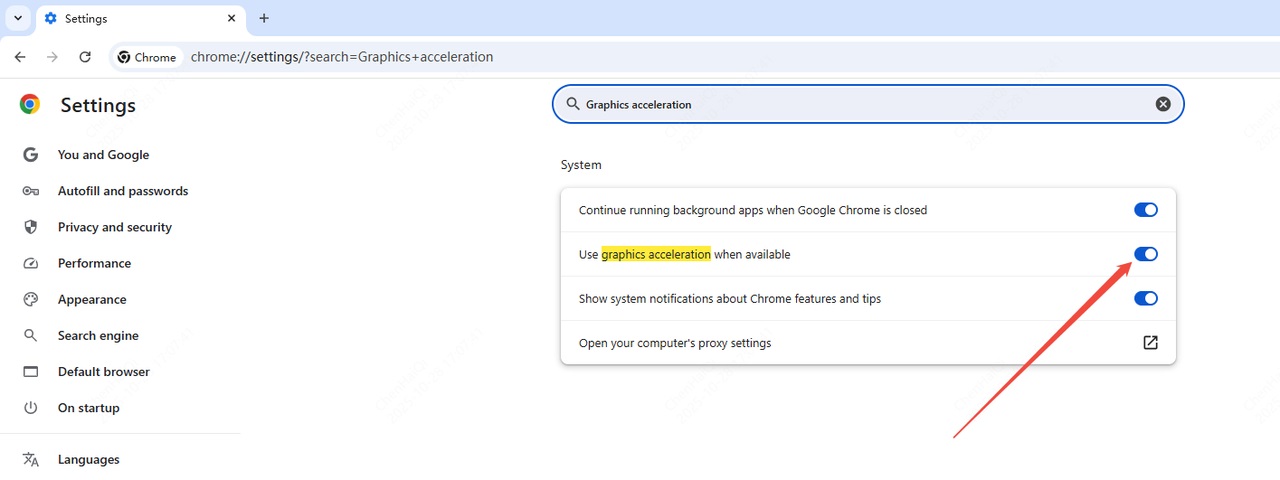
2.Then go to win10 system settings - System - Display - Graphics settings. 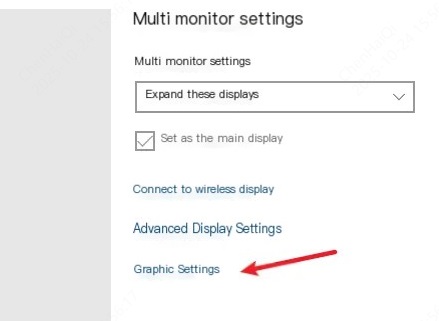
3.After that, you need to enable the hardware accelerated GPU plan and graphics performance preferences and add Google Chrome and Firefox browsers, or the client's easyeda-pro.exe file. 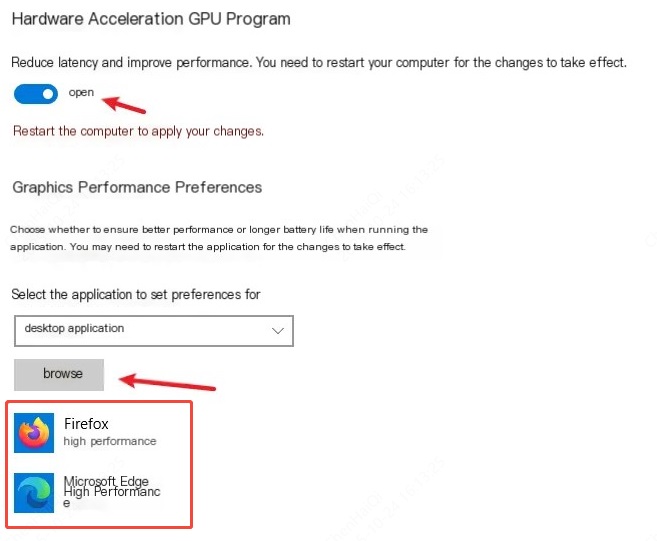
4.Finally, after adding the browser's running file exe (if you need to set the default independent graphics card for the client, you can select easyeda-pro.exe in the client installation directory to add it), click the list, click Options, set the graphics preference to high performance, and click Save. 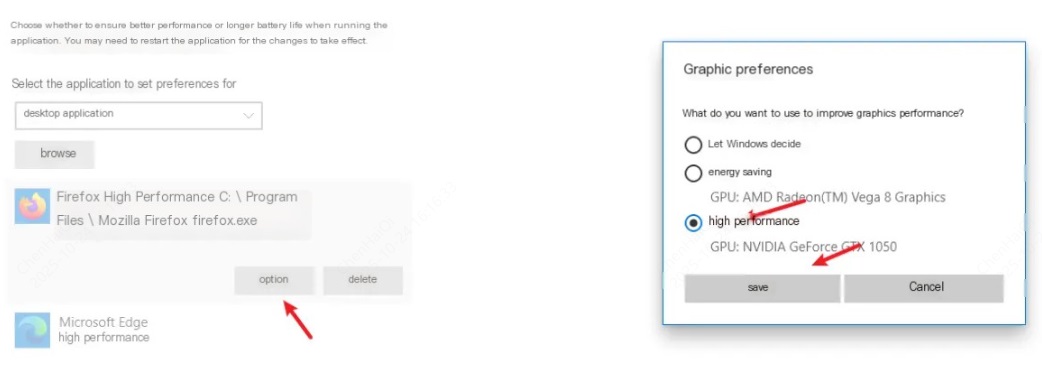
After completing all the previous steps, when you open the browser again to draw the PCB, the independent graphics card will be used, and the running speed of the PCB will be much faster.
If your operating system is Windows 7: 1.First, download the latest graphics card driver from the official website, install it, and update it. 2.Then, install the graphics management software for your discrete graphics card, or open the graphics control panel. For example, for NVIDIA graphics cards: Since our testers don't have Windows 7, the image below only demonstrates how to search for the NVIDIA control panel: Search for NVIDIA in the search box. Graphics cards from other manufacturers generally have control software available, which can be downloaded and installed from the official website. 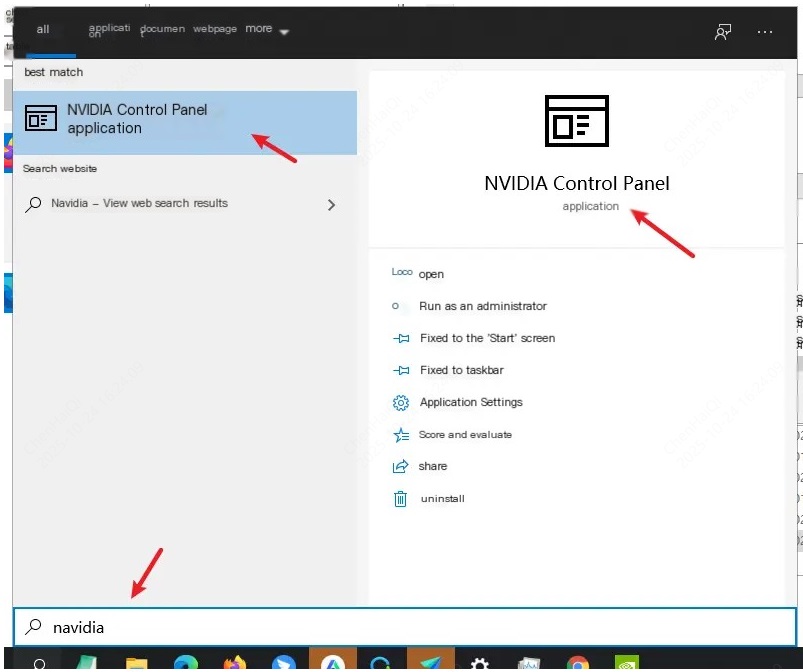
Open and run the NVIDIA Control Panel program: 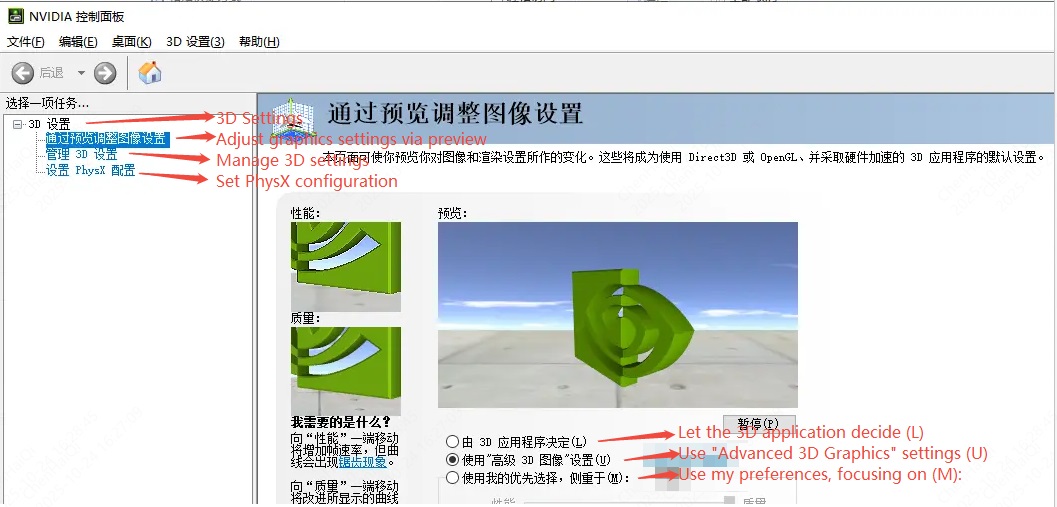
2.In Manage 3D Settings, set the browser's preferred graphics program to the independent graphics card and then apply it. 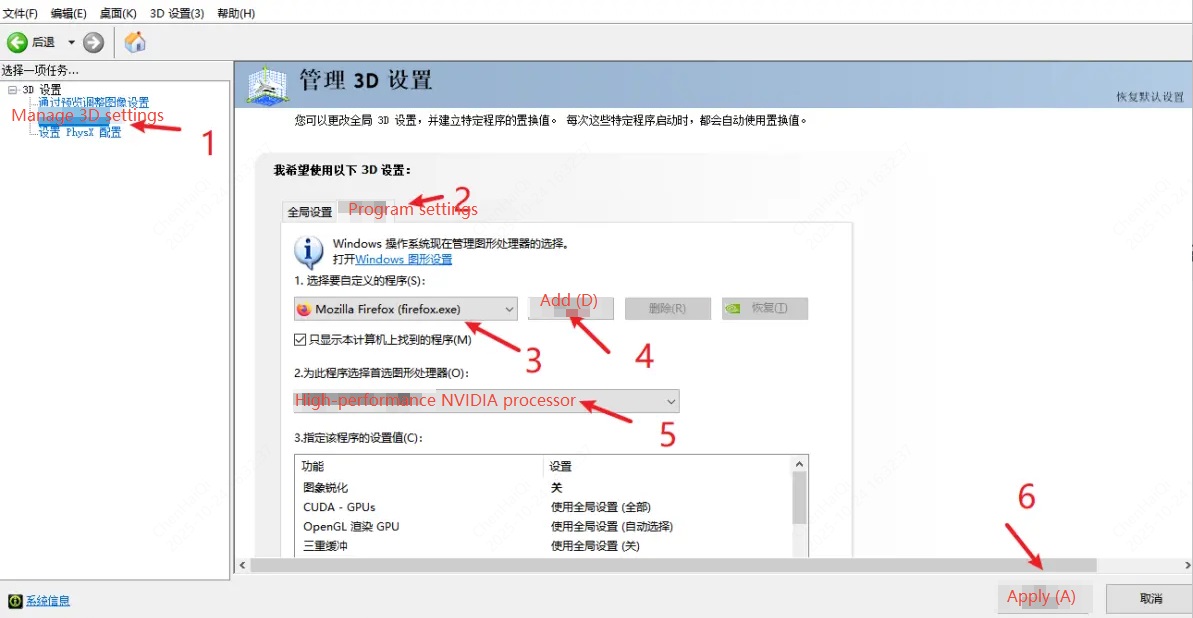
The global settings have also been changed to default to the independent graphics card. 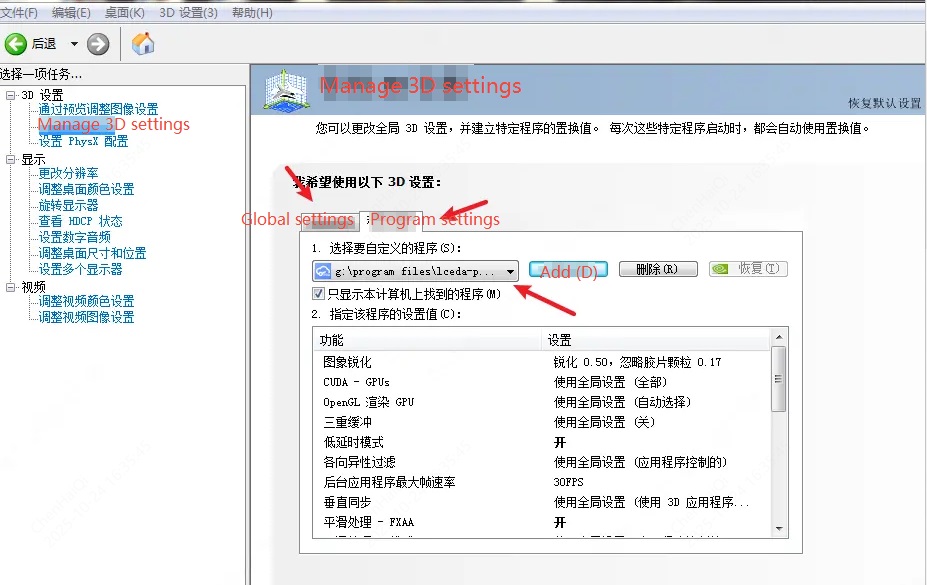
Set PhysX configuration to select the independent graphics card. 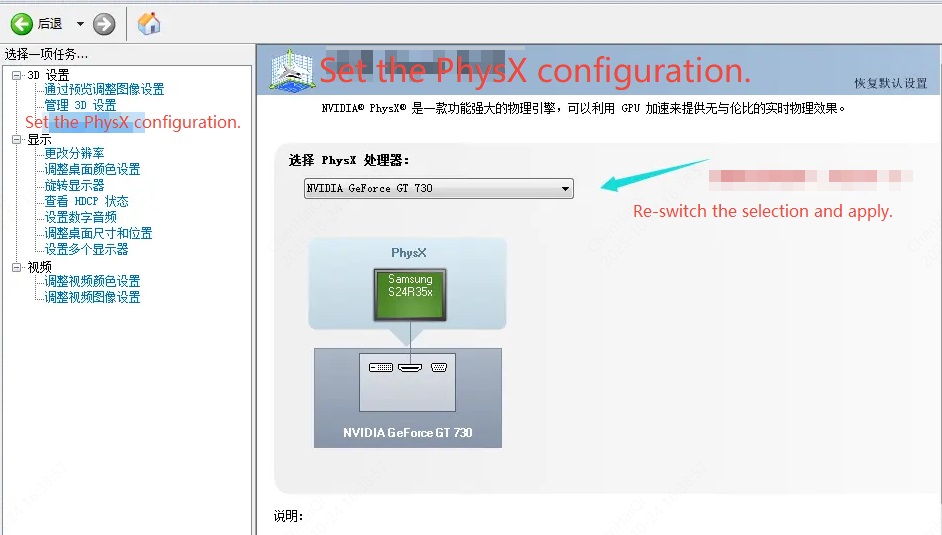
3.Complete the above steps, and the browser will prioritize the settings for your discrete graphics card. If, after setting this up in Windows 7, the client still can't open PCB properly, you'll need to upgrade your system to Windows 10. EasyEDA will no longer work on Windows 7. If you're using an AMD graphics card, the steps are similar, following the same configuration as above; the control software differs.
How do you record error logs and send them to technical staff to locate the error when you encounter a bug that you cannot resolve?
Details
Method 1: Open the settings in the upper right corner of the editor, and then set "Other Setting" to Trace log. 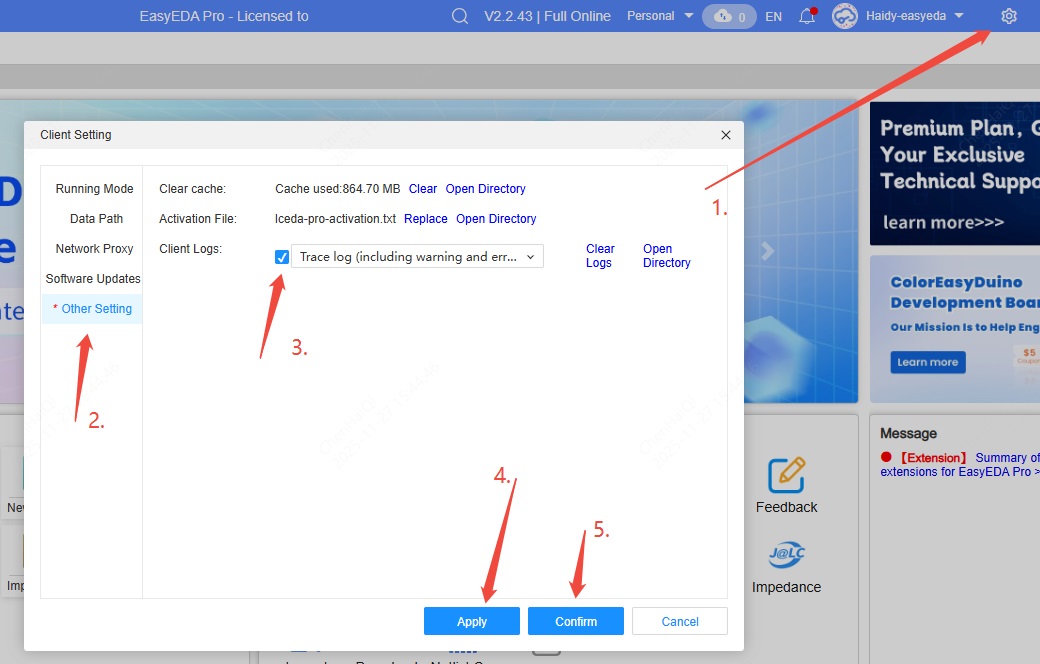
Then start operating your process, running it until you find the error. This process requires you to reproduce your problem and record the error information in the log. After completing the operation, return to the interface from step one and open the directory path. 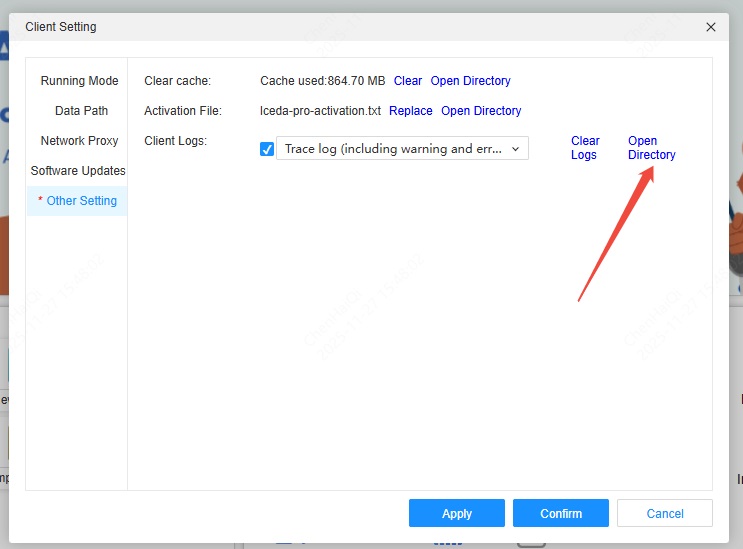
Then, send the latest log file in the folder to the technical staff. 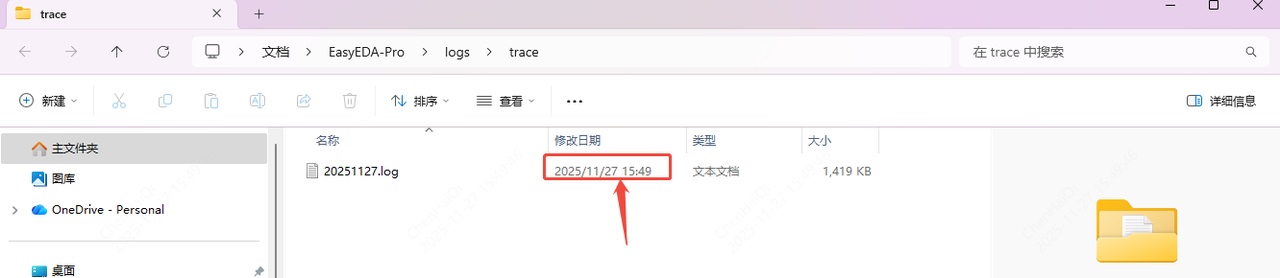
Method 2: Open the Client installation directory and look for easyeda.exe or easyeda-pro.exe 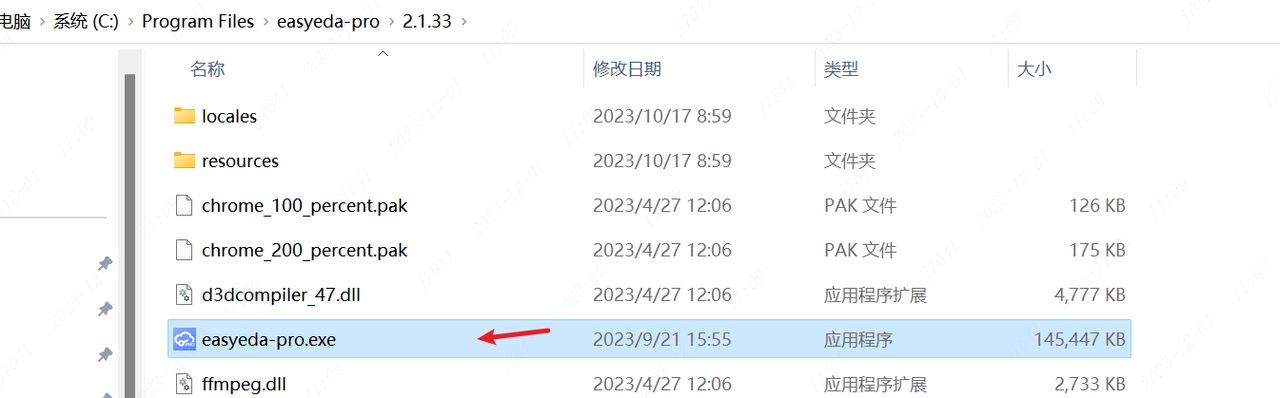
In the top resource manager address bar, enter cmd and press Enter 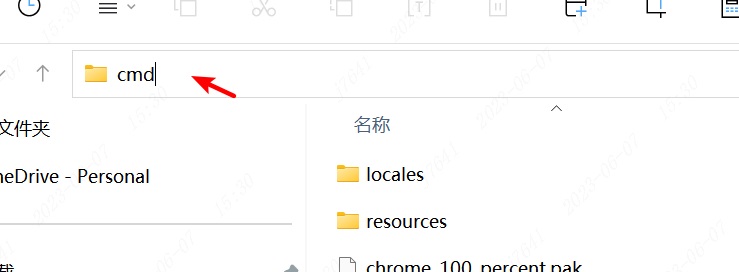
It will automatically open the command line window, drag “exe" file to the window, and enter 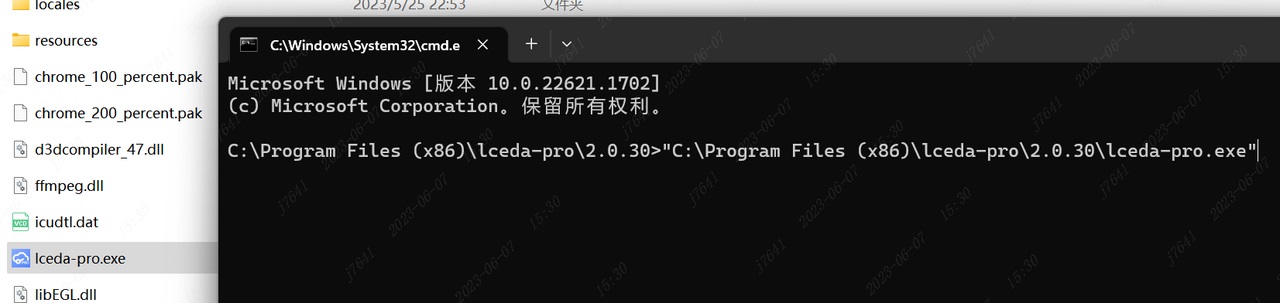
At this time, the command line window will start running Client and output logs 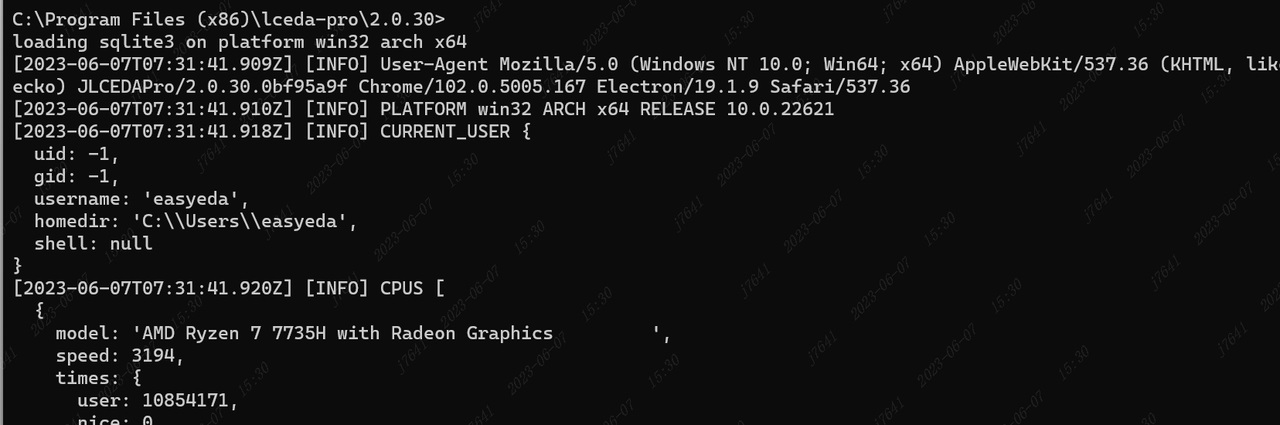
When you enter to open the Client or export the file etc, take a screenshot or copy the error log and send it to technical support for troubleshooting