Desktop Client FAQ
Introduction
EasyEDA Pro desktop client support three modes:
- Full online mode: login is required, libraries and projects are stored in the cloud, collaboration is supported, and cloud projects are automatically backed up to the local;
- Half-offline mode: no login required, both libraries and projects exist locally, collaboration is not supported, and cloud system libraries are supported. This mode is recommended.
- Full offline mode: no login is required, both libraries and projects exist locally, collaboration is not supported, and cloud system libraries are not supported. Built-in 1w+ commonly used system libraries.
Start interface:
Main interface: 
About the menu and top bar: 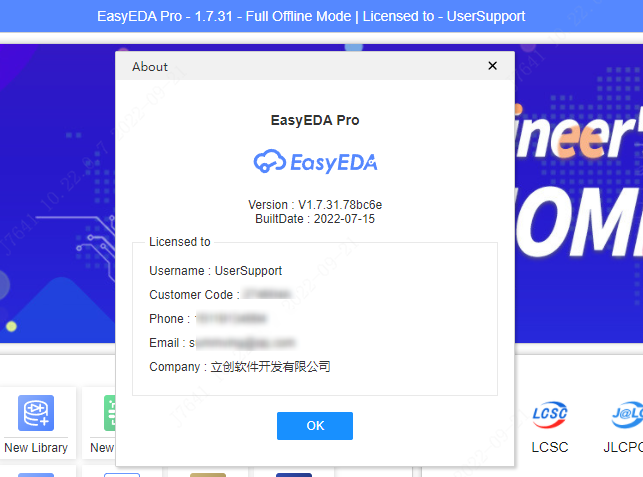
Client installation instructions
- If the beta version has not been installed before, it can be installed directly;
- If the beta version has been installed before, it is recommended to uninstall the old version before installing it to avoid the effect of cache;
- Please ensure that your computer has a graphics card, a discrete graphics card is better;
- Only 64-bit is supported, and XP system is not supported.
Download Link
Only support x86_AMD64 bit PC
https://easyeda.com/page/download
For "Windows version", due to system compatibility issues, the "windows version" may have a white screen on the startup interface after installation. It may not be loaded into the editor, or it will take a long time to load it. If you encounter a white screen on the loading interface, please turn off the firewall and try again, or contact Technical support solution. Email: support@easyeda.com For "Linux version", please follow the instructions in the downloaded compressed footprint to install it. For "Mac version", please follow the instructions in the downloaded compressed footprint to install it.
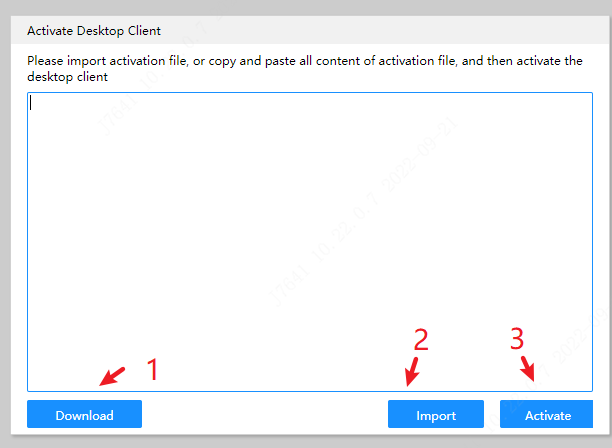
Load Activation File
Activation file free download address:https://easyeda.com/page/desktop-client-activation
when you open the desktop client first time, it will open a activate dialog, you can download the activation file to activate.
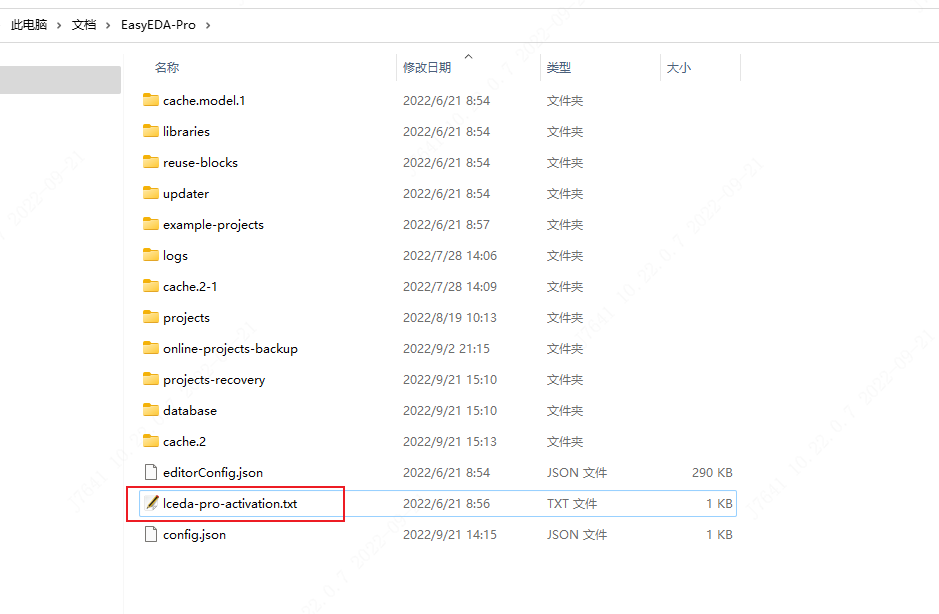
After activation, the activation file will be stored in the data storage directory: This computer/Documents/LCEDA-Pro, you can find it by viewing the default project storage path set. Manual deletion removes the active state.
Notice:
- The activation file is free to download, no need to crack, the genuine license can be downloaded after registration;
- The activation file contains your account information, please do not disclose it to the public and keep it properly;
- The activation file cannot be modified, and the import cannot be activated after modification.
Set Running Mode
After importing the activation file, you can open the client interface and click the "gear" icon in the upper right corner or the "settings" icon on the start page to set the operating mode.
Gear settings in the upper right corner: 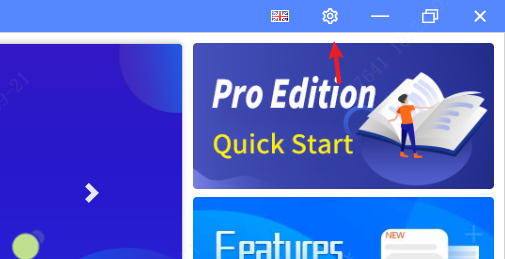
Start page settings button: 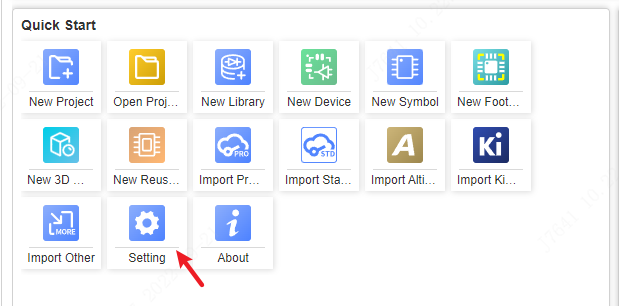
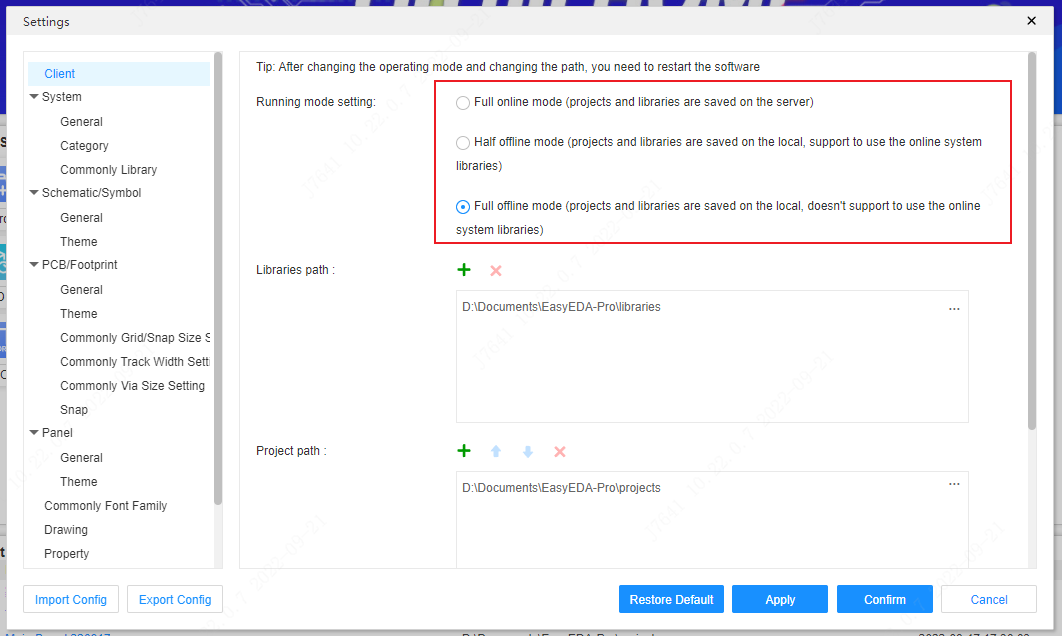
Operation mode description:
- Full online mode:
- Need to use the Internet, need to log in, support team collaboration.
- All data is stored in the cloud server.
- Supports automatic backup of online projects locally, and the editor will back up the project compressed footprint in this folder according to the set backup interval.
- Half-offline/Full offline mode:
- Semi-offline mode supports the use of online system libraries.
- Personal libraries and projects are stored locally.
- Support setting library path, support adding multiple library paths.
- Supports setting the default storage path for new projects.
Create or Open a Project
If you use half-offline/full offline mode, you can create the local project files.
The newly created project file is an independent eprj file 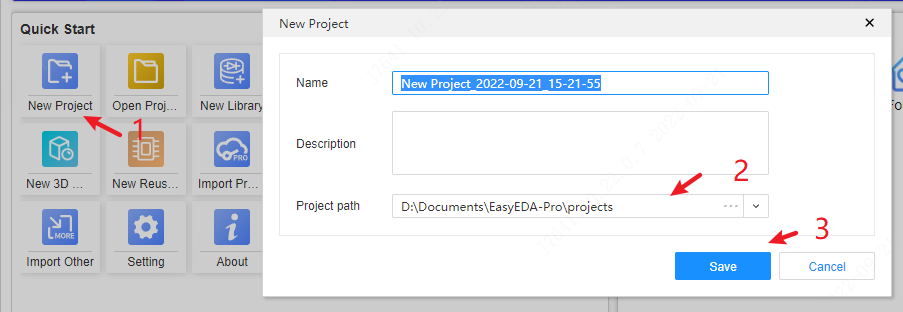
When opening, you can also select the eprj file to open, support directly double-clicking the eprj file to open the project directly at local. 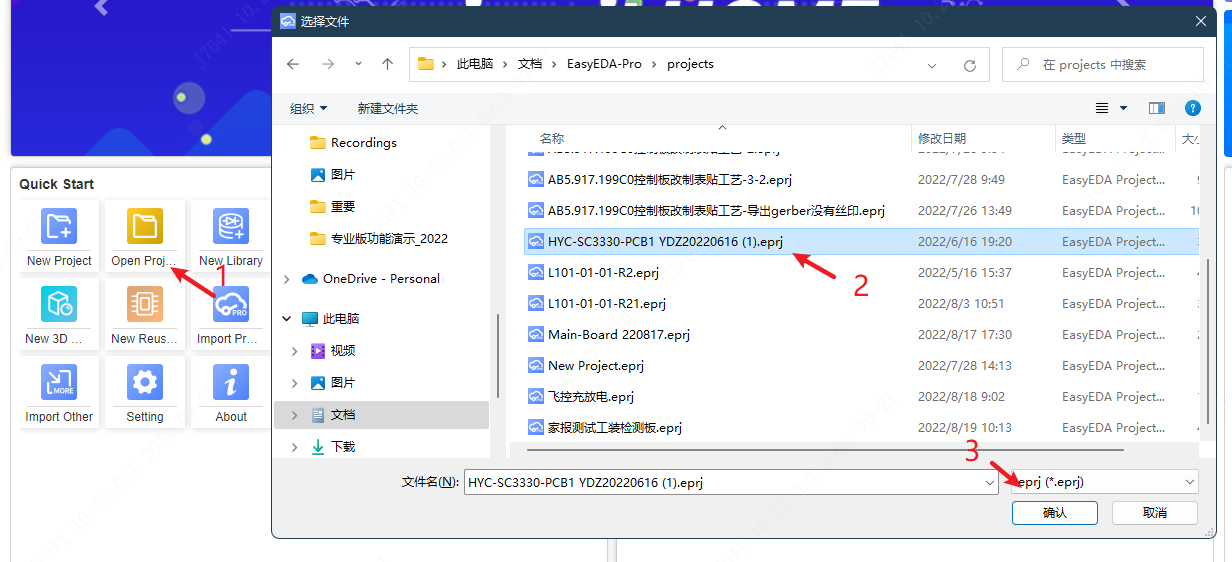
You can also open the project in the project list on the left, and opening the client will automatically load all the projects in the project path, or you can right-click to refresh the project list 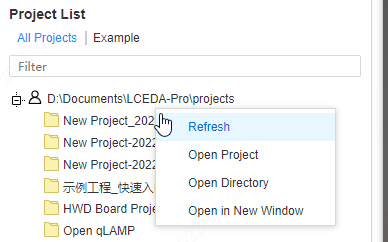
This eprj file is only used by the client. If you need to export the project and import it to the online version, please go to the file menu, save as local, and then import the project compressed footprint to the online version.
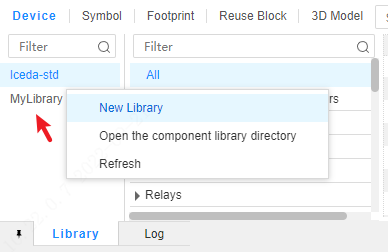
Create a Library
Click the "New Library" button on the start page 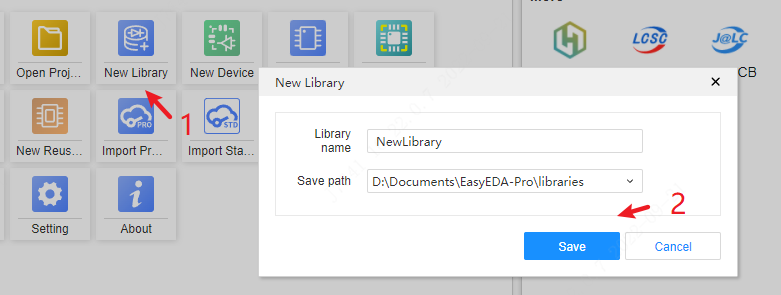
Or "after opening the document", click: File > New > Library in the Top Menu 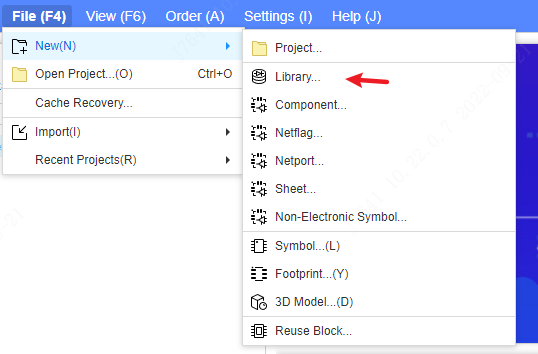
After creating a new one, you can find it in the component library list on the bottom left panel 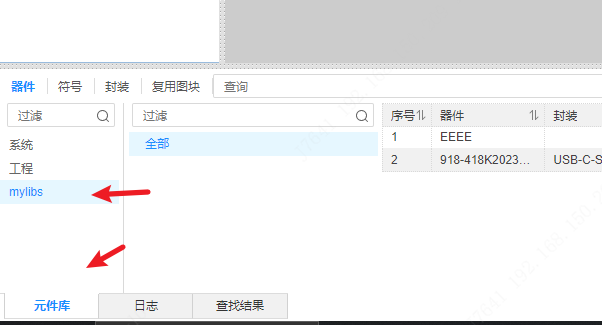
When creating a new device, symbol, footprint, etc., you can choose to save it in your personal library. 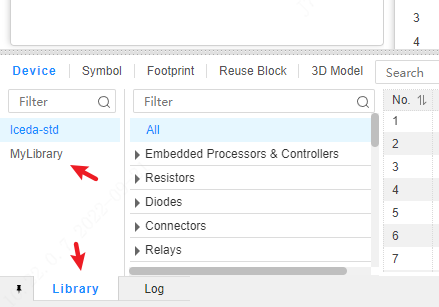
right-click the library name, you can open the path
Library Search : Search support fields for local component library files are: title, partial attributes (footprint, supplier footprint, value, supplier part, part number, part code), description. When you build a device library with your own company's part number or part code, you can search by part number or part code.
Data Directory Description
After the EasyEDA Pro client is installed, a data folder will be created by default in This PC\Documents\EasyEDA-Pro. Please do not delete or modify the files in this directory to avoid errors. 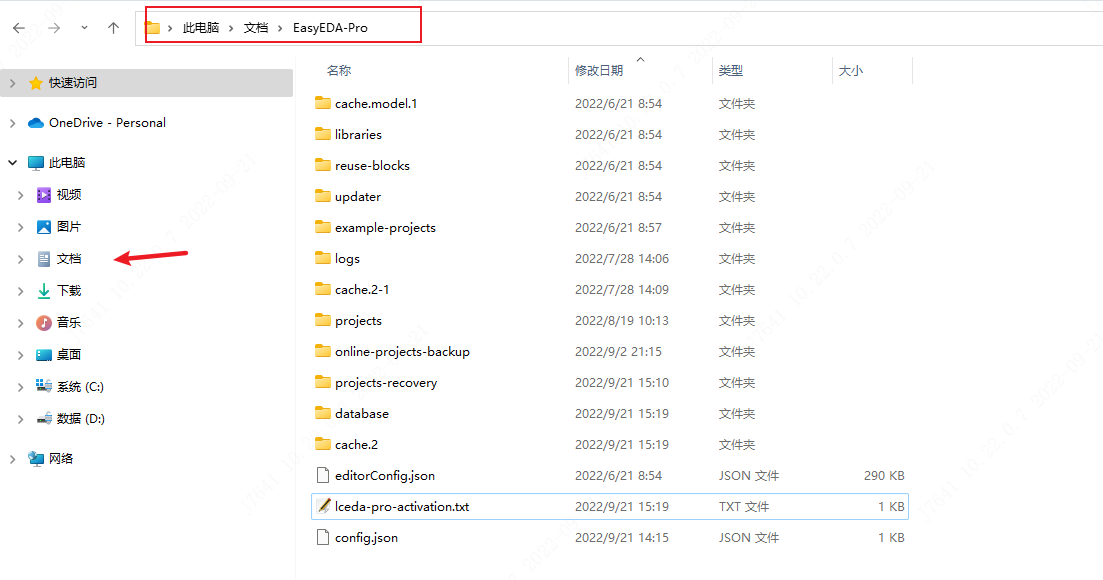
| Folder Name | Type | Remarks/Description |
|---|---|---|
| cache | data cache directory | |
| cache.model | Data cache directory | |
| database | database directory | |
| example-projects | Example project directory | |
| libraries | Default library file directory | Personally created library file storage directory. Note: Starting from v1.9, the system library file lceda-std.elib is no longer placed in this directory. |
| logs | Running log directory | Store the running logs of the client. Note: Starting from the v1.9 client, this configuration is no longer used, and has been changed to create a trace or error or debug folder directly under the log folder. When the client detects that there are folders such as trace, it will automatically generate a corresponding log file. The folder needs to be deleted after use to avoid performance degradation of the client. |
| online-projects-backup | Online project backup directory | In the default full online mode, the online project automatically backs up the project zip file storage directory. |
| projects | Default project file storage directory | Corresponding menu: File - Version Switching (Backup and Restoration). There is a "project name_backup" folder in the directory, which is the storage directory for the backup zip file of the project. |
| projects-recovery | Project cache data storage directory | Corresponding menu: File - Cache Recovery, which is the cache zip archive of the project. |
| updater | The storage directory of the installation package automatically downloaded by the client | |
| config.json | client configuration file | |
| editorConfig.json | Client configuration file | |
| lceda-pro-activation.txt | The activation file of the client | After manually deleting, the client becomes inactive |
Right-Click Menu
You can operate the right-click menu on the start page 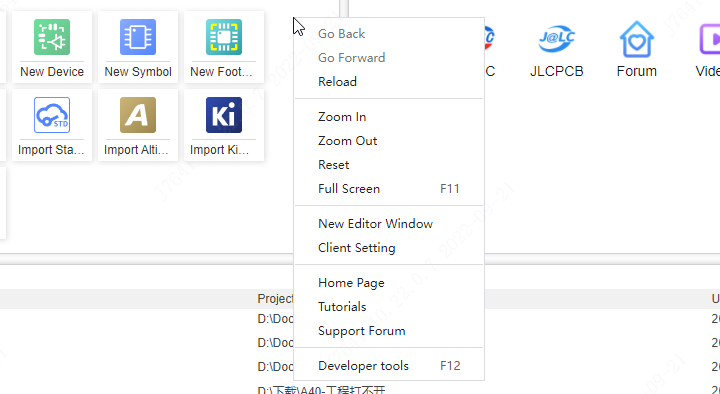
Or after "Open Document", open the right-click menu at the Top Menu text. 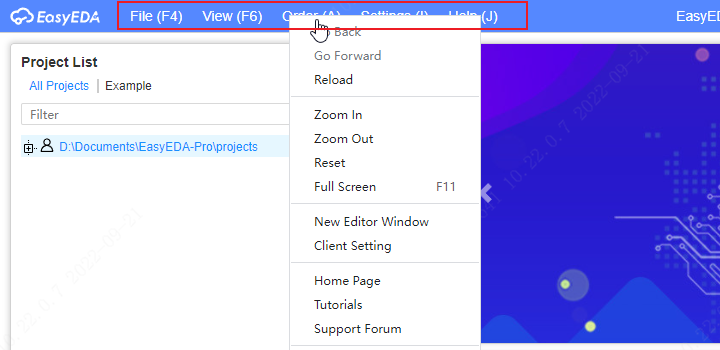
- Forward/Backward: When other web pages are opened on the client, you can use this forward/backward to return to the previous page or the next page
- Reload: Reload the current editor or page
- Zoom In/Zoom Out/Reset/Full Screen: Scale the client interface size.
- New editor window: the same behavior as clicking the logo in the upper left corner of the editor, you can open multiple editors. When opening multiple editors, you can open different projects respectively, and copy and paste documents and components; open them separately The schematic diagram and PCB of the project can be mutually positioned and updated by importing the PCB.
- Client Settings: Opens the client's settings dialog.
- Developer tools: After opening, you can check whether there is an error in the console console. If the editor runs incorrectly, you can send a screenshot of the console's error message (red content) to technical support, and press F12 again to close the developer tools.
Enable Hardware Acceleration
EasyEDA Pro PCB uses GPU rendering PCB. Please upgrade your PC GPU driver or Graphic card if you cannot use PCB smoothly.
Suggesting Win10 and above, at least 8GB ram.
Known Issues
At present, it is found that some Win7 systems cannot run the client normally, and the interface cannot be opened normally. The reason is unknown, which belongs to the system compatibility problem. Sometimes it takes a long time to load the display page. If win7 opens the PCB black screen, you need to upgrade the graphics card driver. If the PCB still cannot be opened after upgrading the driver, it is recommended to upgrade to win10, or use Google Chrome to access.
The detection update in the settings has not been implemented yet. It is expected that the V1.7 version will support detection updates, and V1.8 supports downloading update footprints.
The maximized area offset in the upper right corner of the Linux version. The Mac version of the launch icon does not appear in the launcher.
At present, it is found that some Win7 systems cannot run the client normally, and the interface cannot be opened normally. The reason is unknown, which belongs to the system compatibility problem. Sometimes it takes a long time to load the display page.
If the windows system opens a white screen, you can try:
- Turn off the firewall first, and then start the client. If it runs normally after shutdown, you need to add the client to the firewall whitelist. How to turn off the firewall: https://jingyan.baidu.com/article/cd4c2979d55c41756e6e60a1.html
If the firewall is turned off and the screen cannot be loaded, please try.
- 1. Close the client first, and open the cmd command window of the system with **administrator privileges**,WIN + R keys, then enter cmd, enter
- 2. Enter in the opened cmd window: `netsh winsock reset`
- 3. Enter - 4. Open the client again
If you find any bugs in the client during use, please give us feedback in time to fix it. Thank you for your continued support to EasyEDA!
Import Online Project
Details
If you want to import the project from the online cloud to the offline mode of the client, you can:
- Open the project in the browser, go to: File - Save as Local to get the project zip file
- In the offline mode of the client or browser editor, start page: Import Professional Edition to import
Batch download of professional version projects is not supported, and batch import is not supported.
Export project to online
Details
Same as above, after opening the project, go to: File - Save as Local to get the project zip file, and then import the project into the online editor.